Creating a TCP Server
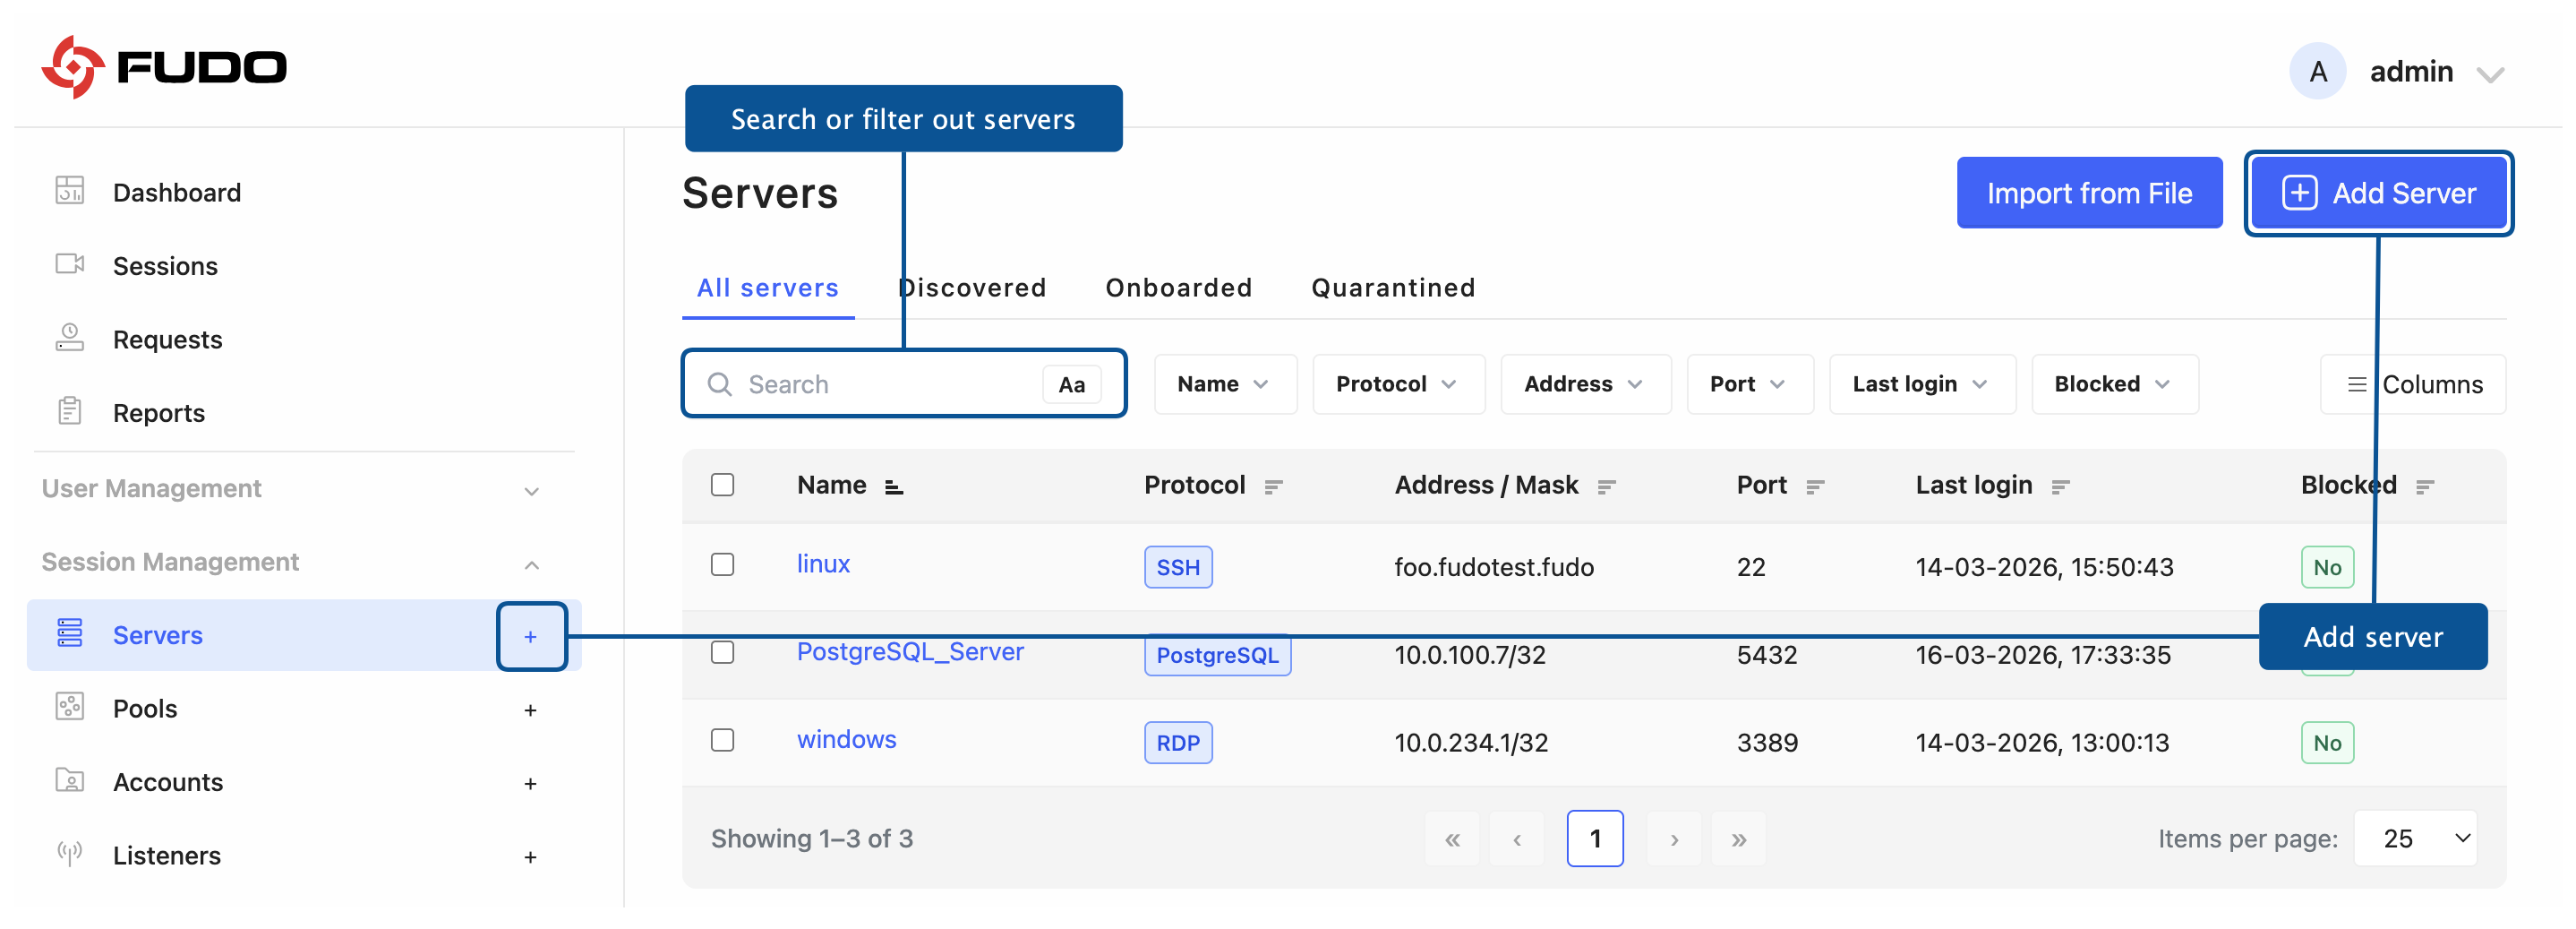
Click + icon next to the tab of the sub-section, or
Select > and then click .
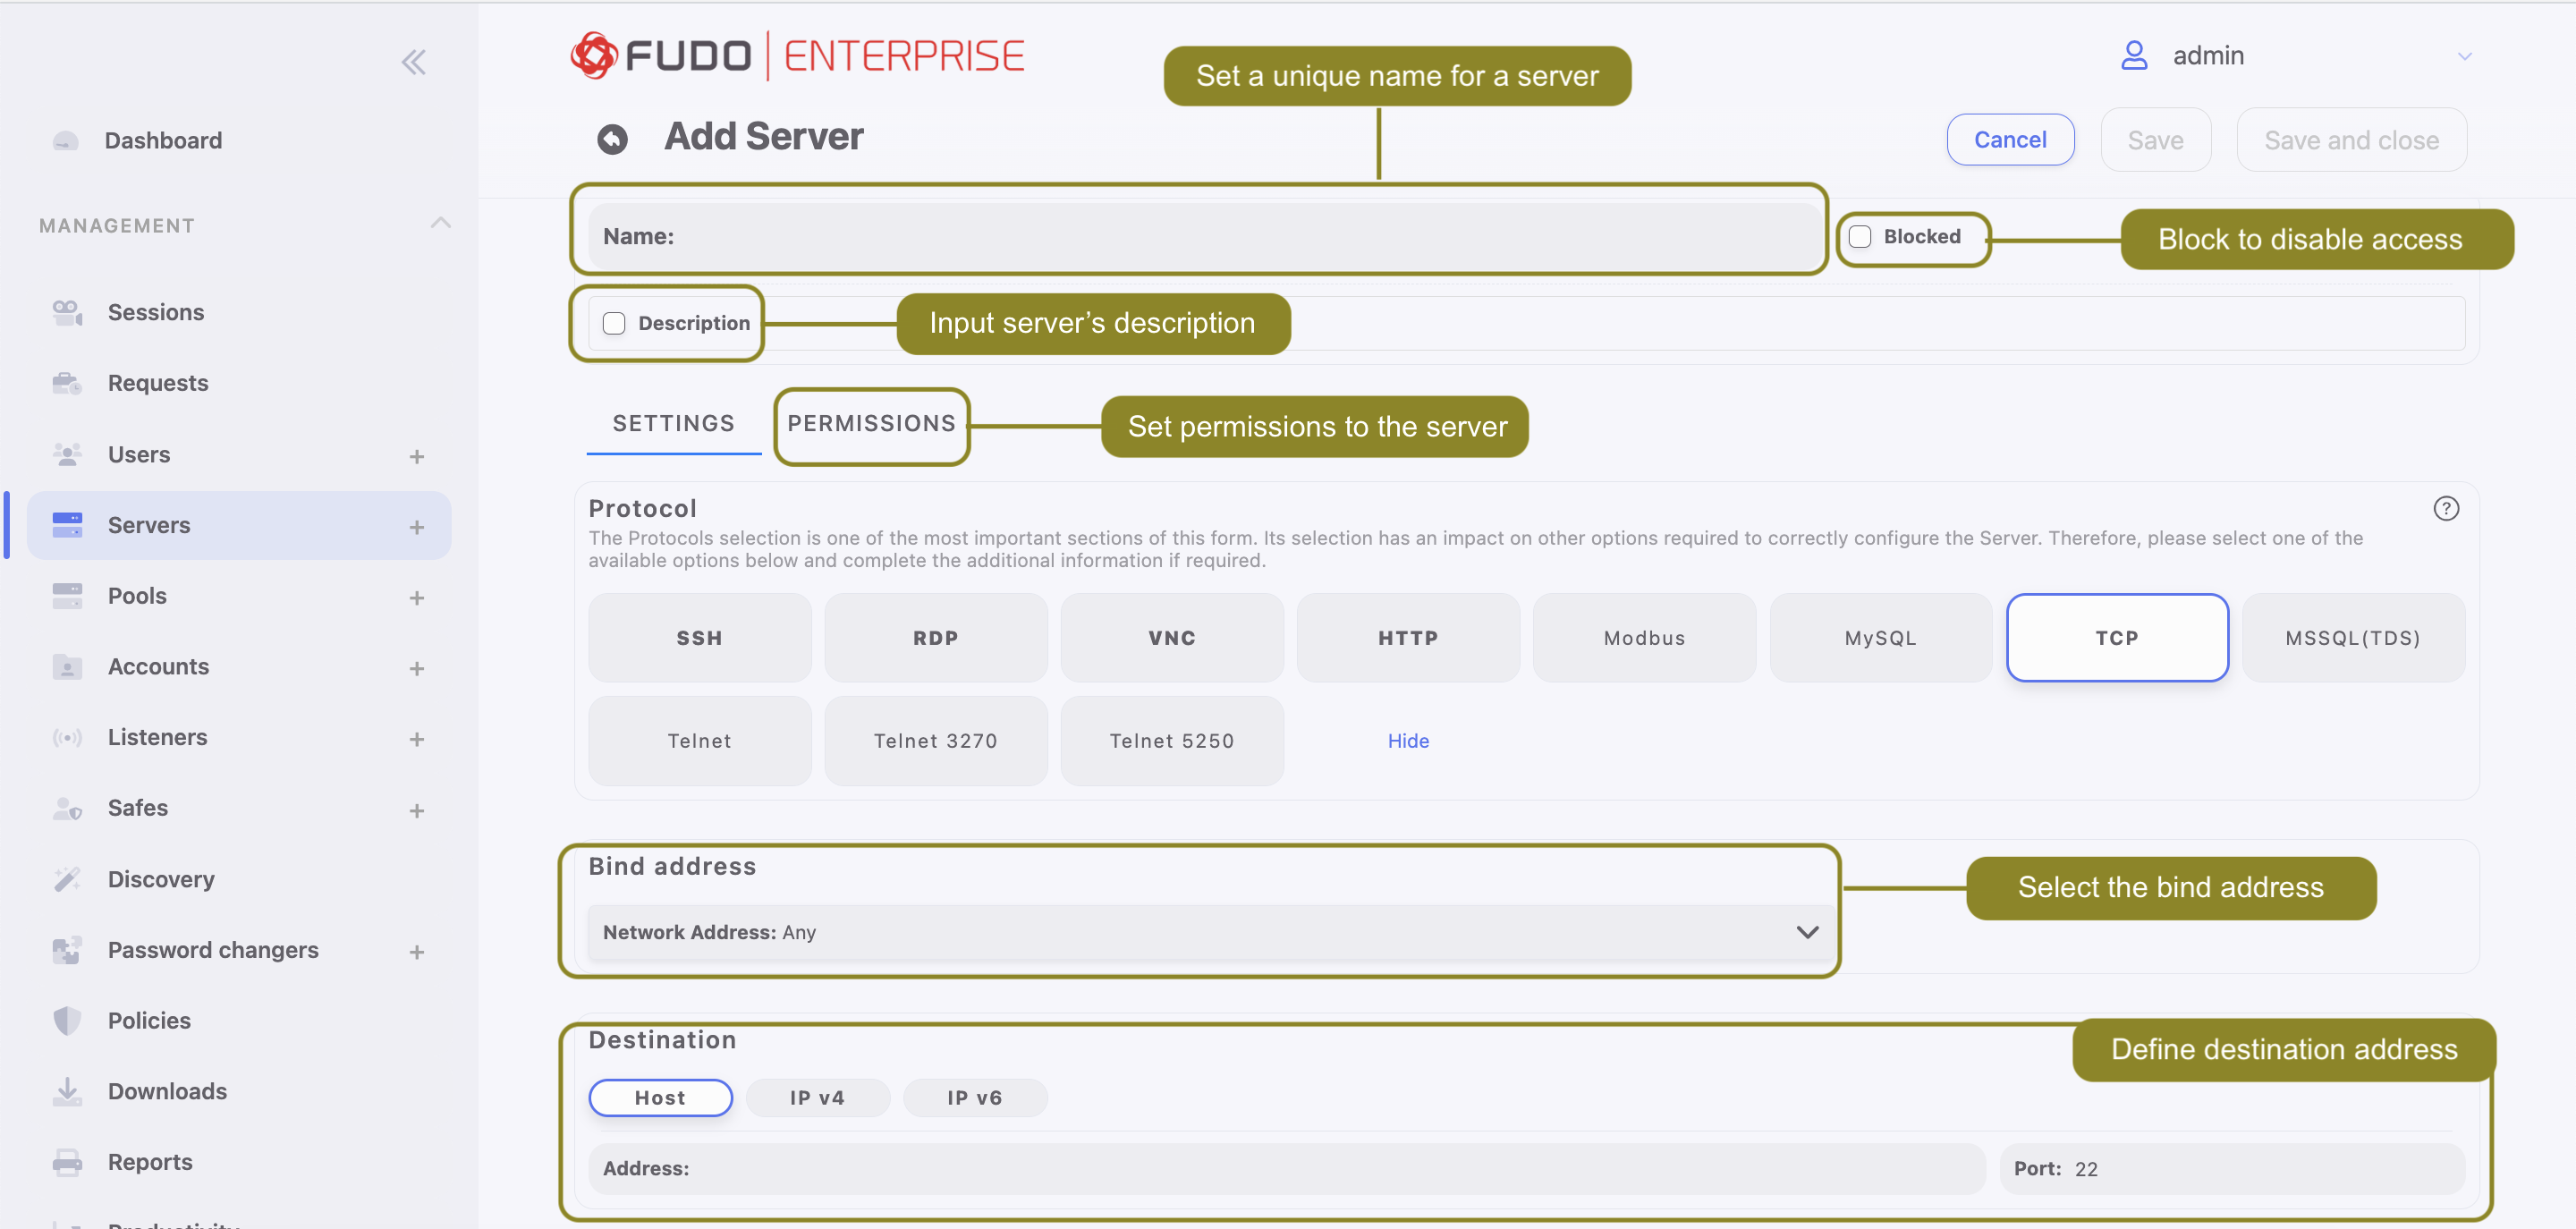
Enter server’s unique name.
Select Blocked option if the object should be unavailable after creation. A blocked server cannot be used to establish connections until it is manually unblocked. Providing a reason for blocking is required.
Optionally, click the Description checkbox and provide a text that will help identifying this server object.
SETTINGS TAB
Go to the SETTINGS tab.
In the Protocol section, select .
Select the Use SSH tunnel option and provide the SSH tunnel key if you want to establish the connection through an SSH reverse tunnel.
Note
In the Tunnel mode, the target host and port are exposed through a secure remote tunnel endpoint instead of being reached directly through the Bind address and Destination settings. See Use SSH Tunnel - SSH Reverse Tunnel Server Configuration.
If you want to connect using a Tunnel-type listener to a server configured with the Use SSH tunnel option (SSH reverse tunnel), you must use the server name instead of a direct IP address and port. See Connection to a Server with Reverse Tunnel via Tunnel-type Listener.
If you do not use the SSH tunnel, from the Network address drop-down list, select the IP address from which connections to the monitored server will be initiated, and then configure the Destination settings.
Warning
After server’s definition is saved, protocol’s field is uneditable.
Note
The Network address drop-down list elements are IP address defined in the Network configuration menu (Network Interfaces Configuration) or labeled IP addresses (Labeled IP Addresses).
In case of cluster configuration, select a labeled IP address from the Network address drop-down list and make sure that other nodes have IP addresses assigned to this label. For more information refer to the Labeled IP Addresses topic.
In the Destination section select
Host,IPv4orIPv6. Enter server’s IP address.
Note
Depending on selected option, default values for the Mask and Port fields are filled out automatically. This way the Fudo Enterprise system detects server as one with unique address. In order to set up address for entire subnet, provide a dedicated value for the Address and the Mask fields.
In the case of overlapping address definitions, during connection establishment the more specific configuration (higher network mask) is always selected, even if the user does not have permissions assigned to it. This mechanism enables defining exceptions within broader access rules (e.g., granting access to
/24while explicitly excluding/32).
Click .
OBJECT RIGHTS TAB
The OBJECT RIGHTS tab is used to define which users and roles are allowed to manage the object and which capabilities (Read, Modify, Delete, Block) are assigned to them.
Go to the OBJECT RIGHTS tab.
Open the USERS sub-tab.
Click , select the users from the list, and click .
In the Users list, select the capabilities for each user by enabling the options available for the given object, such as Read, Modify, Delete, or Block.
Open the Roles sub-tab.
Click , select the roles from the list, and click .
In the Roles list, select the capabilities for each role by enabling the options available for the given object, such as Read, Modify, Delete, or Block.

Related topics: