Trusted time-stamping
A trusted timestamp makes recorded session a more convincing evidence in court.
Prerequisites
- Trusted time-stamping feature requires signing a contract with an institution providing time-stamping services.
- Certificate and private key issued by the time-stamping service provider.
- KIR time-stamping service requires a DNS server to be configured. Refer to the DNS configuration topic for more information on adding DNS servers.
- Fudo Enterprise must be able to reach the
http://www.ts.kir.com.pl/HttpTspServerweb address in case of the KIR time-stamping service. - Fudo Enterprise must be able to reach the
193.178.164.5IP address in case of the PWPW time-stamping service.
Data Transmitted to Timestamp Provider
When timestamping sessions in Fudo Enterprise, a hash is generated and sent to the timestamp provider. This hash is composed of session data from the fudo_session table, and content from the session’s RAW dump. It is a one-way hash, ensuring that no session details can be extracted from it.
Note
To ensure the generation of a RAW dump, set the Session recording option in Account settings to all or raw (refer to the Creating a regular account section to see the example).
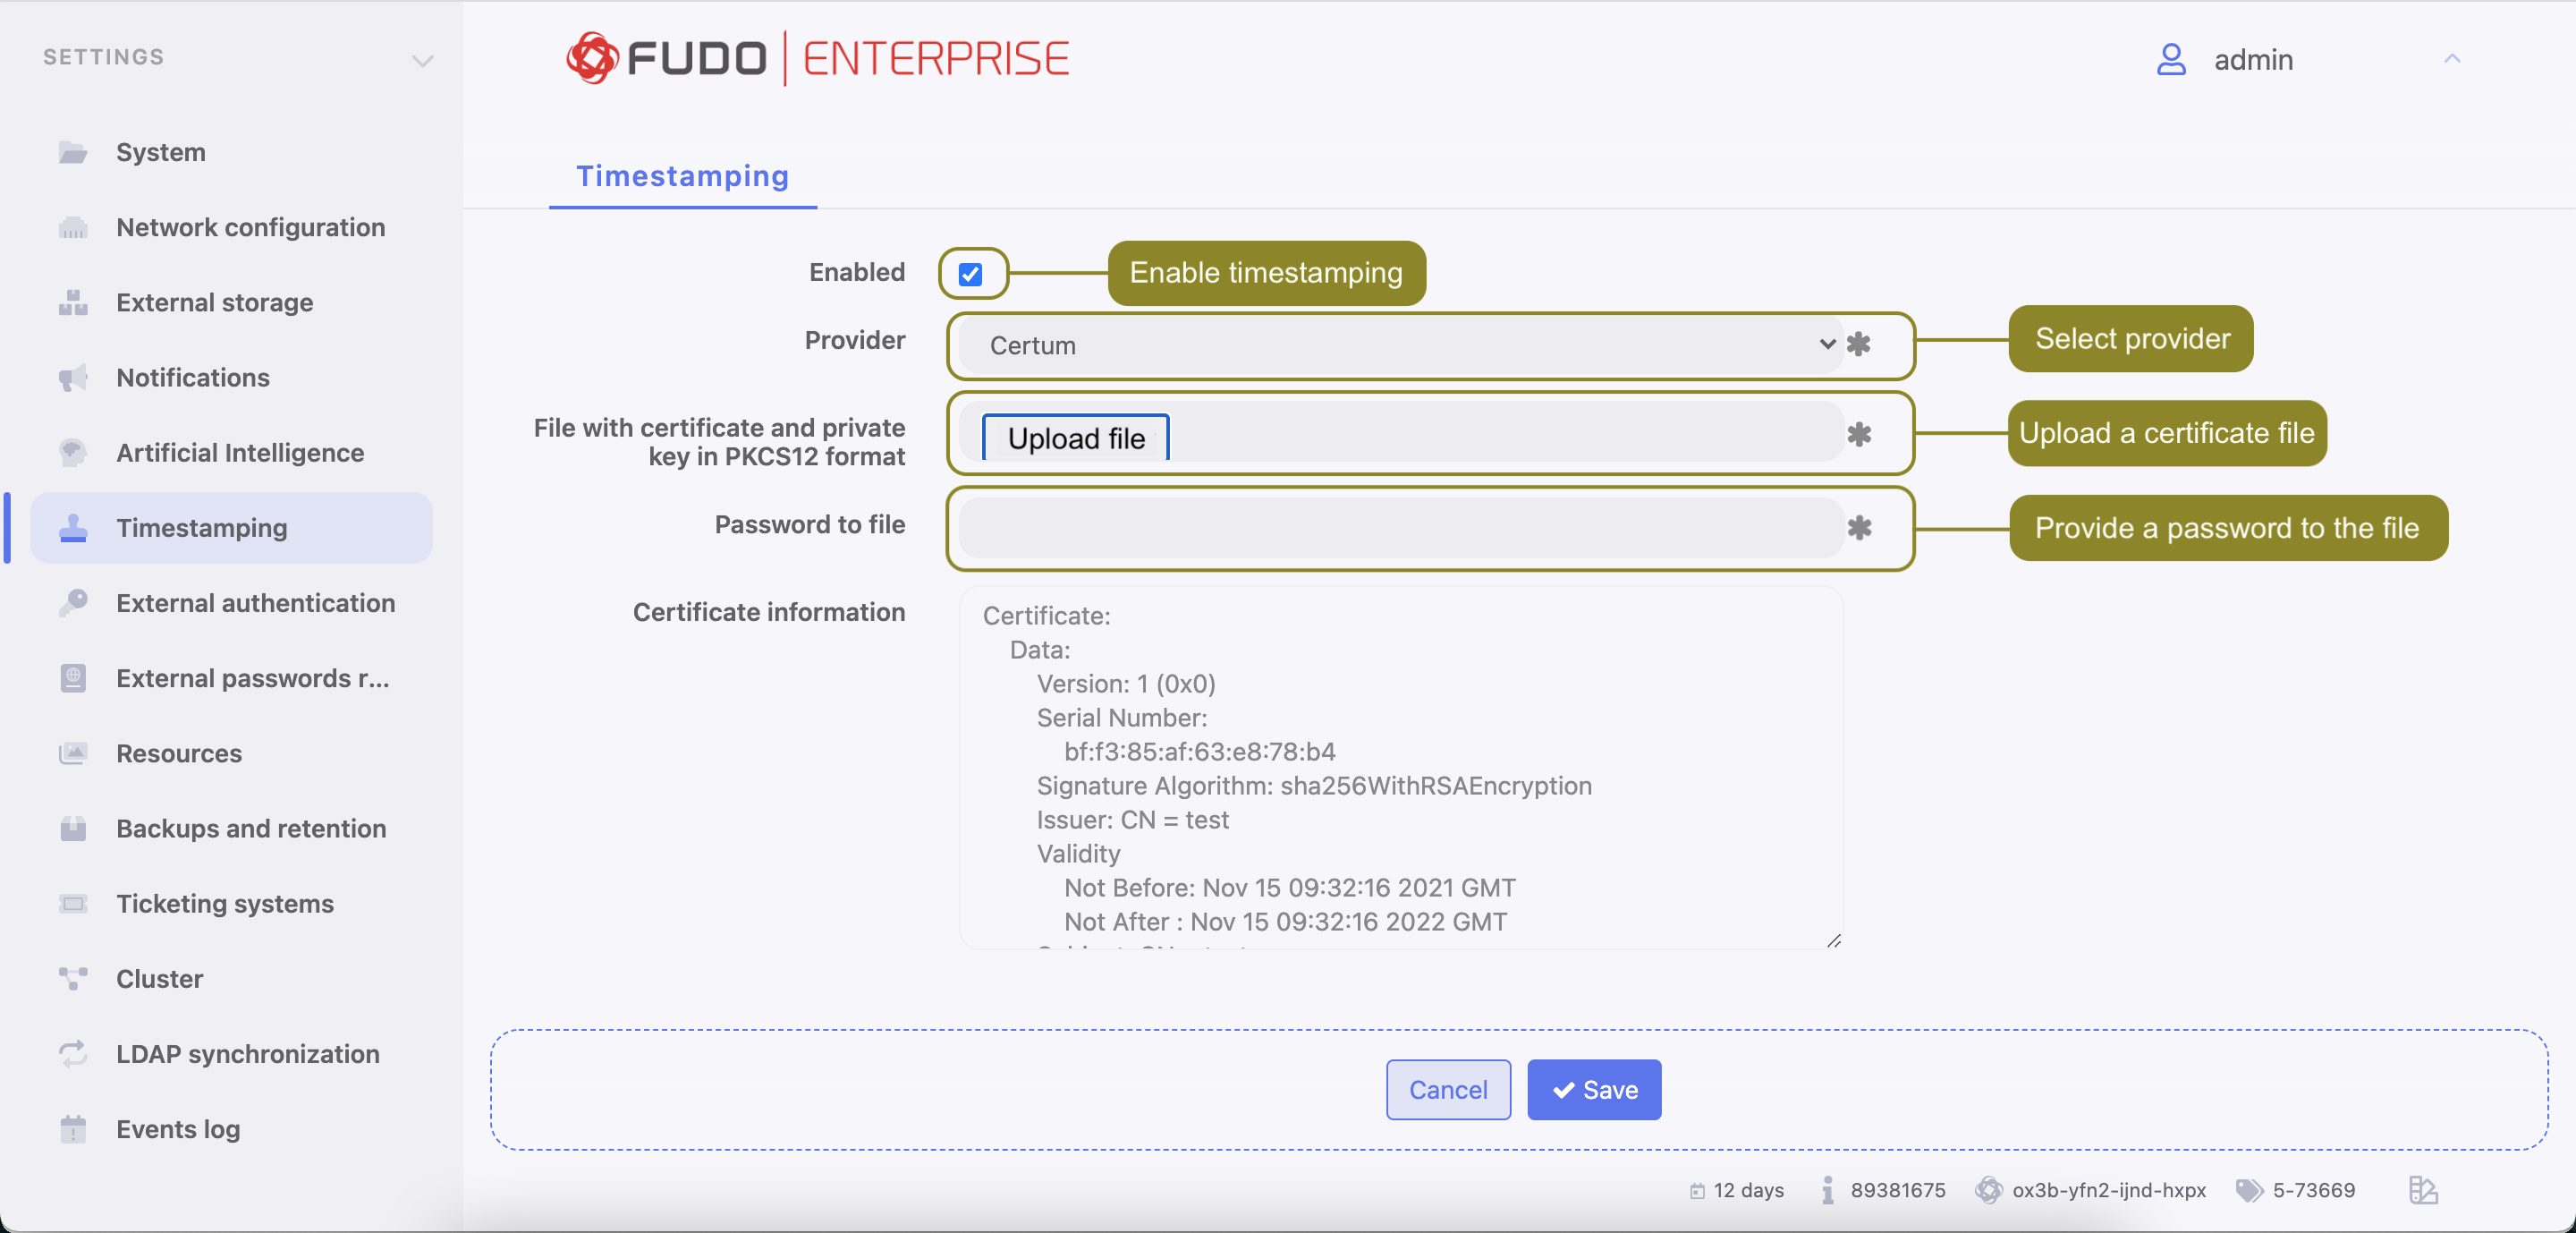
Enabling and configuring trusted time-stamping
Note
Fudo Enterprise will time-stamp only sessions that have been completed after the time-stamping feature was enabled.
- Select > .
- Select the Enabled option.
- Select from the Provider drop-down list the institution providing trusted time-stamping services.
- Provide the certificate and the private key of the time-stamping service.
Note
You should receive these information from your time-stamping service provider.
- Click .
Related topics: