Setup Fudo Enterprise - proxy scenario
The proxy scenario for RDS requires more manual configuration in Fudo Enterprise compared to the bastion scenario but offers simplified connection method. Each server in the RDS Collection must have its own proxy listener on Fudo Enterprise, assigned a dedicated IP address with port 3389.
In this setup, you need to:
- create users through the RDS functionality to align with Active Directory users,
- add all servers in the RDS Collection,
- configure an account for each server,
- create a listener in proxy mode for each server.
Note
This use case describes how to configure Fudo Enterprise using the Active Directory external authentication method. Please keep in mind that you can customize user authentication using any other method supported by Fudo Enterprise to align with your specific requirements, the methods typically used in your environment, and your work scenarios.
Configure external authentication method:
- Login into your Fudo Enterprise Admin Panel.
- Select > .
- In the External authentication tab click .
- From the Type drop down list select Active Directory.
- In the Host field provide the Domain Controller IP address (e.g.,
10.0.136.1).- Leave default port number:
389.- Set the Bind address to Any.
- Provide the name of the domain which will be used for authenticating users in Active Directory (e.g.,
mk.local).- In the Login, Secret, and Repeat secret fields provide the privileged account’s login credentials used to access the Domain Controller.
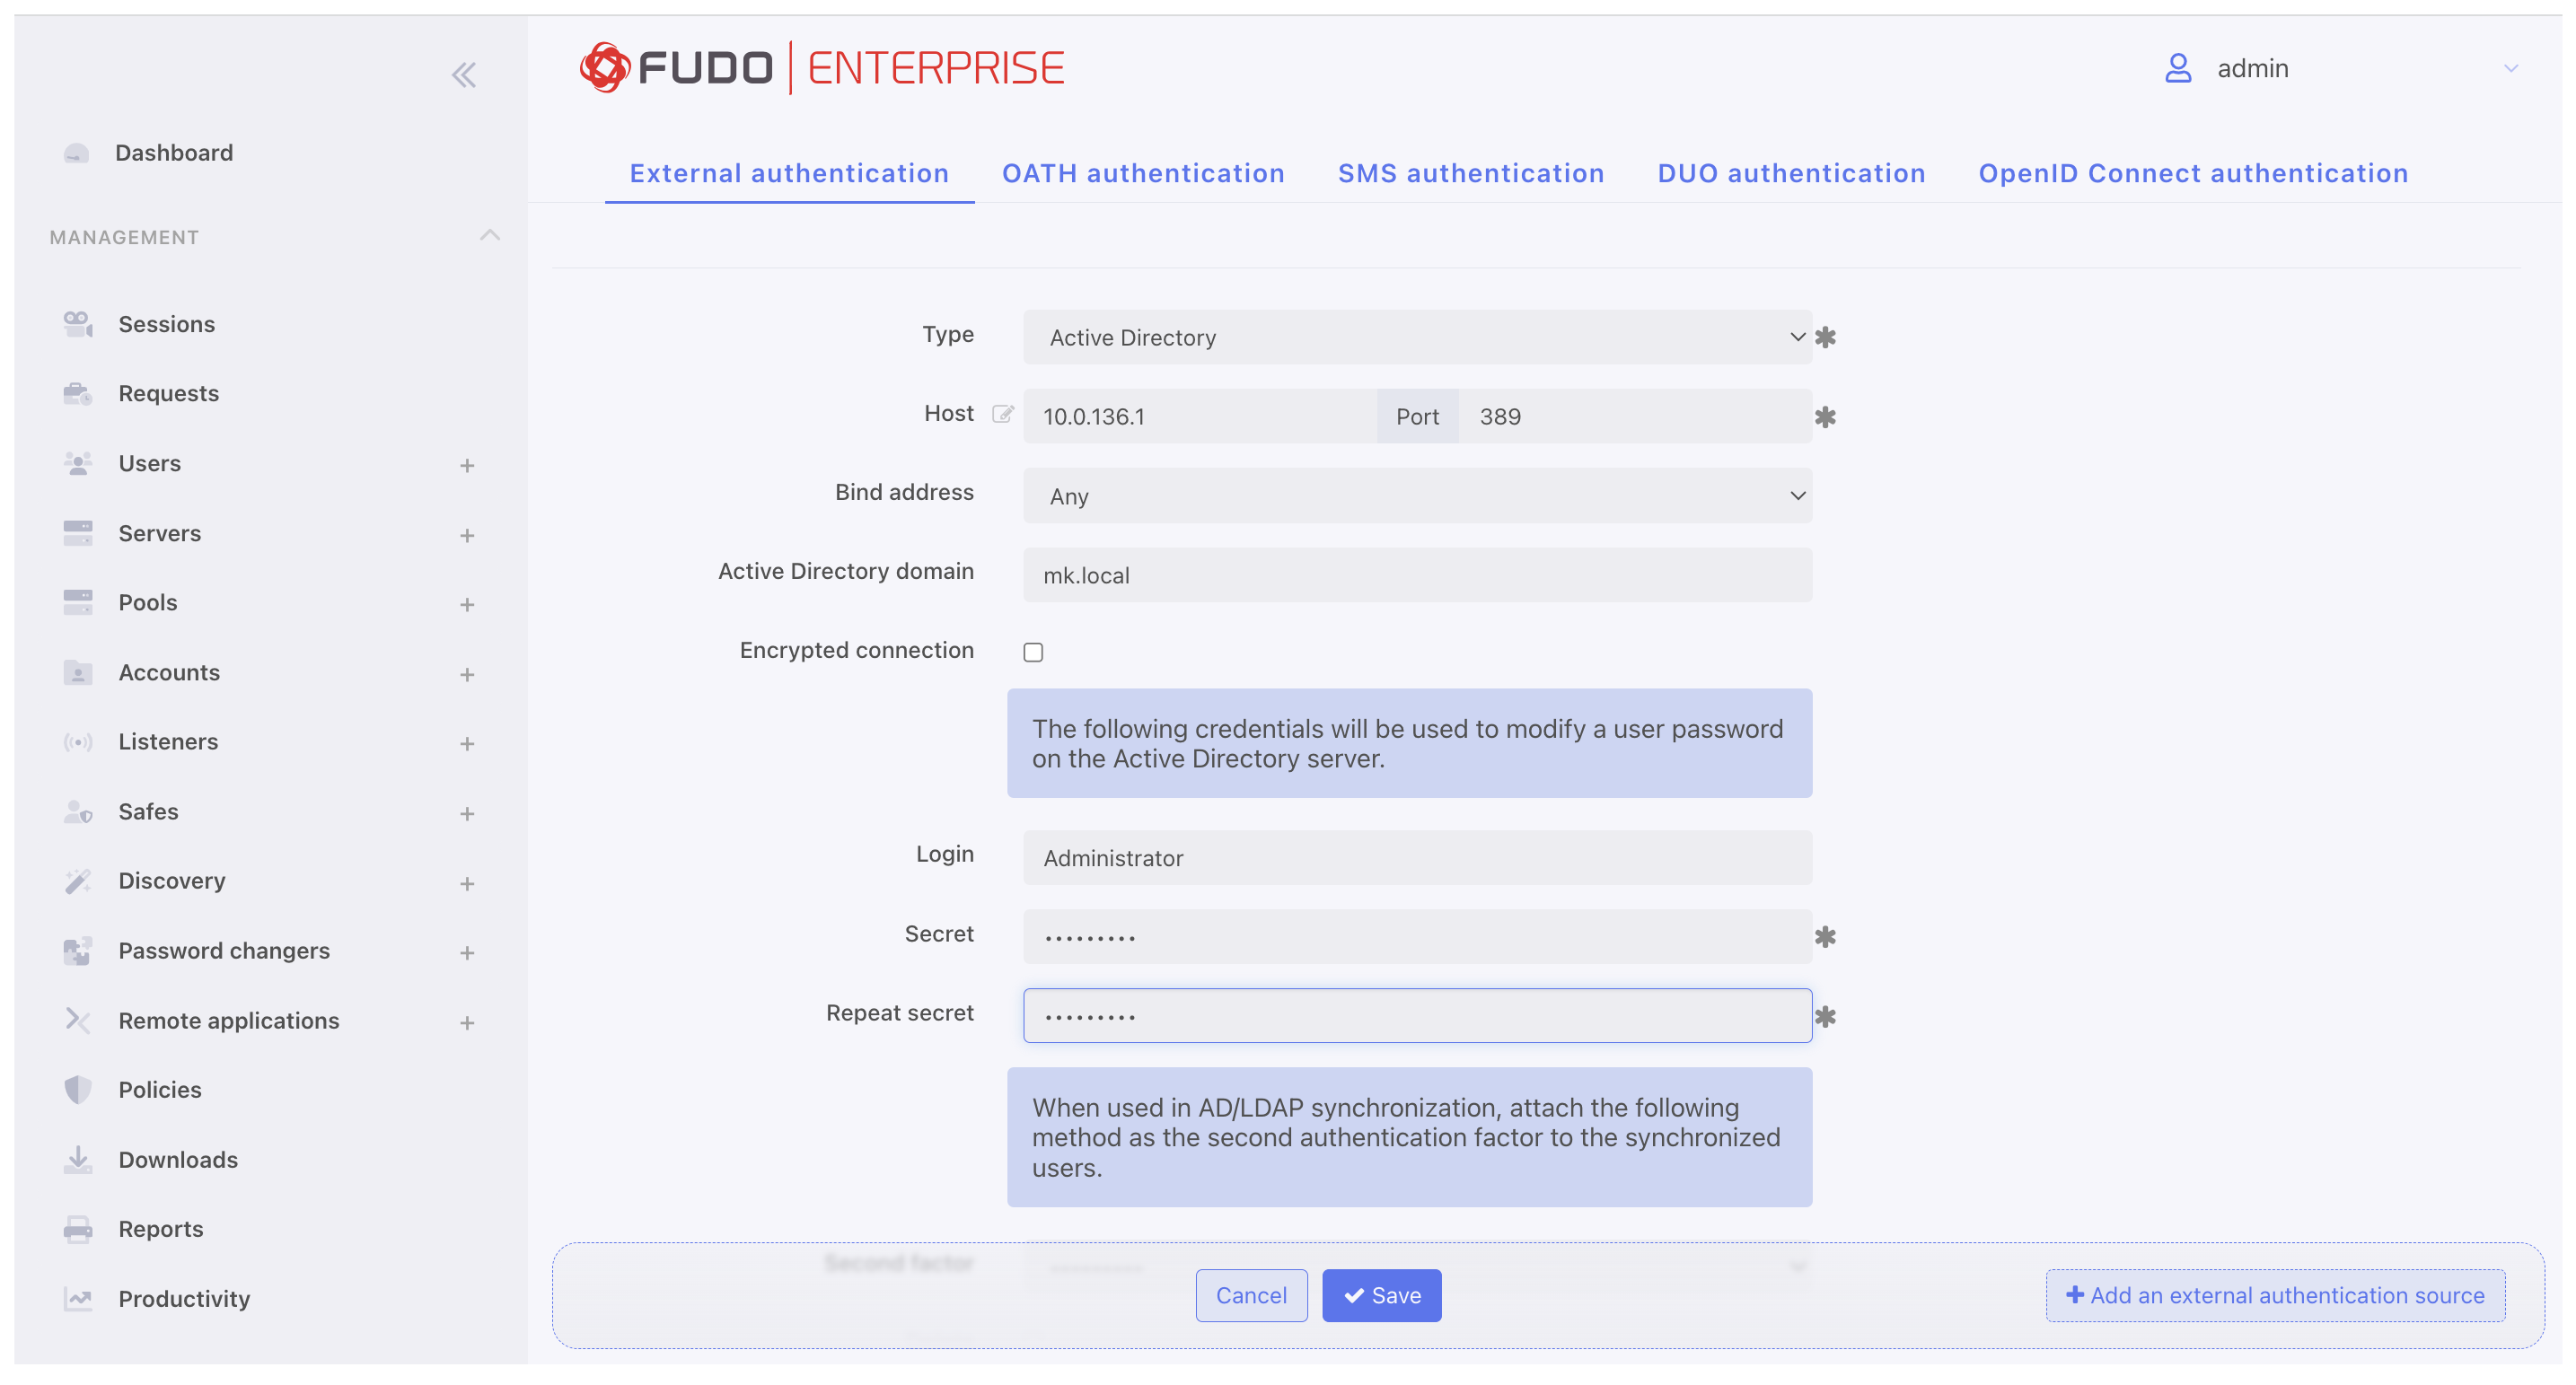
- Click .
Create User in Fudo:
- Select > and then click .
- Enter the user name that matches the chosen user account in Active Directory (e.g.,
user1).- In the Settings tab, under the Safes section, select portal.
- Click .
- Go to the Authentication section and from the Add authentication method drop down list select External authentication.
- Chose created in previous steps Active Directory method and click .
- If necessary, please fill in the remaining parameters as needed for your specific configuration. For more details, please refer to the Creating a user section.
- Click .
Configure Server with the role of Connection Broker:
- Select > and then click .
- Enter server’s unique name (e.g.,
Broker).- In the Permissions section, add users allowed to manage this object.
- In the Settings section on the list of available protocols select
RDP.
- Select the TLS enabled and the NLA enabled options.
- In the Destination section select
IPv4and enter IP address of the server selected during RDS setup for the RD Broker role (in our example,RDBserver with IP10.0.136.2).
- Click .
Configure Servers with the role of Session Hosts:
- Select > and then click .
- Enter server’s unique name (e.g.,
HOST1).- In the Permissions section, add users allowed to manage this object.
- In the Settings section on the list of available protocols select
RDP.
- Select the TLS enabled and the NLA enabled options.
- In the Destination section select
IPv4and enter server’s IP address (in our example,10.0.136.4).
- Click .
- Repeat all the above steps to create second server with name
HOST2and IP address10.0.136.5.
Configure Accounts:
- Select > and then click .
- Define object’s name (e.g.,
rds-host1-forward).- Select
forwardfrom the Type drop-down list.- Go to the Server / Pool section and from the drop down list select Server created in previous step (e.g.,
HOST1) to assign created account to this server.
- Click .
- Repeat all the above steps to create accounts for
HOST2andBROKERservers (e.g.,rds-host2-forward, rds-broker-forward).
Configure Listeners
- Select > and then click .
- Enter listener’s unique name (e.g.,``rdp-proxy-01``).
- Go to Permissions tab and add users allowed to manage this listener (e.g.,
user1).
- Go to Settings tab and press the button in the Protocol field.
- Select the TLS enabled option to enable encryption.
- Check the NLA enabled option for additional security.
- In the Connection mode section, select
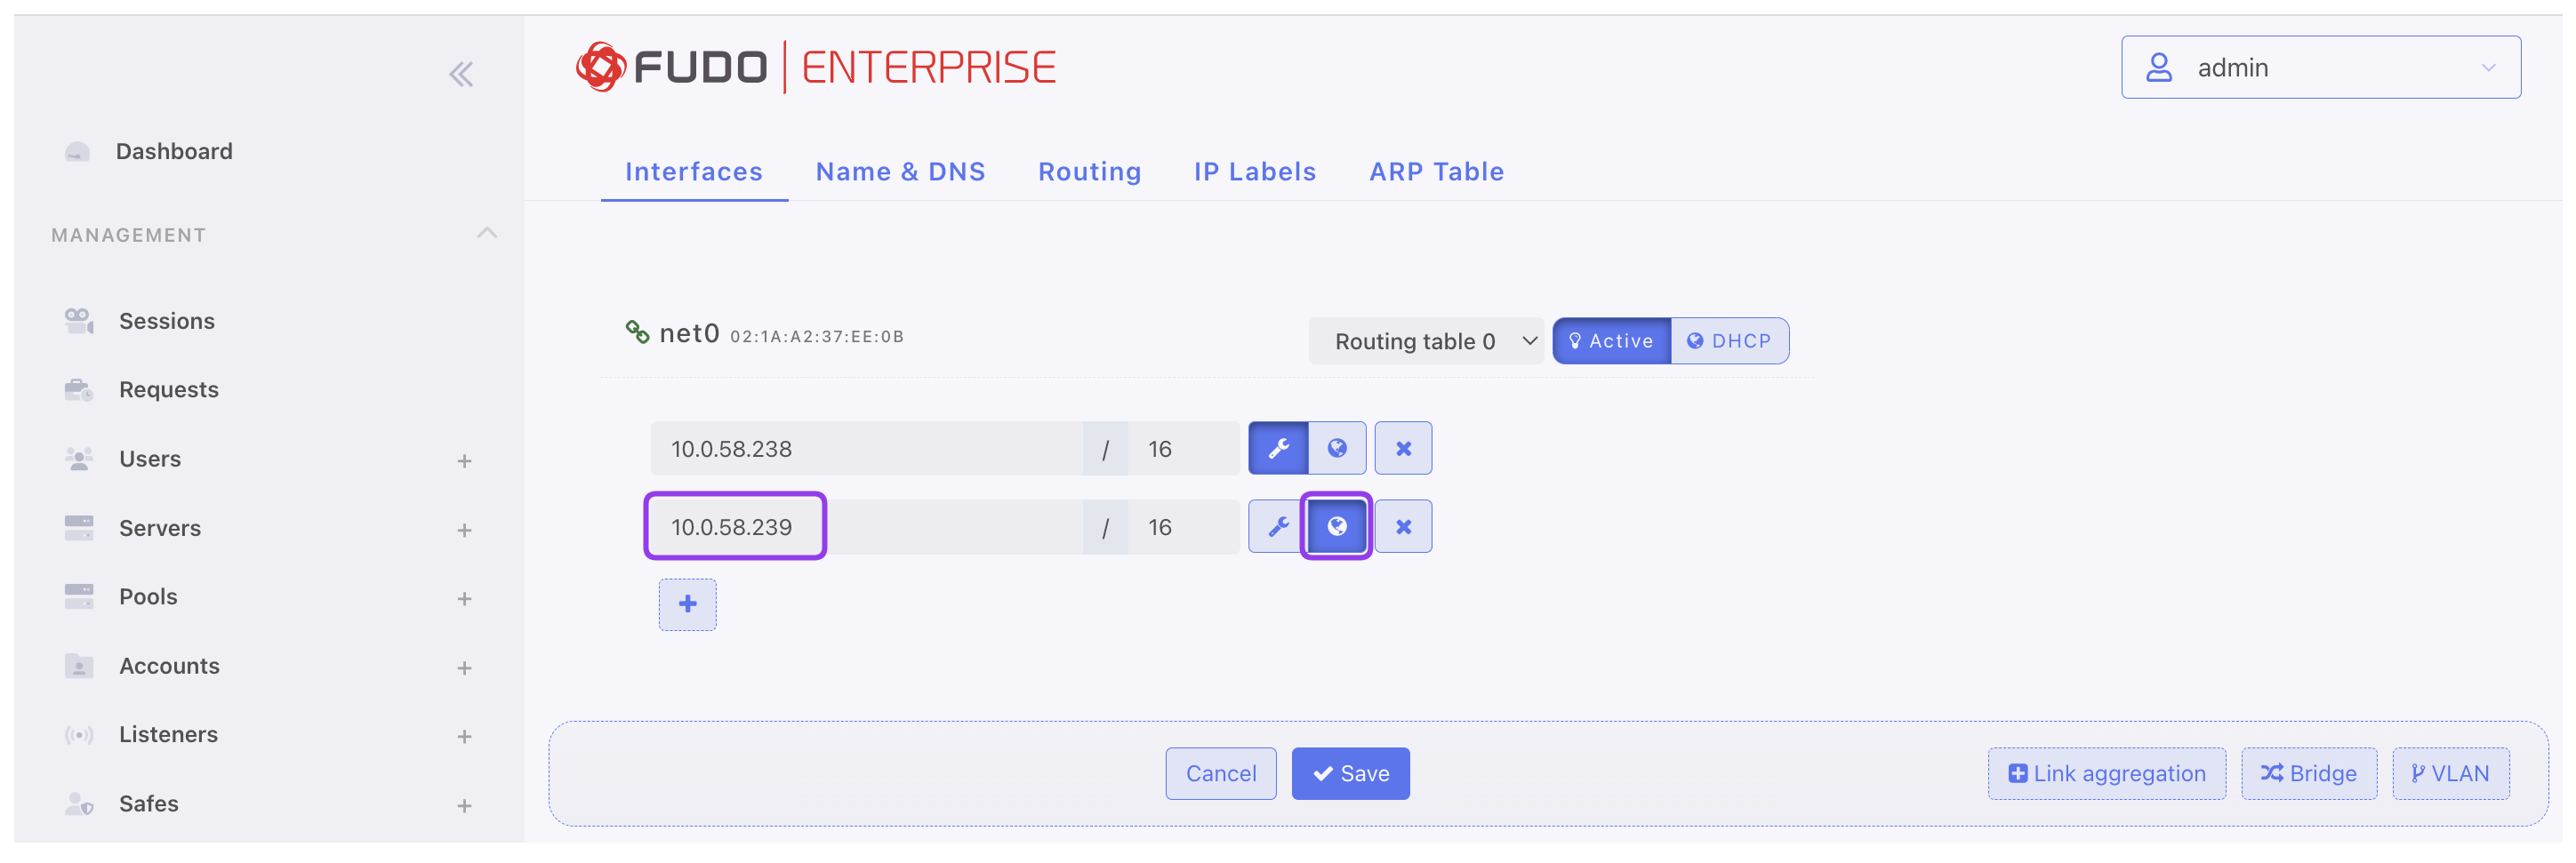
proxy.- Set the local address to dedicated IP address (e.g.,
10.0.58.238), and port3389.Note
To learn how to manage additional IP addresses, please refer to the Network interfaces configuration section.
- In the CA certificate field, click to generate TLS certificate by choosing key algorithm and providing Common Name (server name where the certificate is installed), or click to upload server certificate file with private key pasted at the end of the file.
- Click .
- Repeat all the above steps to create additional listeners with a dedicated IP address and port 3389 for
HOST2andBROKERservers.
Configure Safe:
Select > and then click .
Enter safe’s unique name (e.g.,``rdp-safe``).
Go to the Users tab to assign users allowed to access accounts assigned to this safe.
- Click .
- Click i next to the users’ names to enable their server access through the monitored safe (e.g.,
user1).- Click to close the modal window.
Select Accounts tab to add accounts accessible through this safe.
- Click .
- Click . next to each account name created in the previous steps to add it (e.g.,
rds-host1-forward, rds-host2-forward, rds-broker-forward).- Click to close the modal window.
- Click . in the Listeners column, next click . to assign a listener to it (e.g.,``rdp-proxy-01, rdp-proxy-02, rdp-proxy-03``). Assign independent listener to each account (e.g.,``rdp-proxy-01, rdp-proxy-02, rdp-proxy-03``).
- Click to close the modal window.
Click to save the safe configuration.
Establish a connection through the Access Gateway:
Warning
When establishing connections using the Remote Desktop Services, please use the Native client option. Web client feature is not functional for this type of scenario.
- Log in to the Fudo Enterprise Access Gateway using
user1as the username and password corresponding to the one configured in the Active Directory.Note
You can find the Access Gateway address in the > menu tab.
- Hover the cursor over the
user1account name, select Native client and click the button to download the.rdpconfiguration file.
- Open the downloaded file to establish a connection.
- Enter the password for the
user1account to log in to the server.
Redirect the connection through Fudo using RDP native client:
- In order to redirect the connection through Fudo Enterprise, we need to use the Fudo Access Gateway address in the RDP client configuration.
- Choose your favorite remote desktop client, such as Microsoft Remote Desktop, and follow its workflow to add a new PC for connection.
- Following the example of Microsoft Remote Desktop, click the plus icon in the upper part of the window and select Add PC.
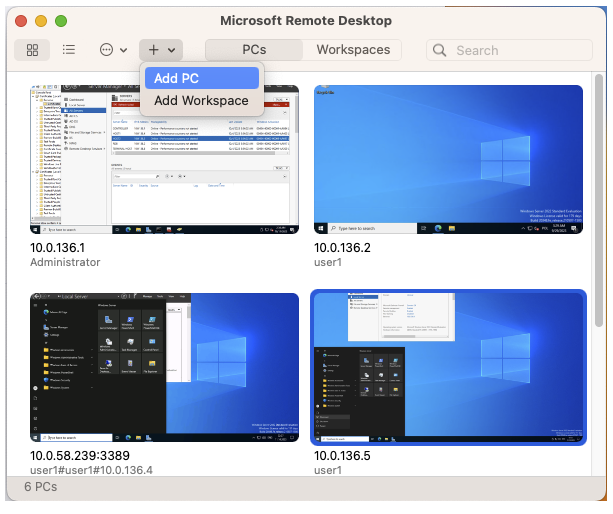
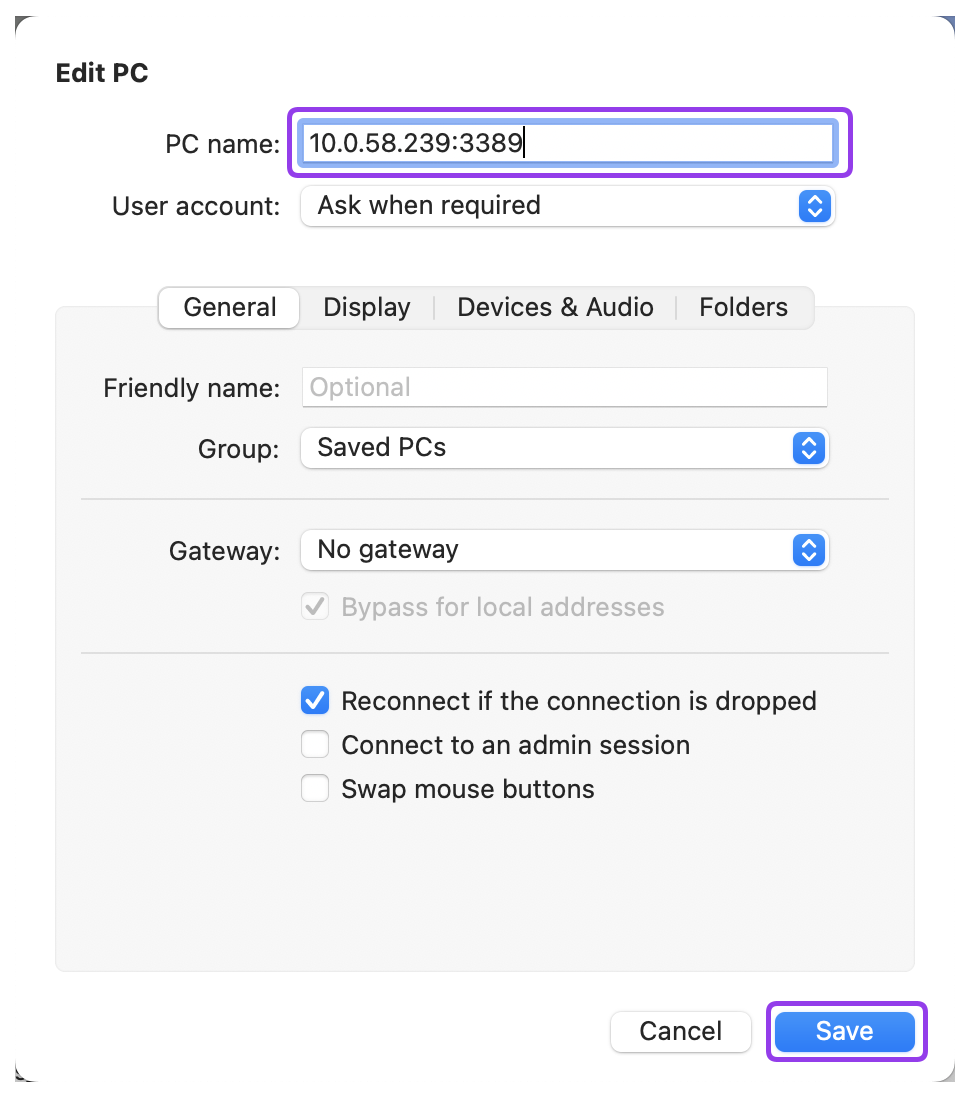
- In the PC Name field, enter the address of the Fudo Enterprise Access Gateway followed by the port number and click Add.
Note
You can find the Access Gateway address in the > menu tab.
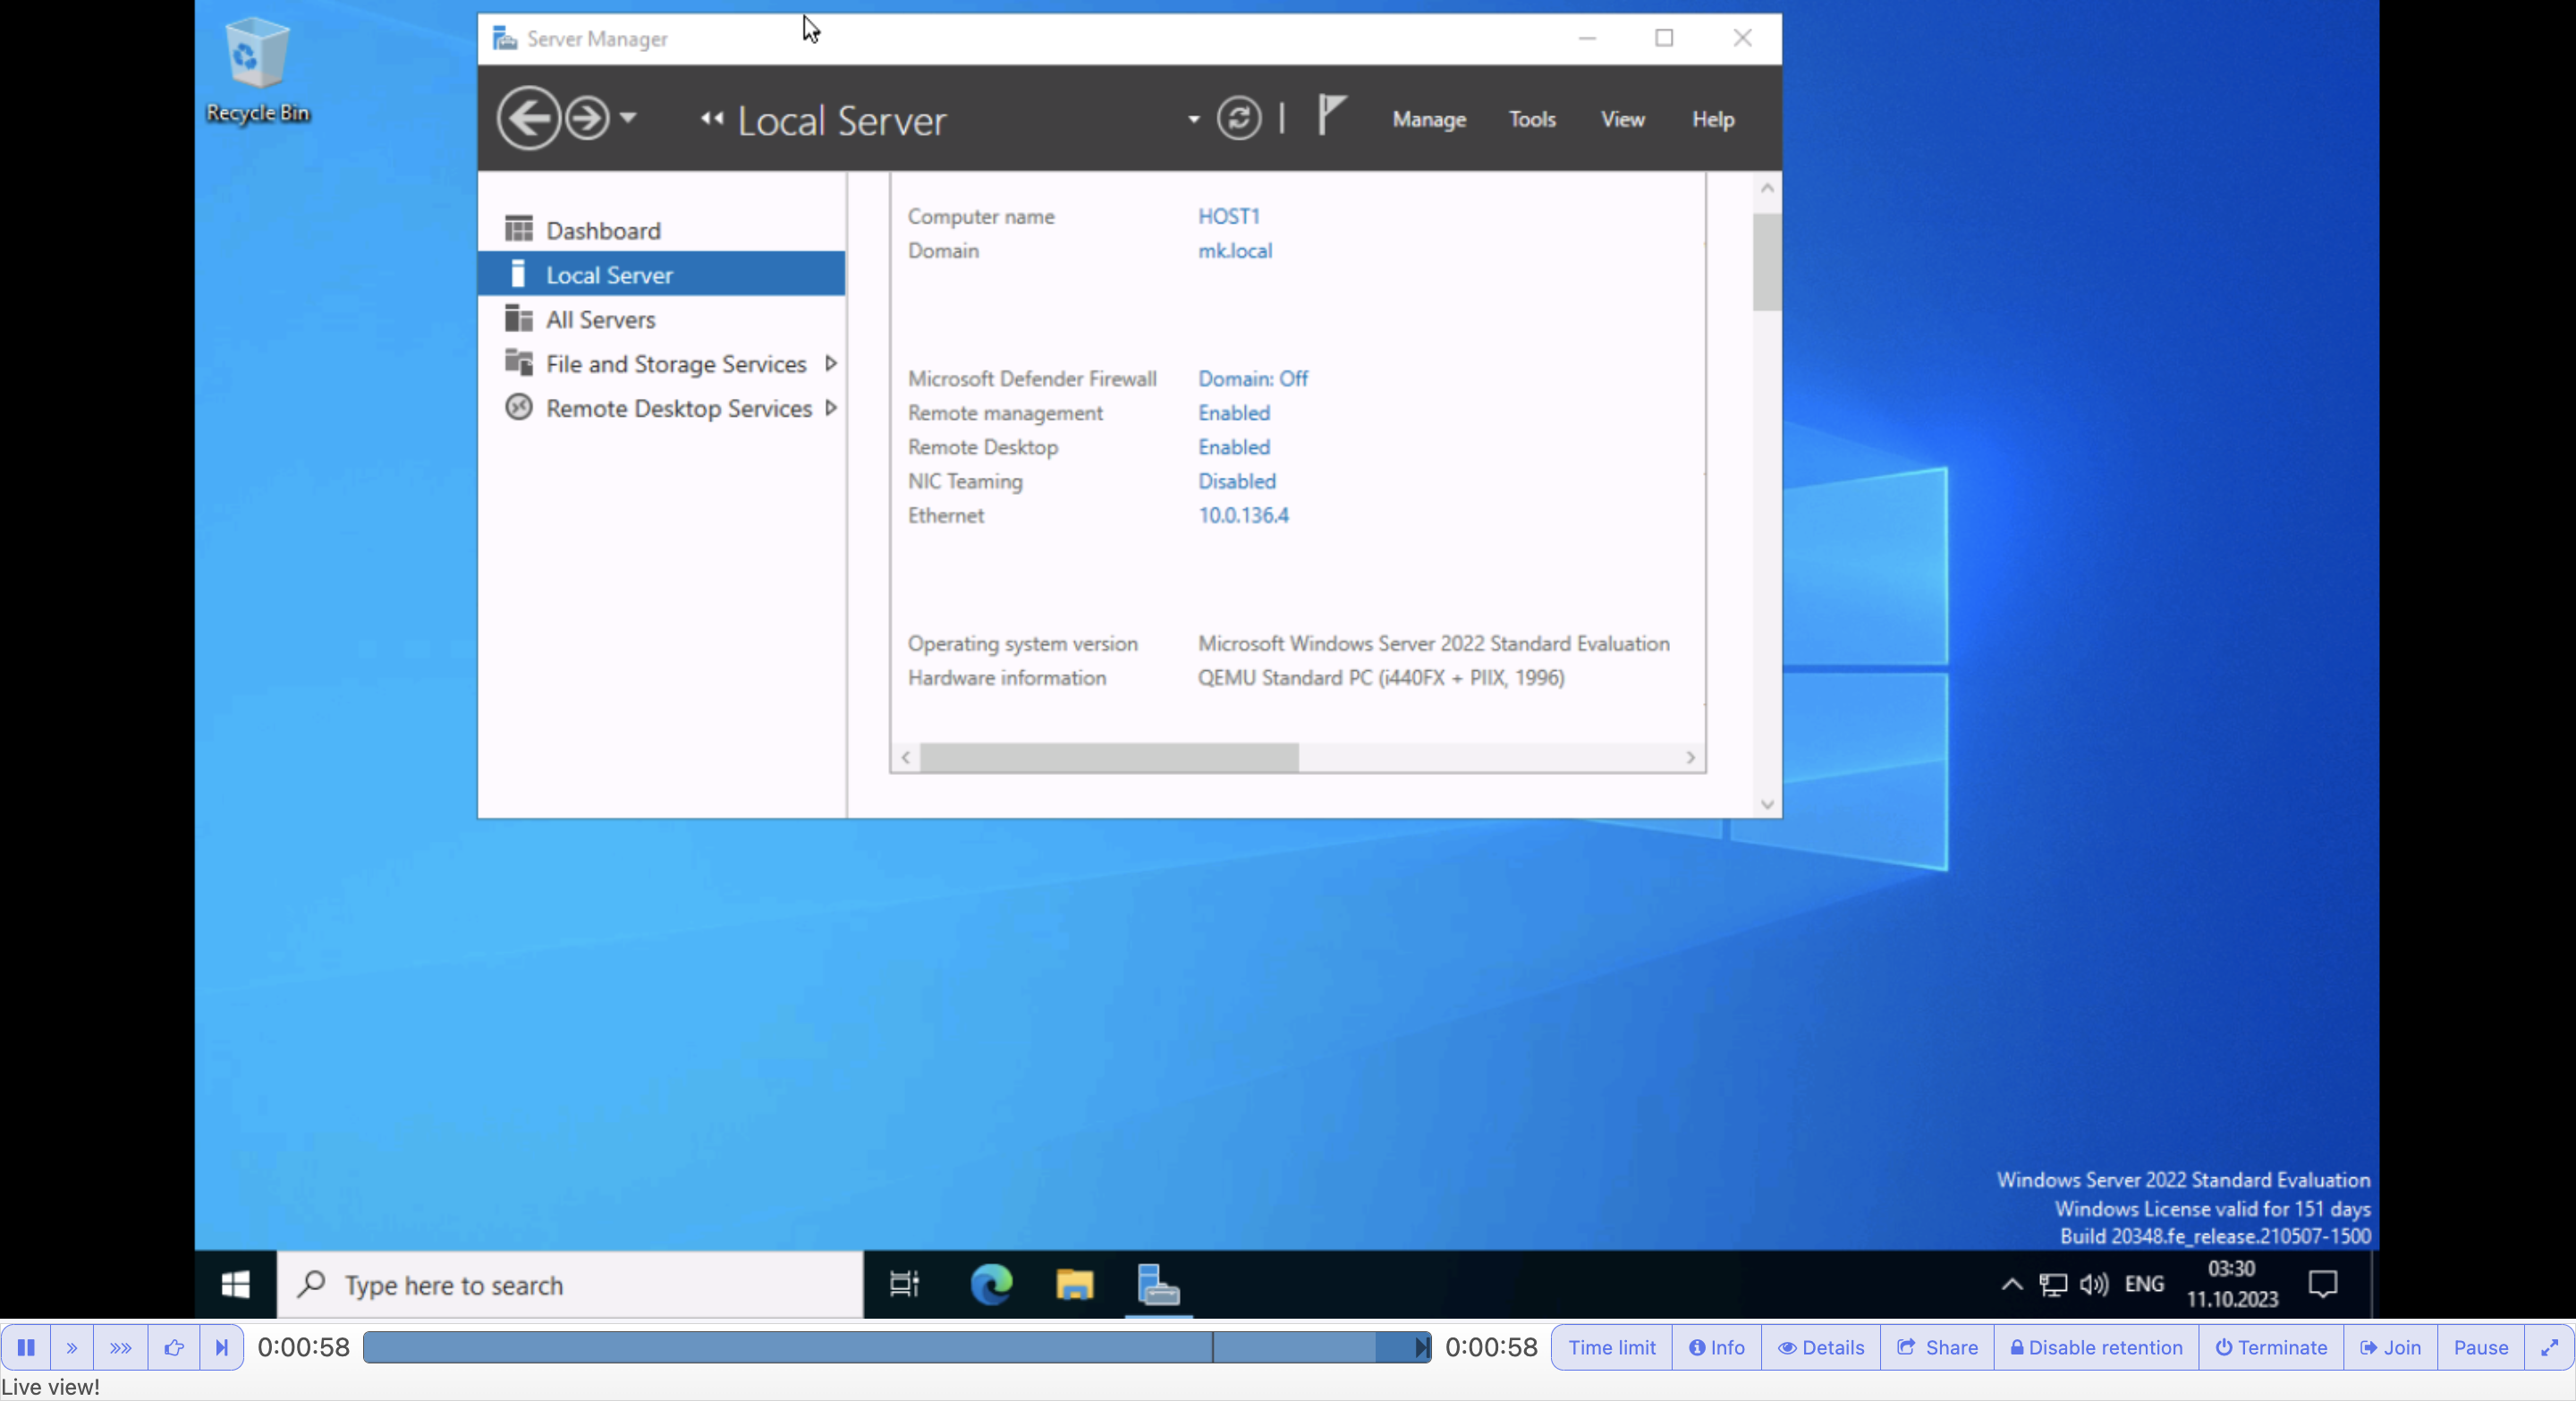
- Connect to the added PC by providing the login and password of the
user1set in the Active Directory environment (according to method selected while creating user in Fudo Enterprise).- Remote Desktop client will establish connection with one of the servers from the RDS collection.
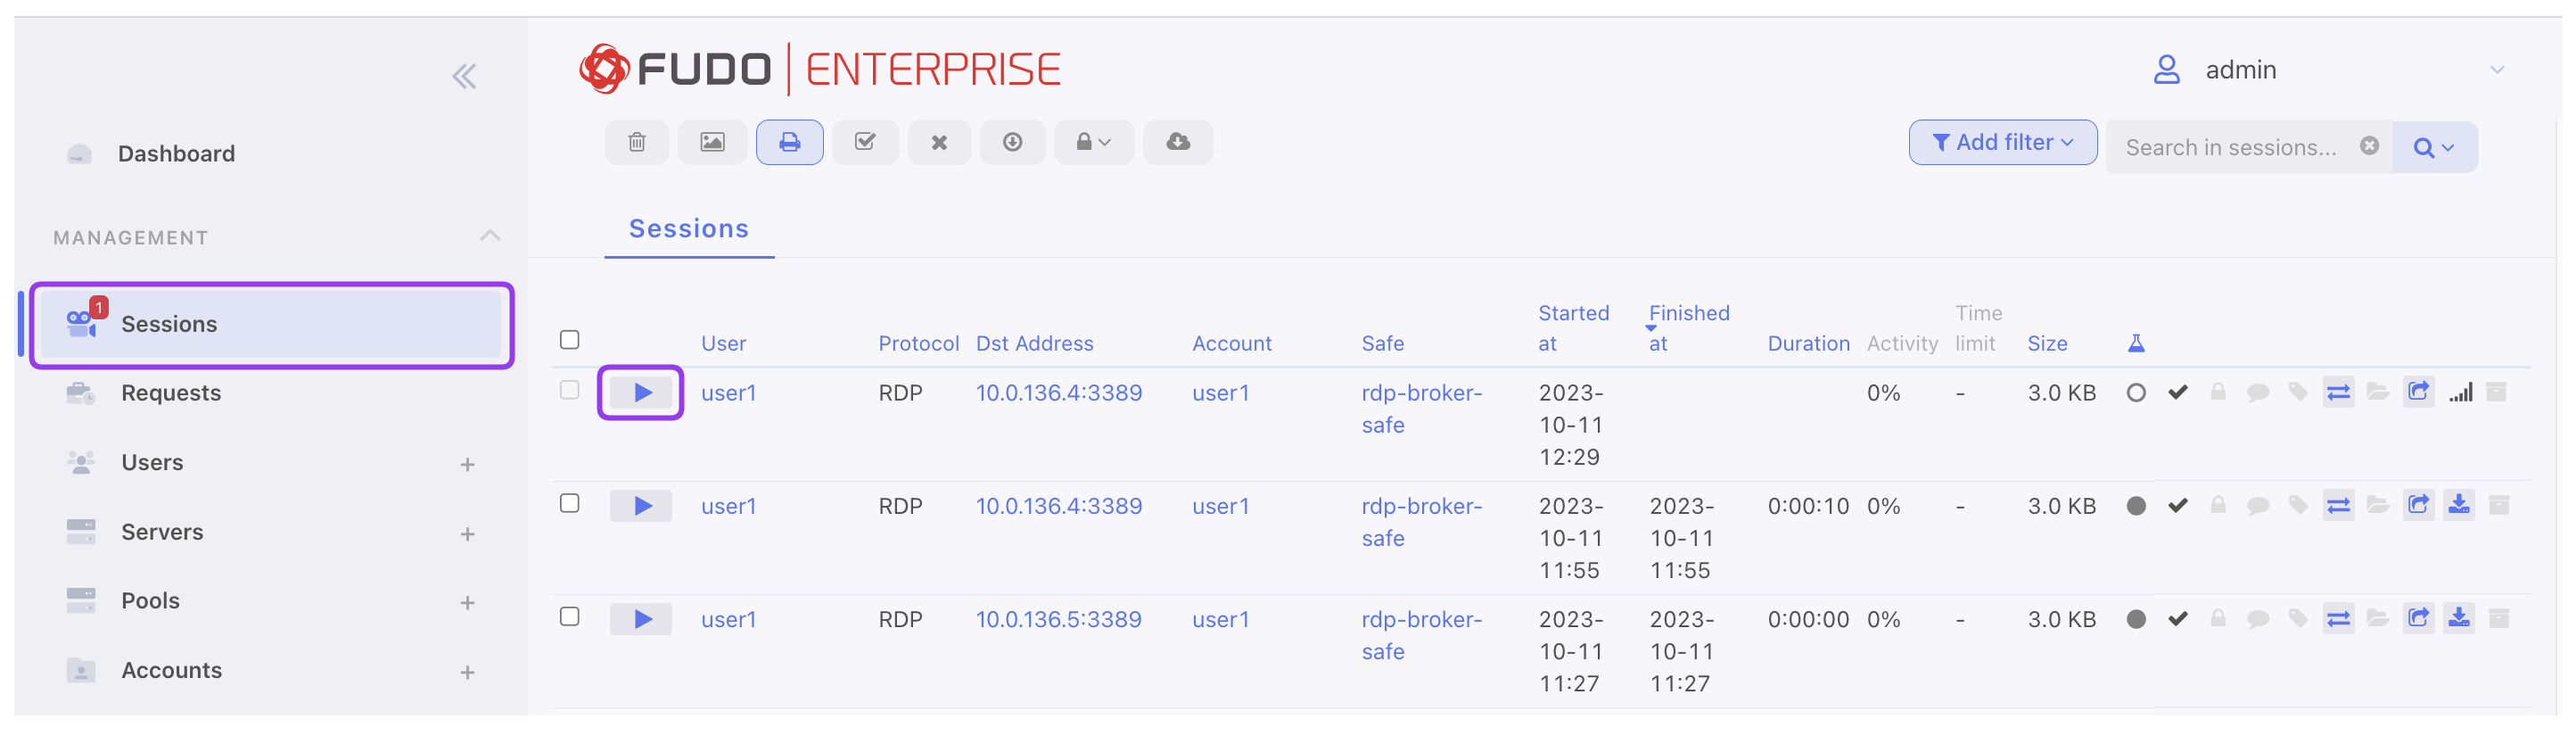
View the established session in the Fudo Enterprise Admin Panel:
- Login into your Fudo Enterprise Admin Panel.
- Select > .
- Find desired session and click i.
Related topics: