Creating a scanner for Domain Controller Servers
The Discovery feature is able to search domain controllers for servers and add them to the relevant pools during the Onboarding process. Alternatively, the feature can send the servers to quarantine, which means blocking servers in the domain.
Note
Before proceeding with creating a scanner, you need to set up:
In order to create a scanner, proceed as follows:
- Select > >
- Click
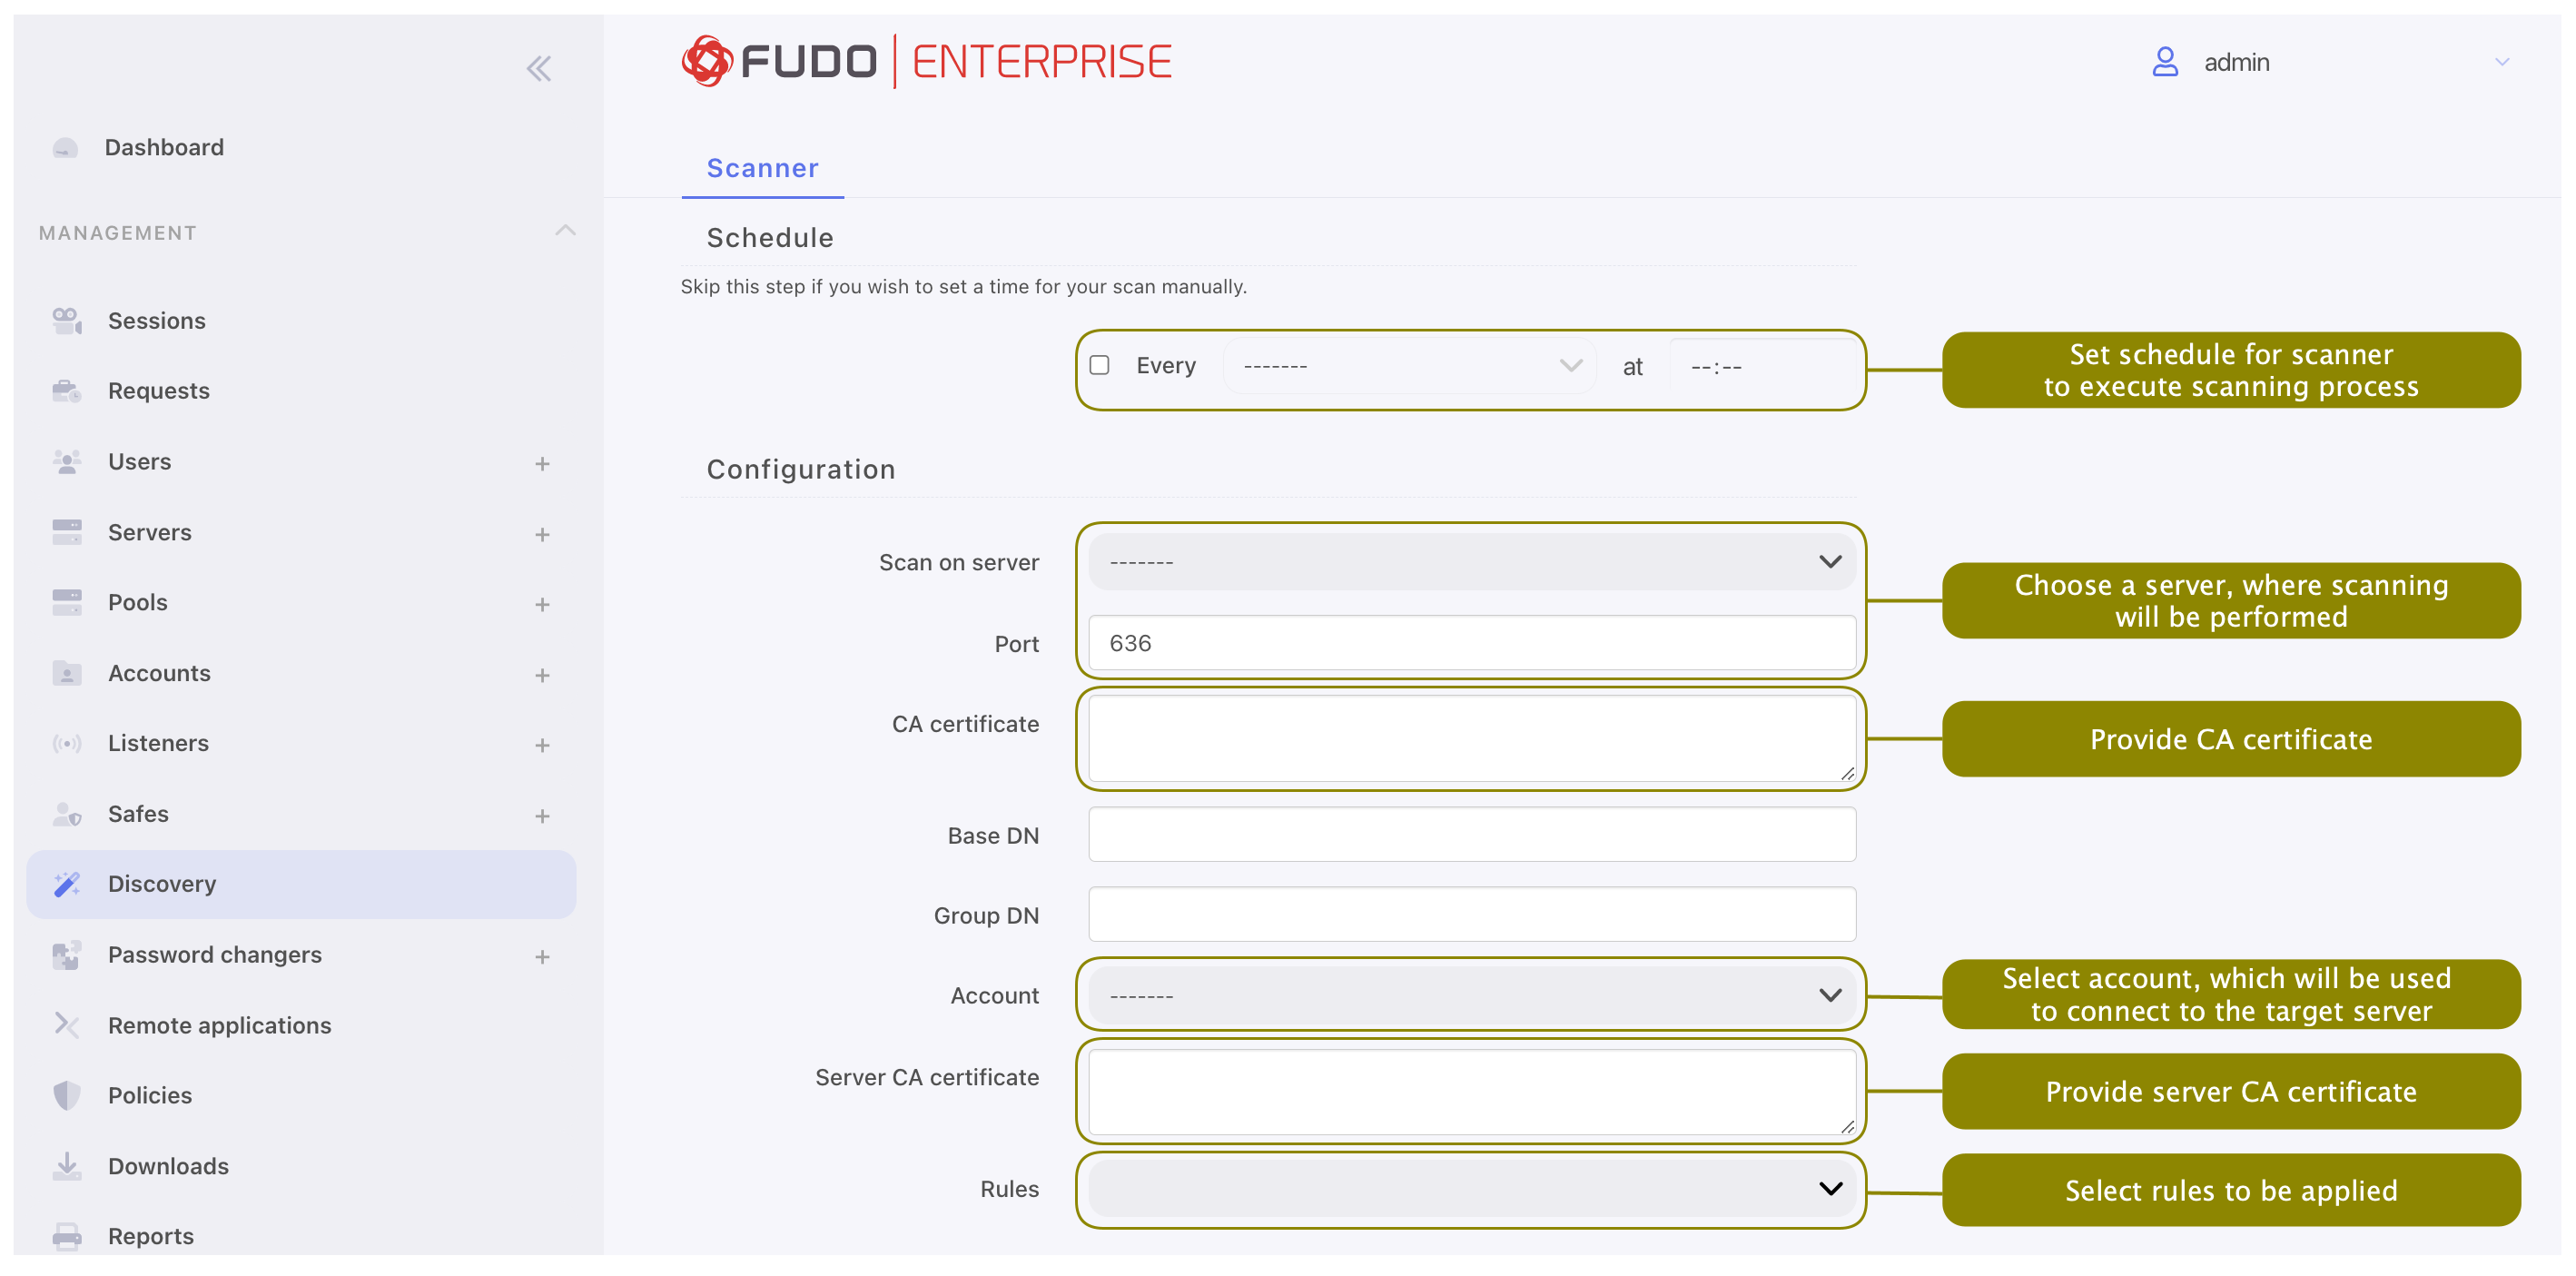
- Enter scanner’s name.
- Select
Domain Controller Serversfrom the Scanner type drop-down list. - Optionally, enter scanner’s description.
- In the Schedule section, choose a day and time for your scanner to start automatically on a weekly basis. This field is optional, so you can skip this step to start your scan manually anytime.
- Fill Configuration section with:
7.1. Target server in the Scan on server field.
7.2. Port number to the target server.
7.3. CA certificate.
7.4. Base DN value to indicate the exact location in the domain (optional). Use following format:
cn=##username##,dc=example,dc=com.7.5. Group DN value to indicate the exact group in the domain (optional). Use following format:
cn=##username##,dc=example,dc=com.Note
If Base DN or Group DN is not specified, the scanner will search the entire domain.
7.6. Account to be used to connect to the target server.
7.7. Server CA certificate which will be assigned to the discovered servers.
7.8. Choose previously defined Rules to set the following actions after the scan. Please note that in case more than one rule is added and their actions overlap, the order of the rules is taken into account: the first matching rule will be applied.
- Click .
Related topics: