Handling Local Account Password Changes Using a Domain Account with WinRM Password Changer
The following guide describes the basic configuration of Fudo Enterprise required to enable local account password changes on domain-joined workstations using a domain account.
- To ensure proper operation of the password changer in Fudo Enterprise, the following configurations must be added:
- Hostname and DNS server configuration.
- KDC server configuration.
- Configuration of the server where the local account is located.
- Configuration of a privileged account used to perform the password change.
- Configuration of the local or domain account for which the password will be changed.
Note
- Fudo Enterprise must be configured with the same time zone as the domain.
- A privileged domain account can be used to change passwords for both local and domain accounts. This should be considered when configuring privileged users responsible for password changes and those whose passwords will be changed.
Hostname and DNS Server Configuration
Set the hostname by following these steps:
- Go to > .
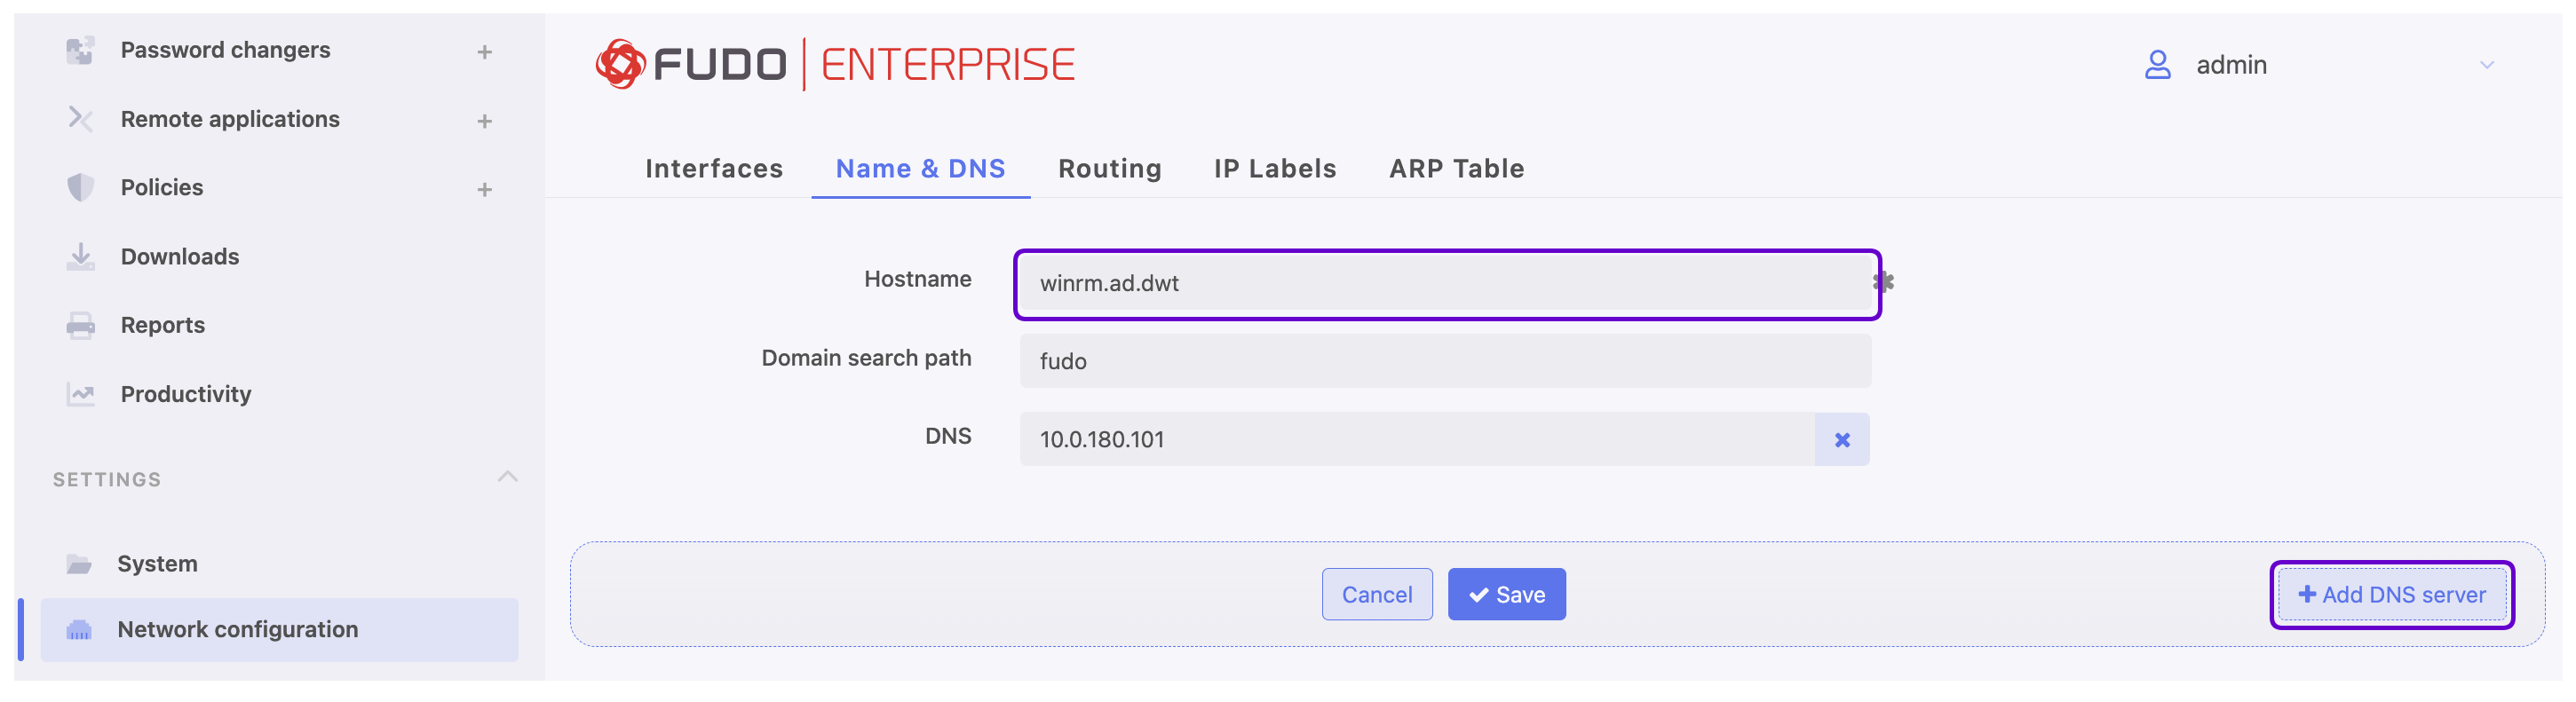
- Navigate to the Name and DNS tab.
In the Hostname field, enter the hostname along with the domain in the following format:
hostname.yourdomain.local(e.g.,winrm.ad.dwt).Configure the DNS server:
- Click to define a new DNS server.
- Enter the IP address of the DNS server (e.g.,
10.0.180.101).- Click .
Adding a KDC Server
Add the KDC server configuration by following these steps:
- Select > > Global tab.
- In the Kerberos section, ensure the Use Kerberos authentication option is enabled.
- Click .
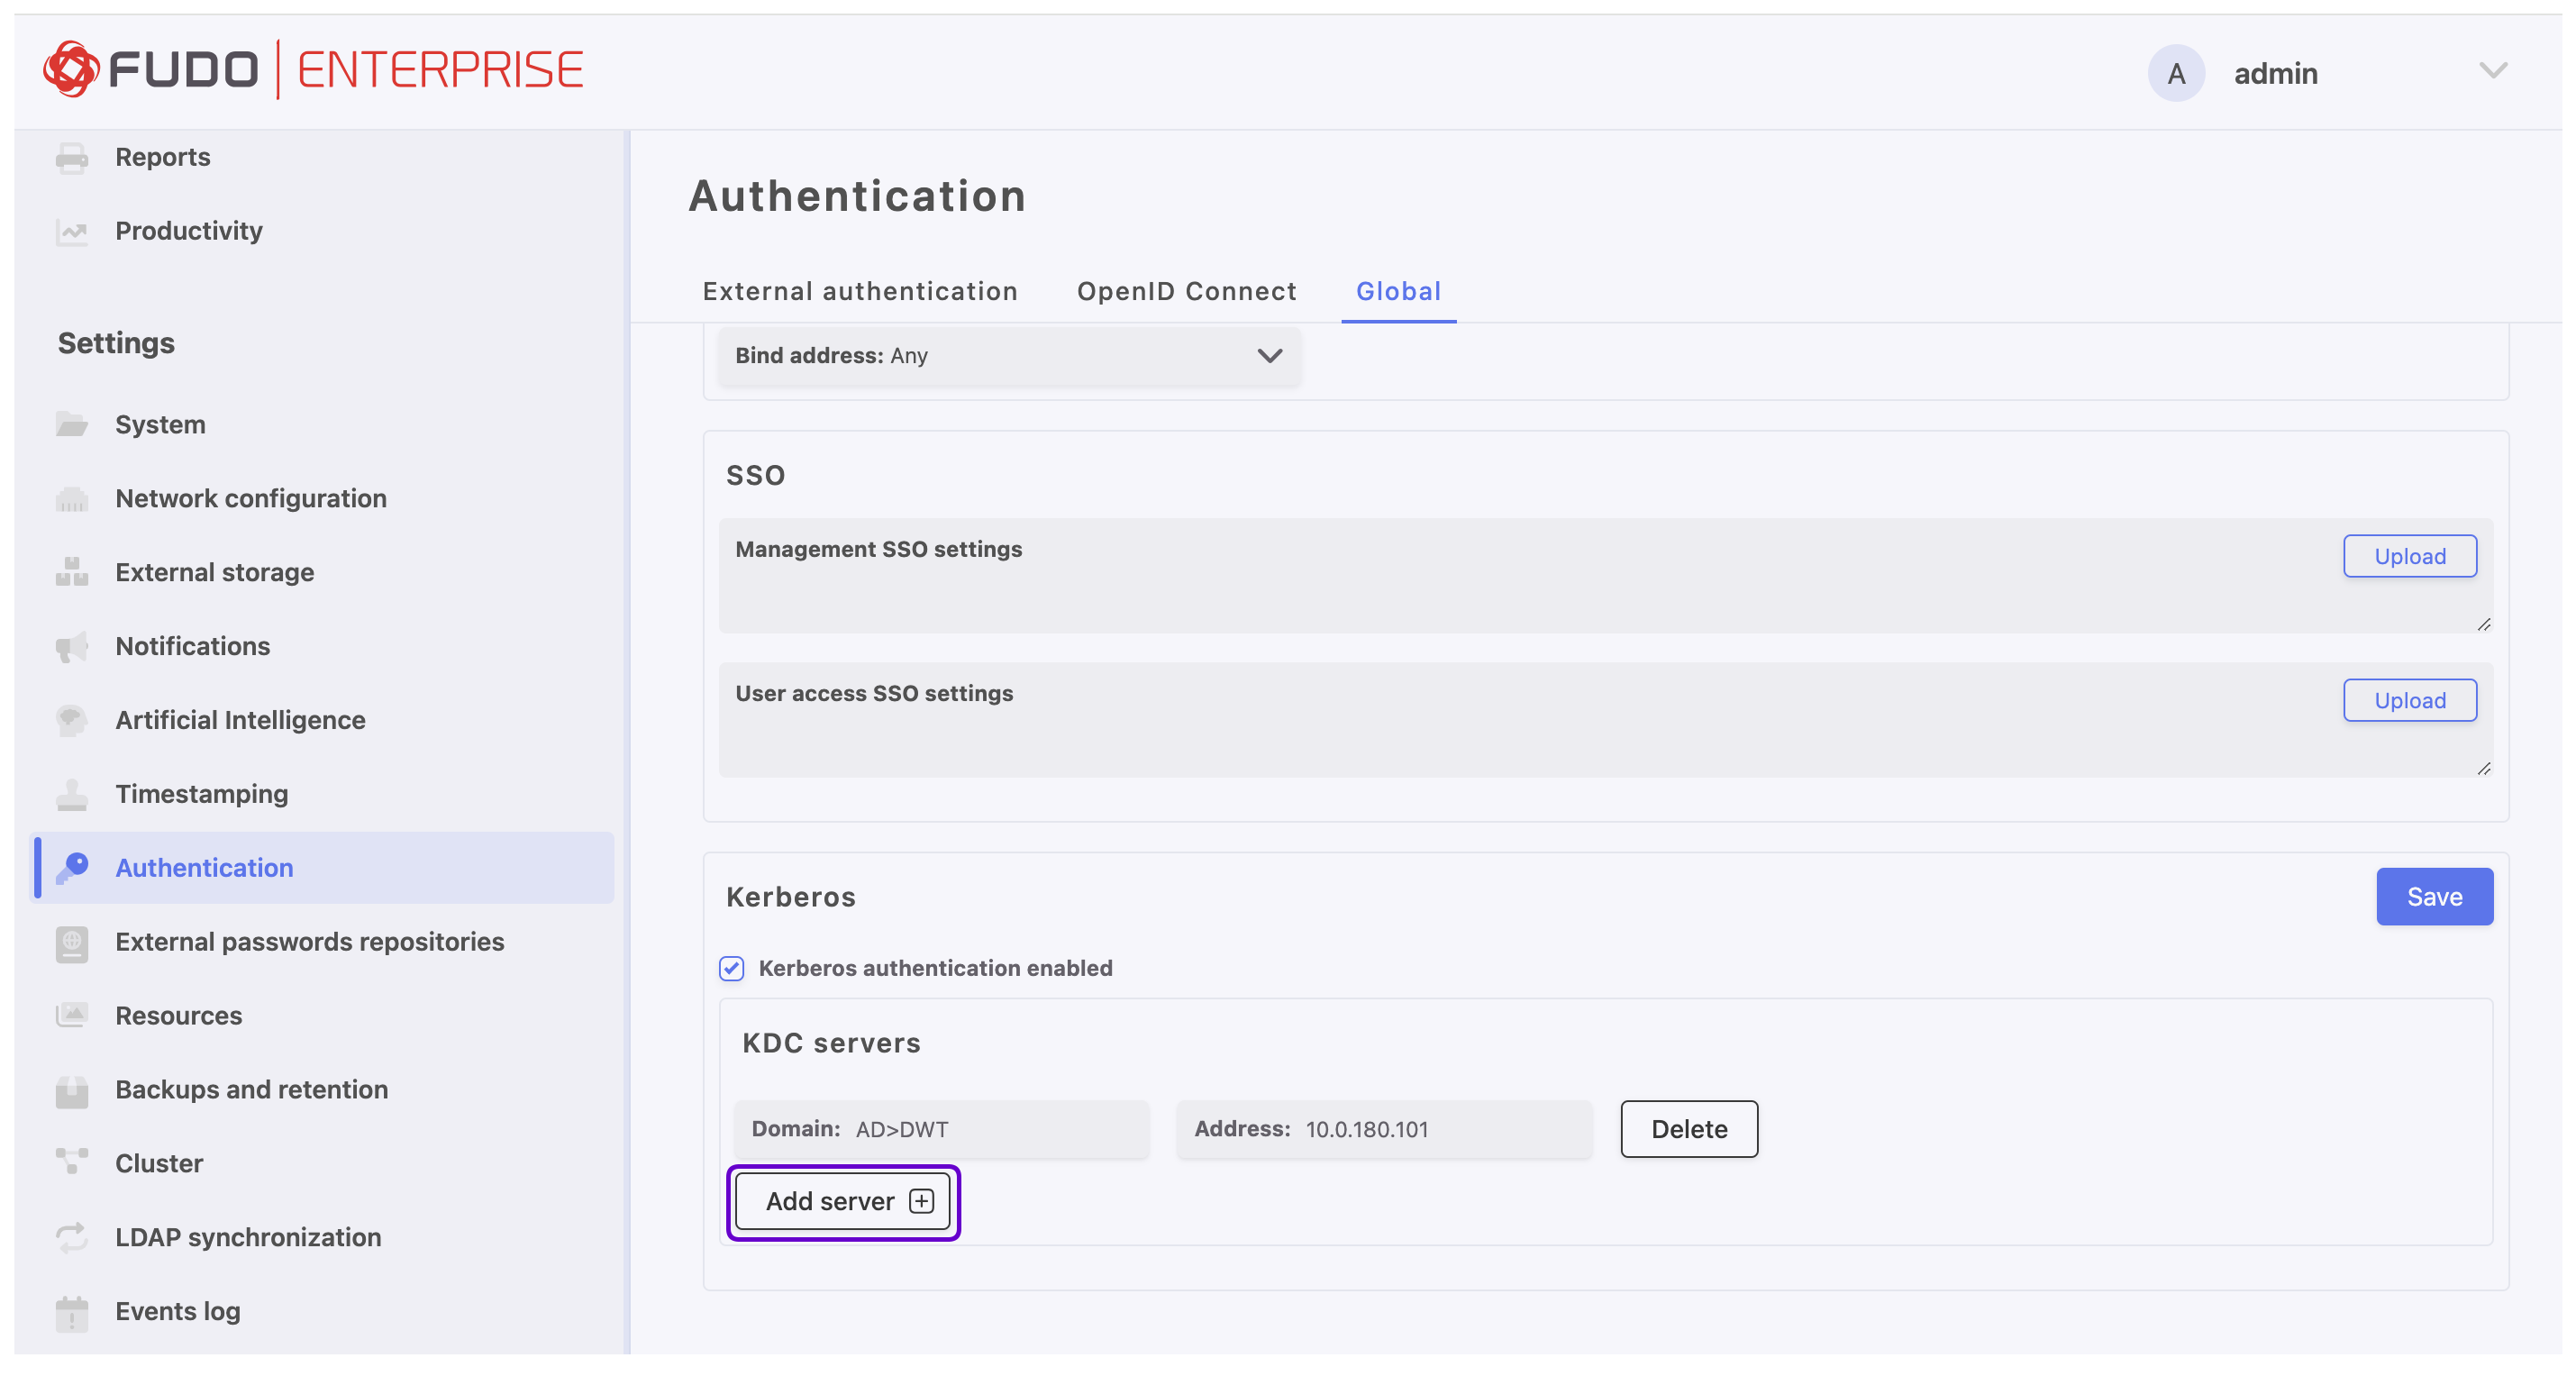
- In the Domain and Address fields, enter the domain and IP address of the server responsible for authentication and key distribution in the Kerberos protocol (e.g.,
AD.DWTand10.0.130.100).
Server Configuration
Create a configuration for the server where the local account is located:
- Select > from the left menu and click
- Enter a unique name for the created object (e.g.,
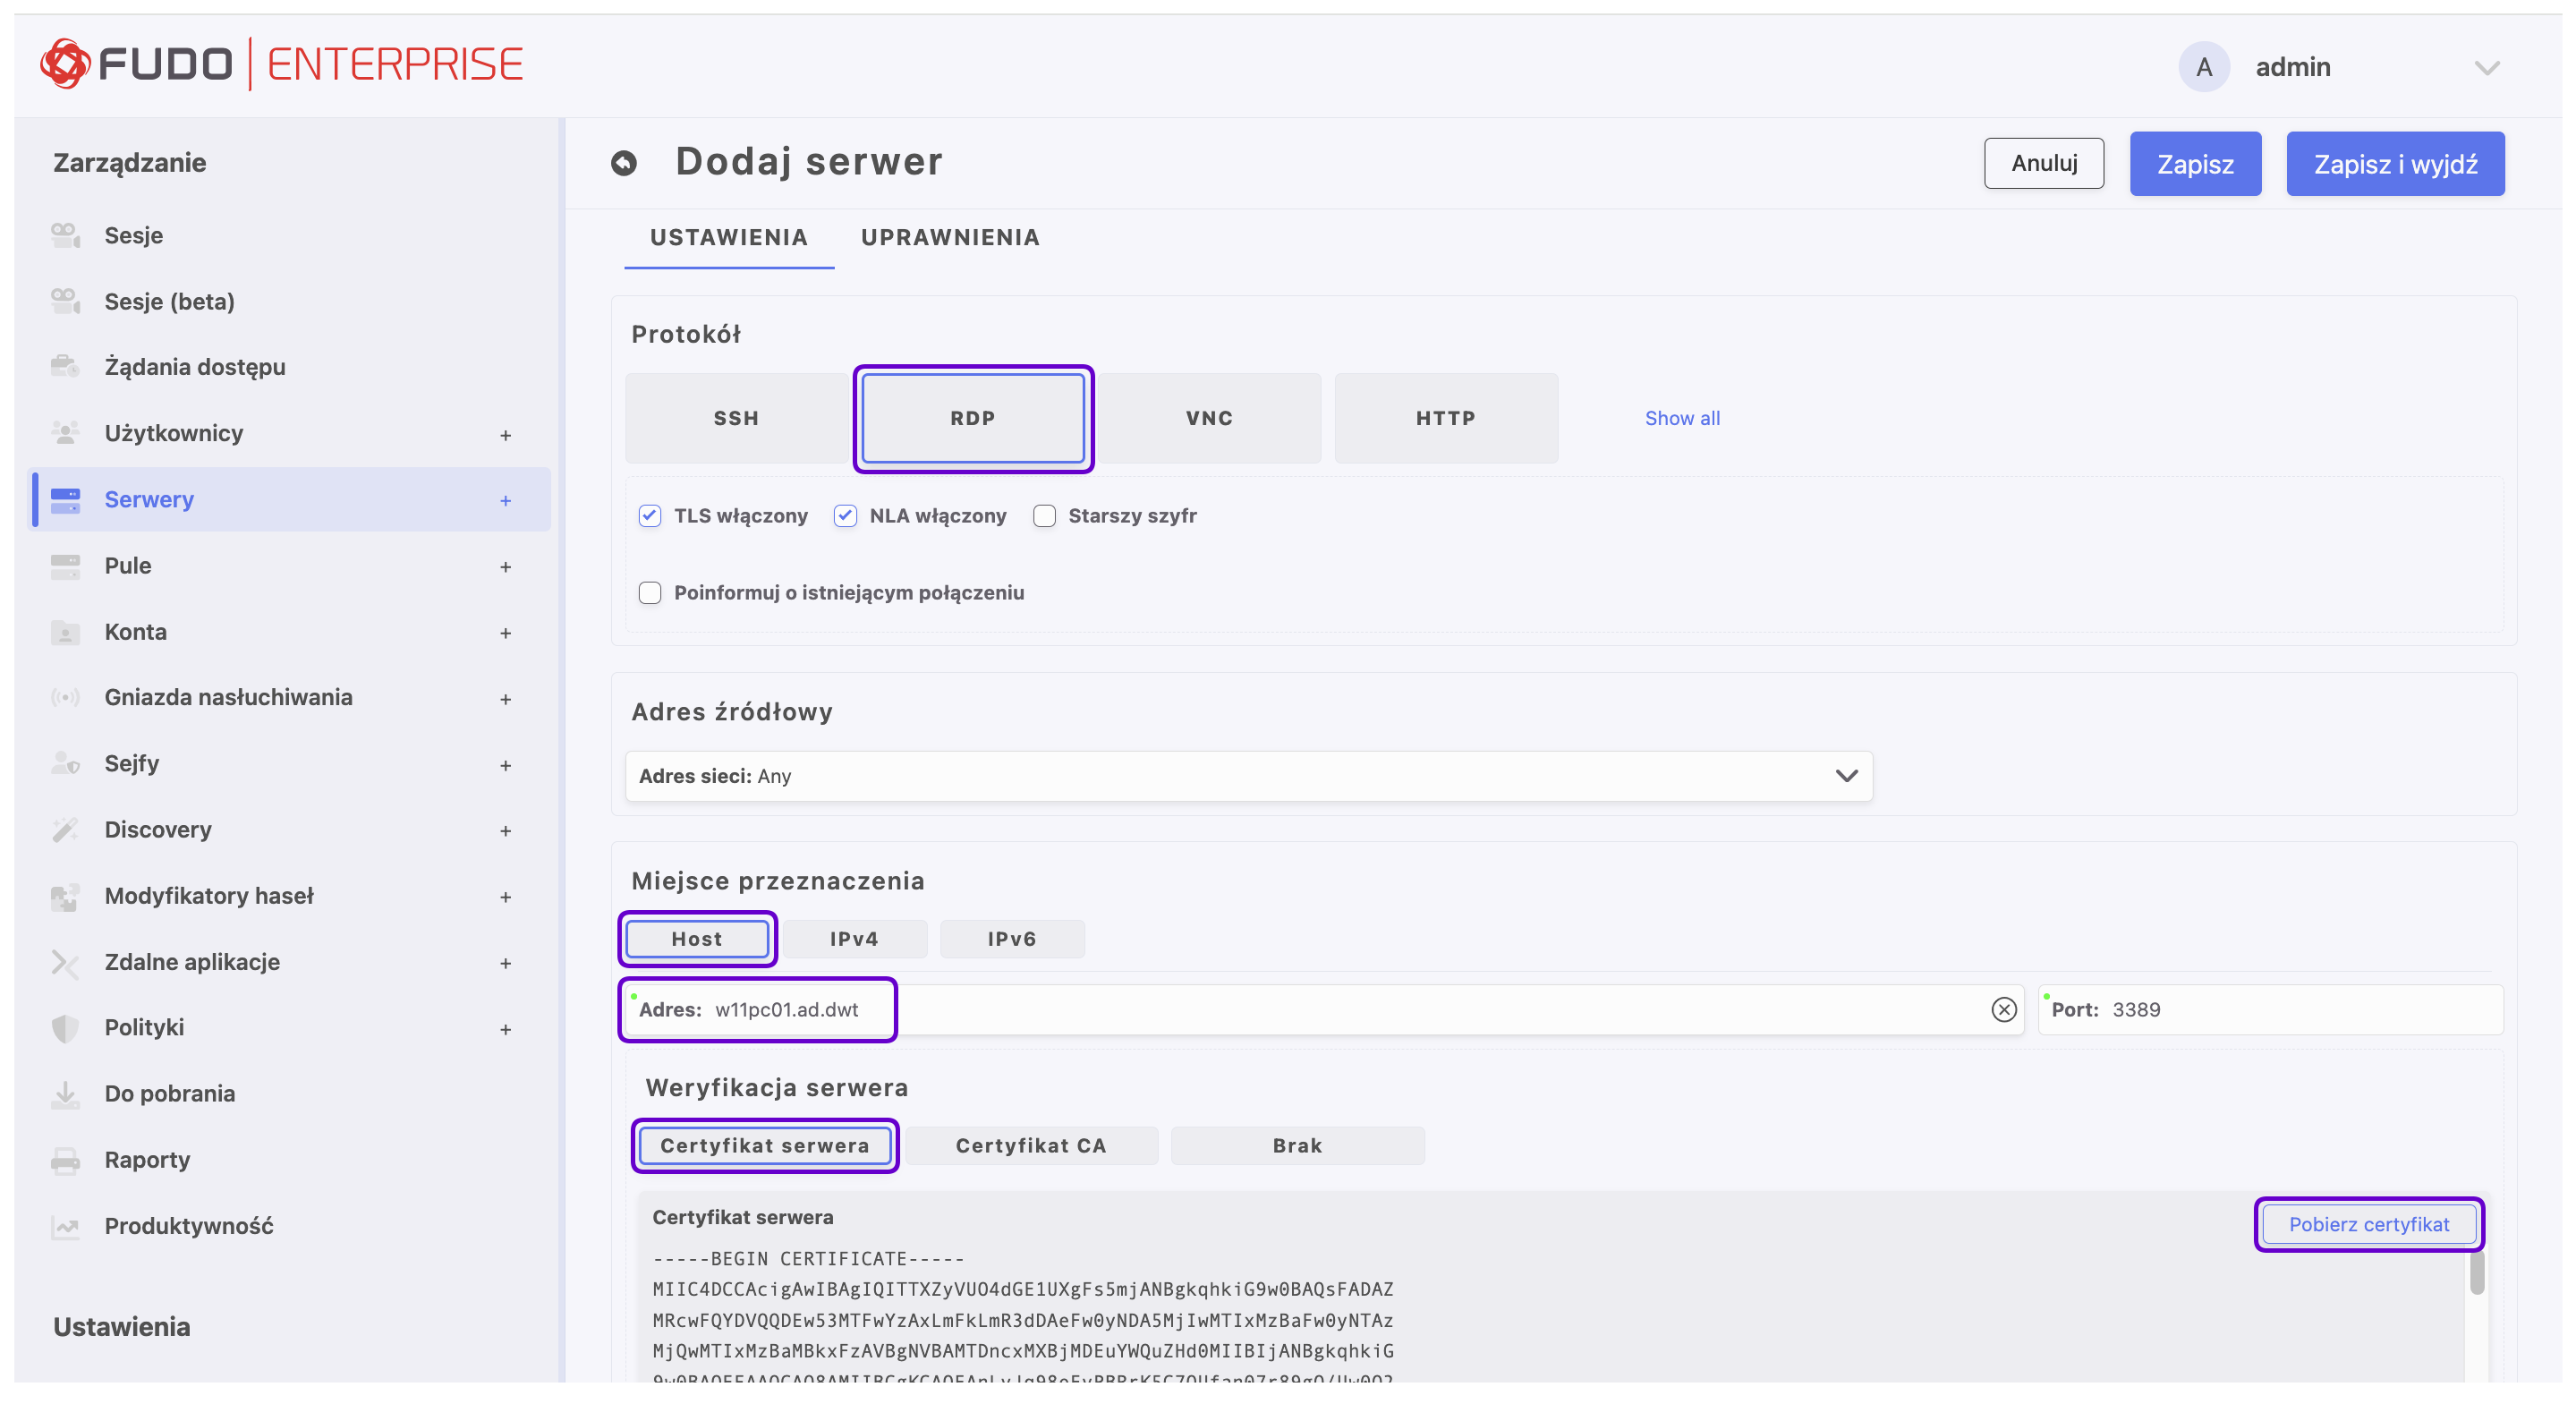
RDP_Server). - Navigate to the Settings section.
- In the Protocol field, select
RDP. - Define the destination server:
- Select
Host. - In the Address field, enter the hostname along with the domain (e.g.,
w11pc01.ad.dwt). - Enter the Port number.
- In the Server Verification section, select Server Certificate and click Download Certificate.
- Click .
Note
In this scenario, the hostname along with the domain must be provided. This name will be used in the transport_host variable of the password changer. Defining the server by IPv4/IPv6 address is not supported.
Related Topics: