OpenID Connect authentication definition with Microsoft Entra (Azure)
To configure the OpenID Connect authentication method with Microsoft Entra, please follow below steps.
Note
Please note that this is a general guide, and specific details may vary depending on your Microsoft Entra setup. Refer to Microsoft Entra documentation for precise configuration steps.
Create user in Microsoft Entra ID
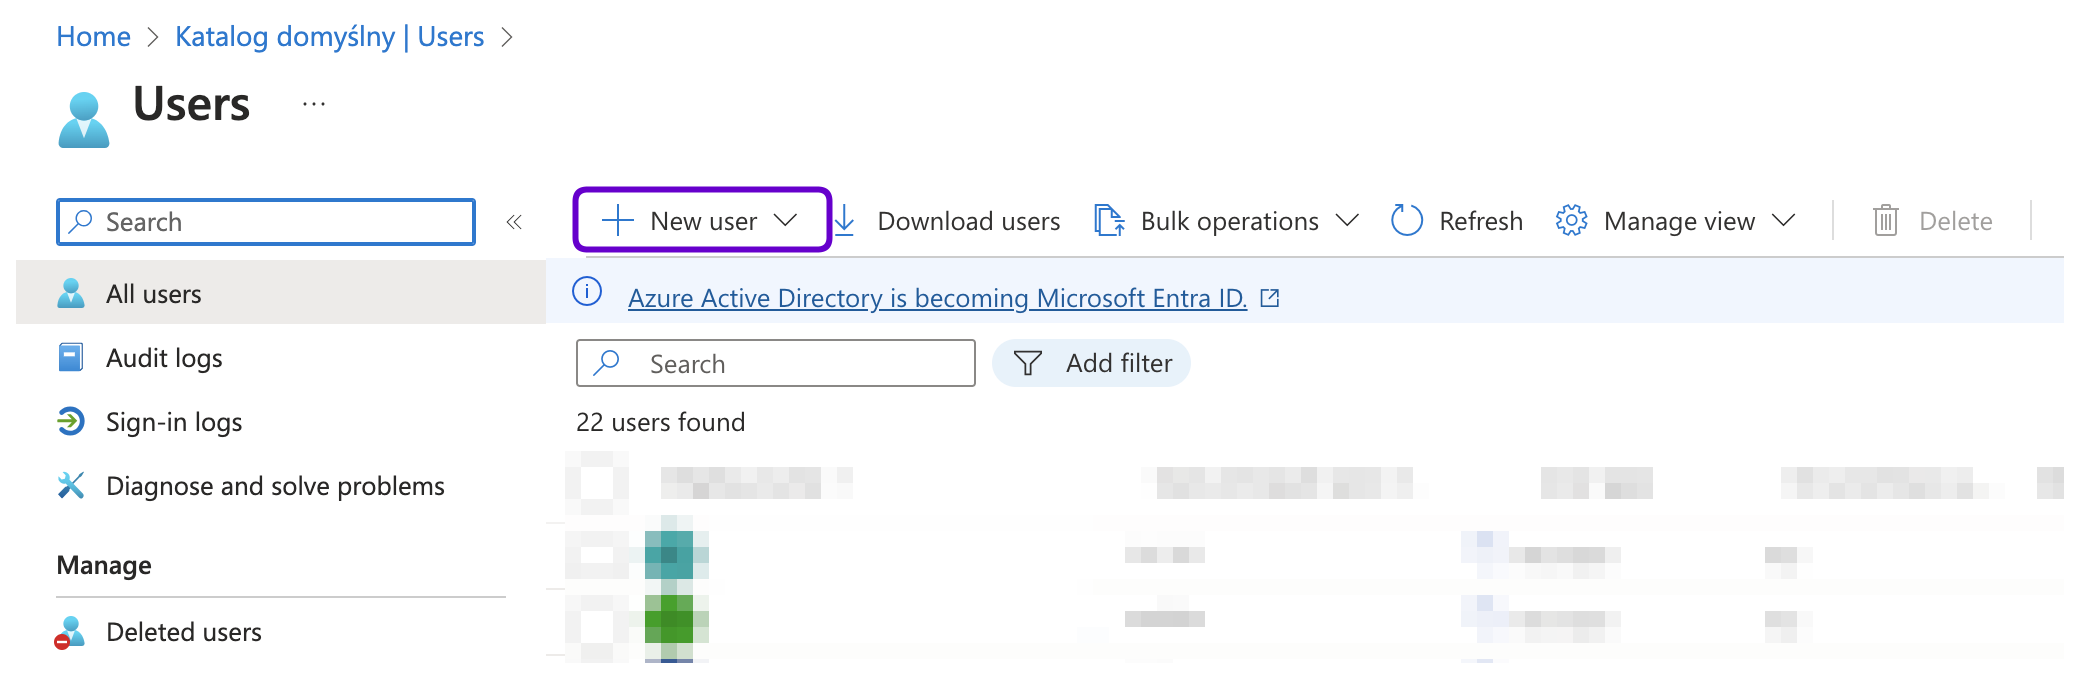
- Go to the Microsoft Entra Admin Center and log in with your Microsoft Entra credentials.
- In the left-hand menu, select Identity > Users > All users.

- Click the + New user and select Create new user from the drop-down list.
- In the User principal name field, enter the username of the user account. For example,
user1@fudosecurity.com.- In the Display name field, provide the name of the user of the account.
- Provide the password phrase in the Password field or click the Auto-generate password option to generate the password.
- Select the Account enabled option.
- In the Properties tab, under the Contact Information, in the Email field provide the email address. For example,
user1@fudosecurity.com.- Enter the details required for the user under the Properties and Assignments tabs.
- Click Create.
Register Fudo in Microsoft Entra ID
- In the left-hand menu, select Identity > Applications > Enterprise applications.
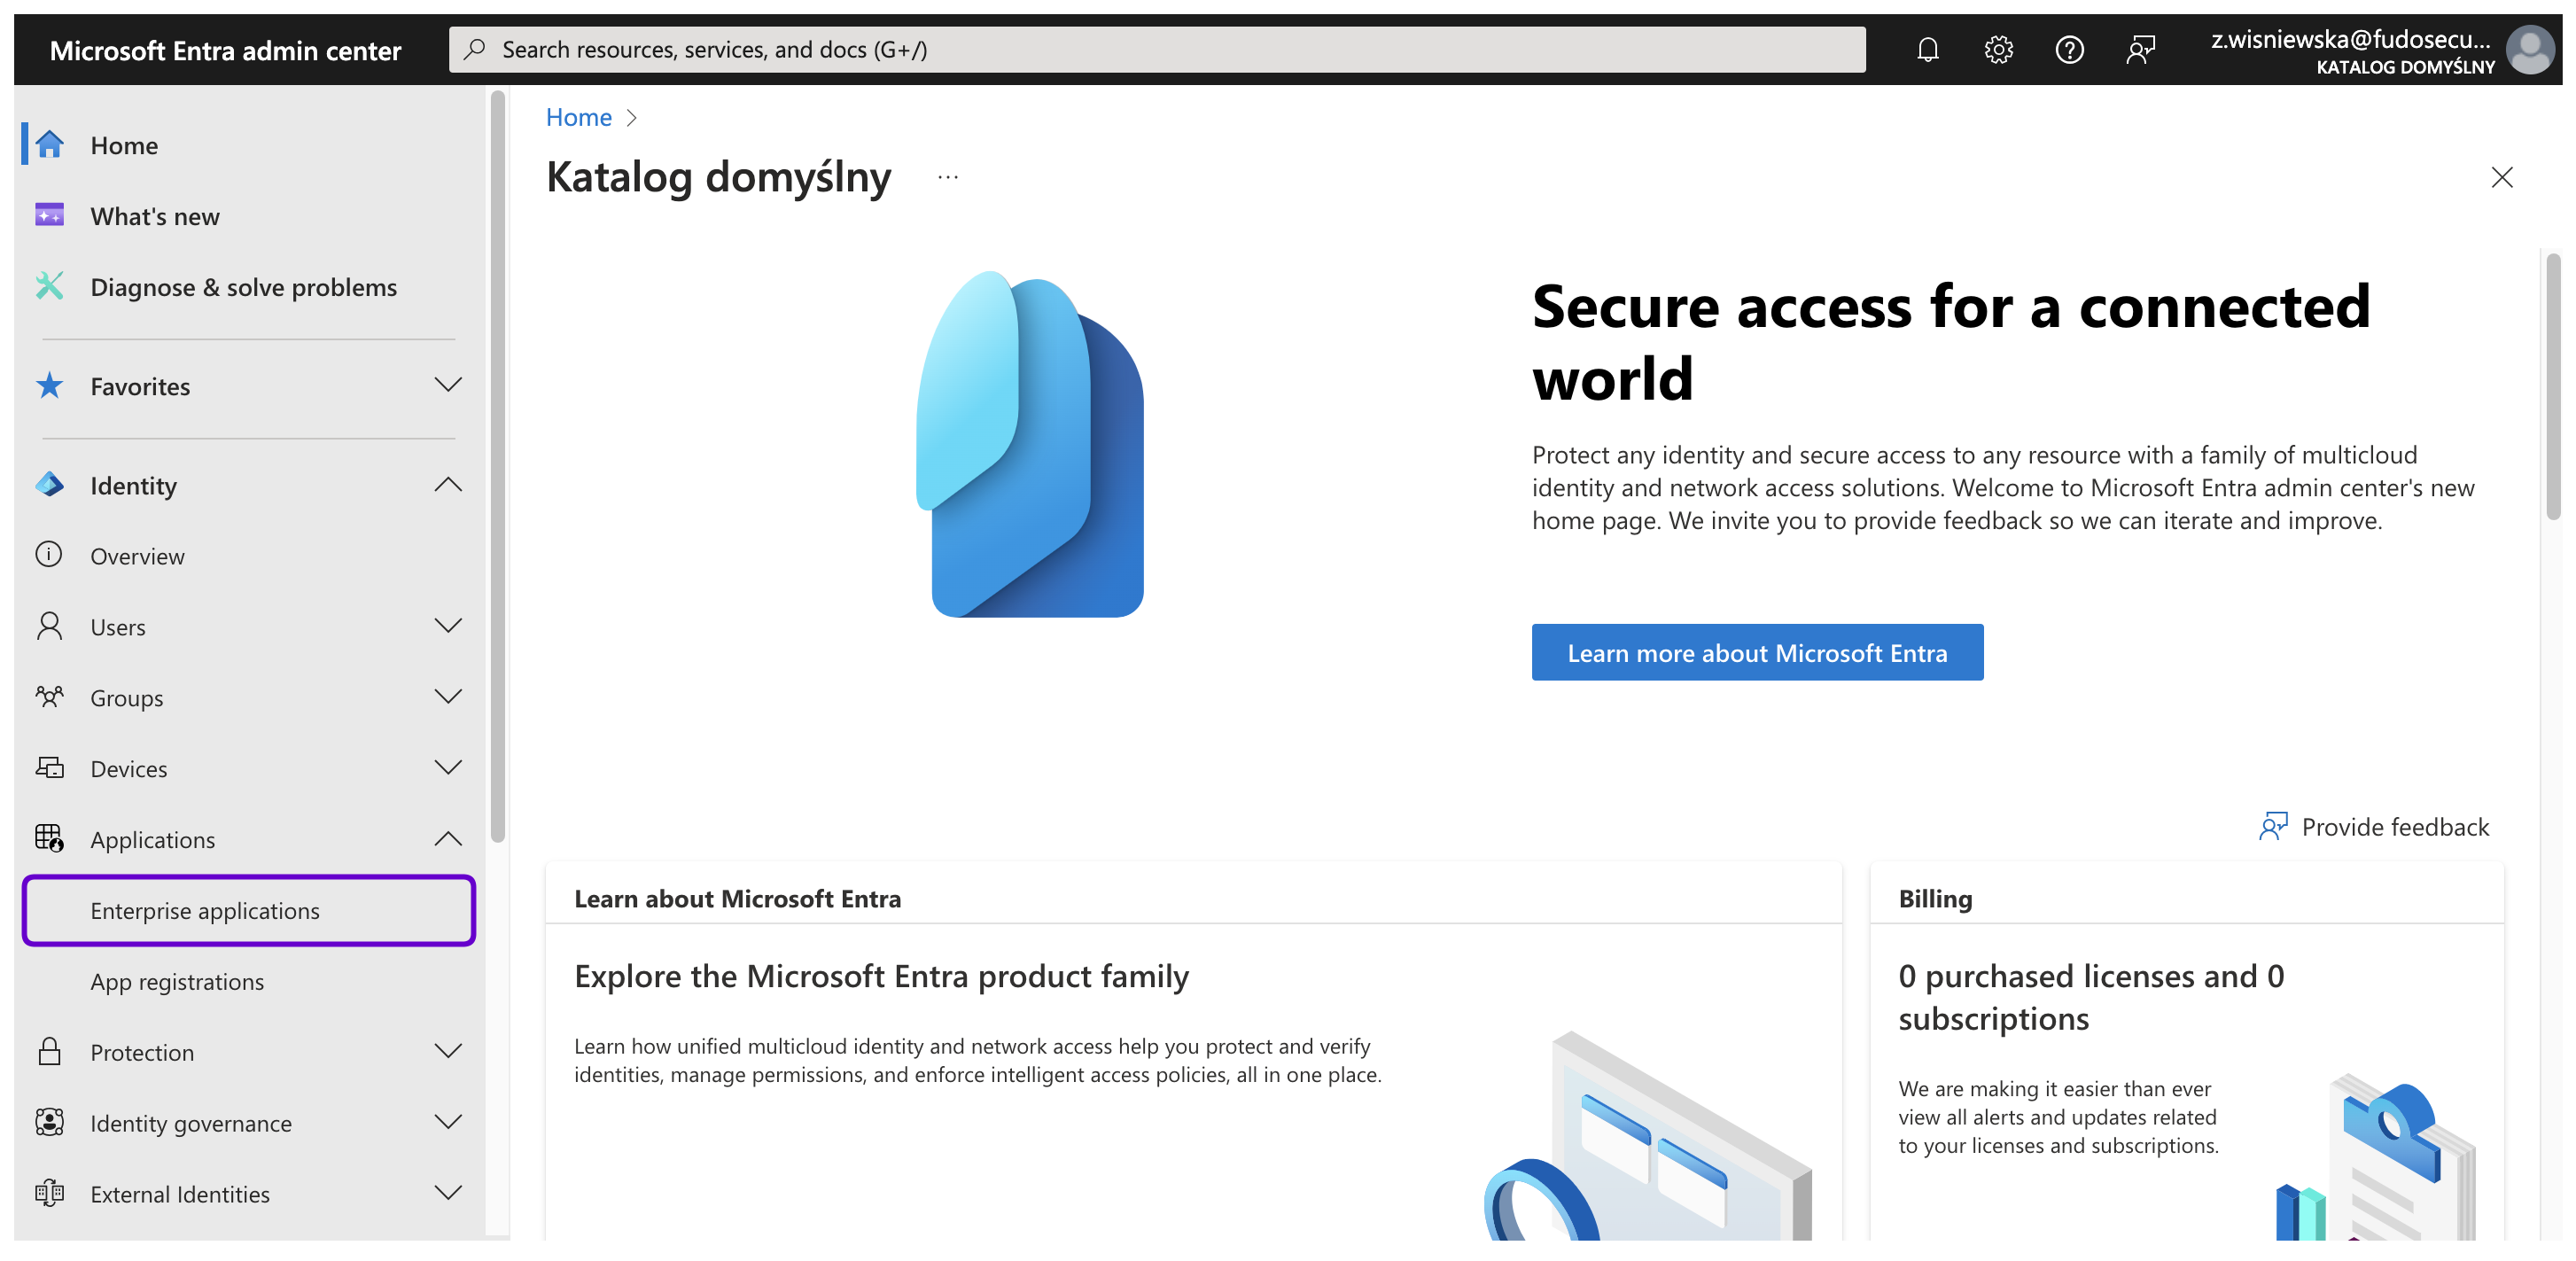
- Click the + New application button to create a new application.
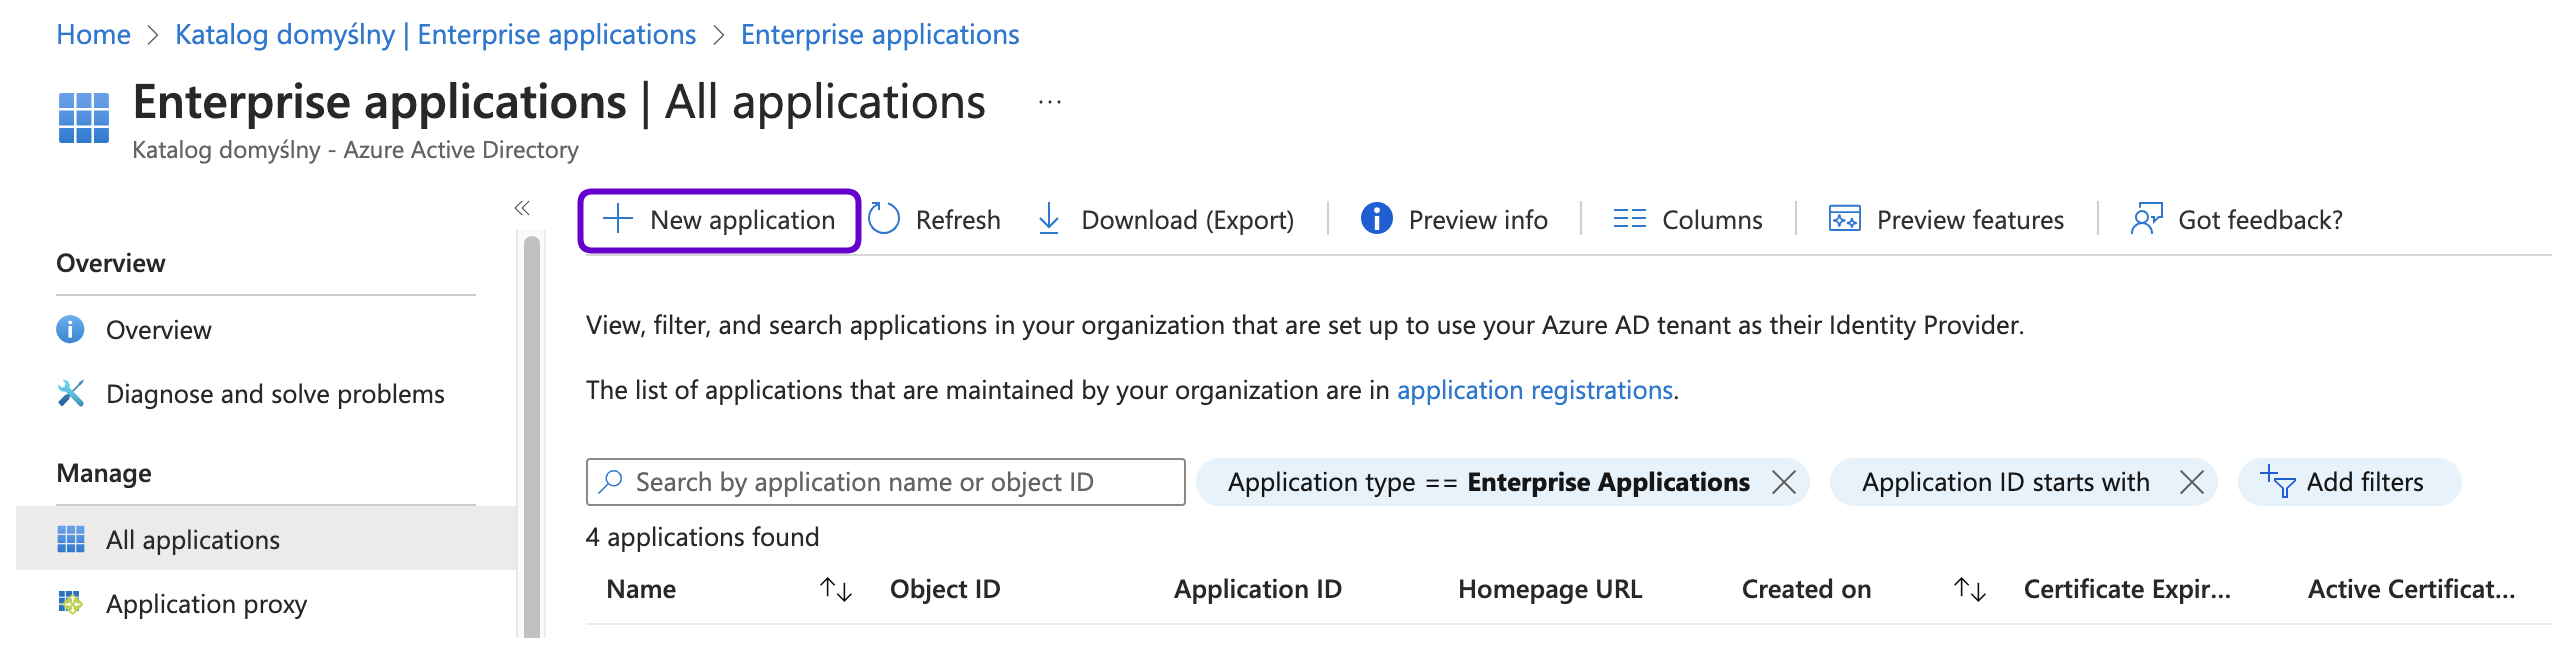
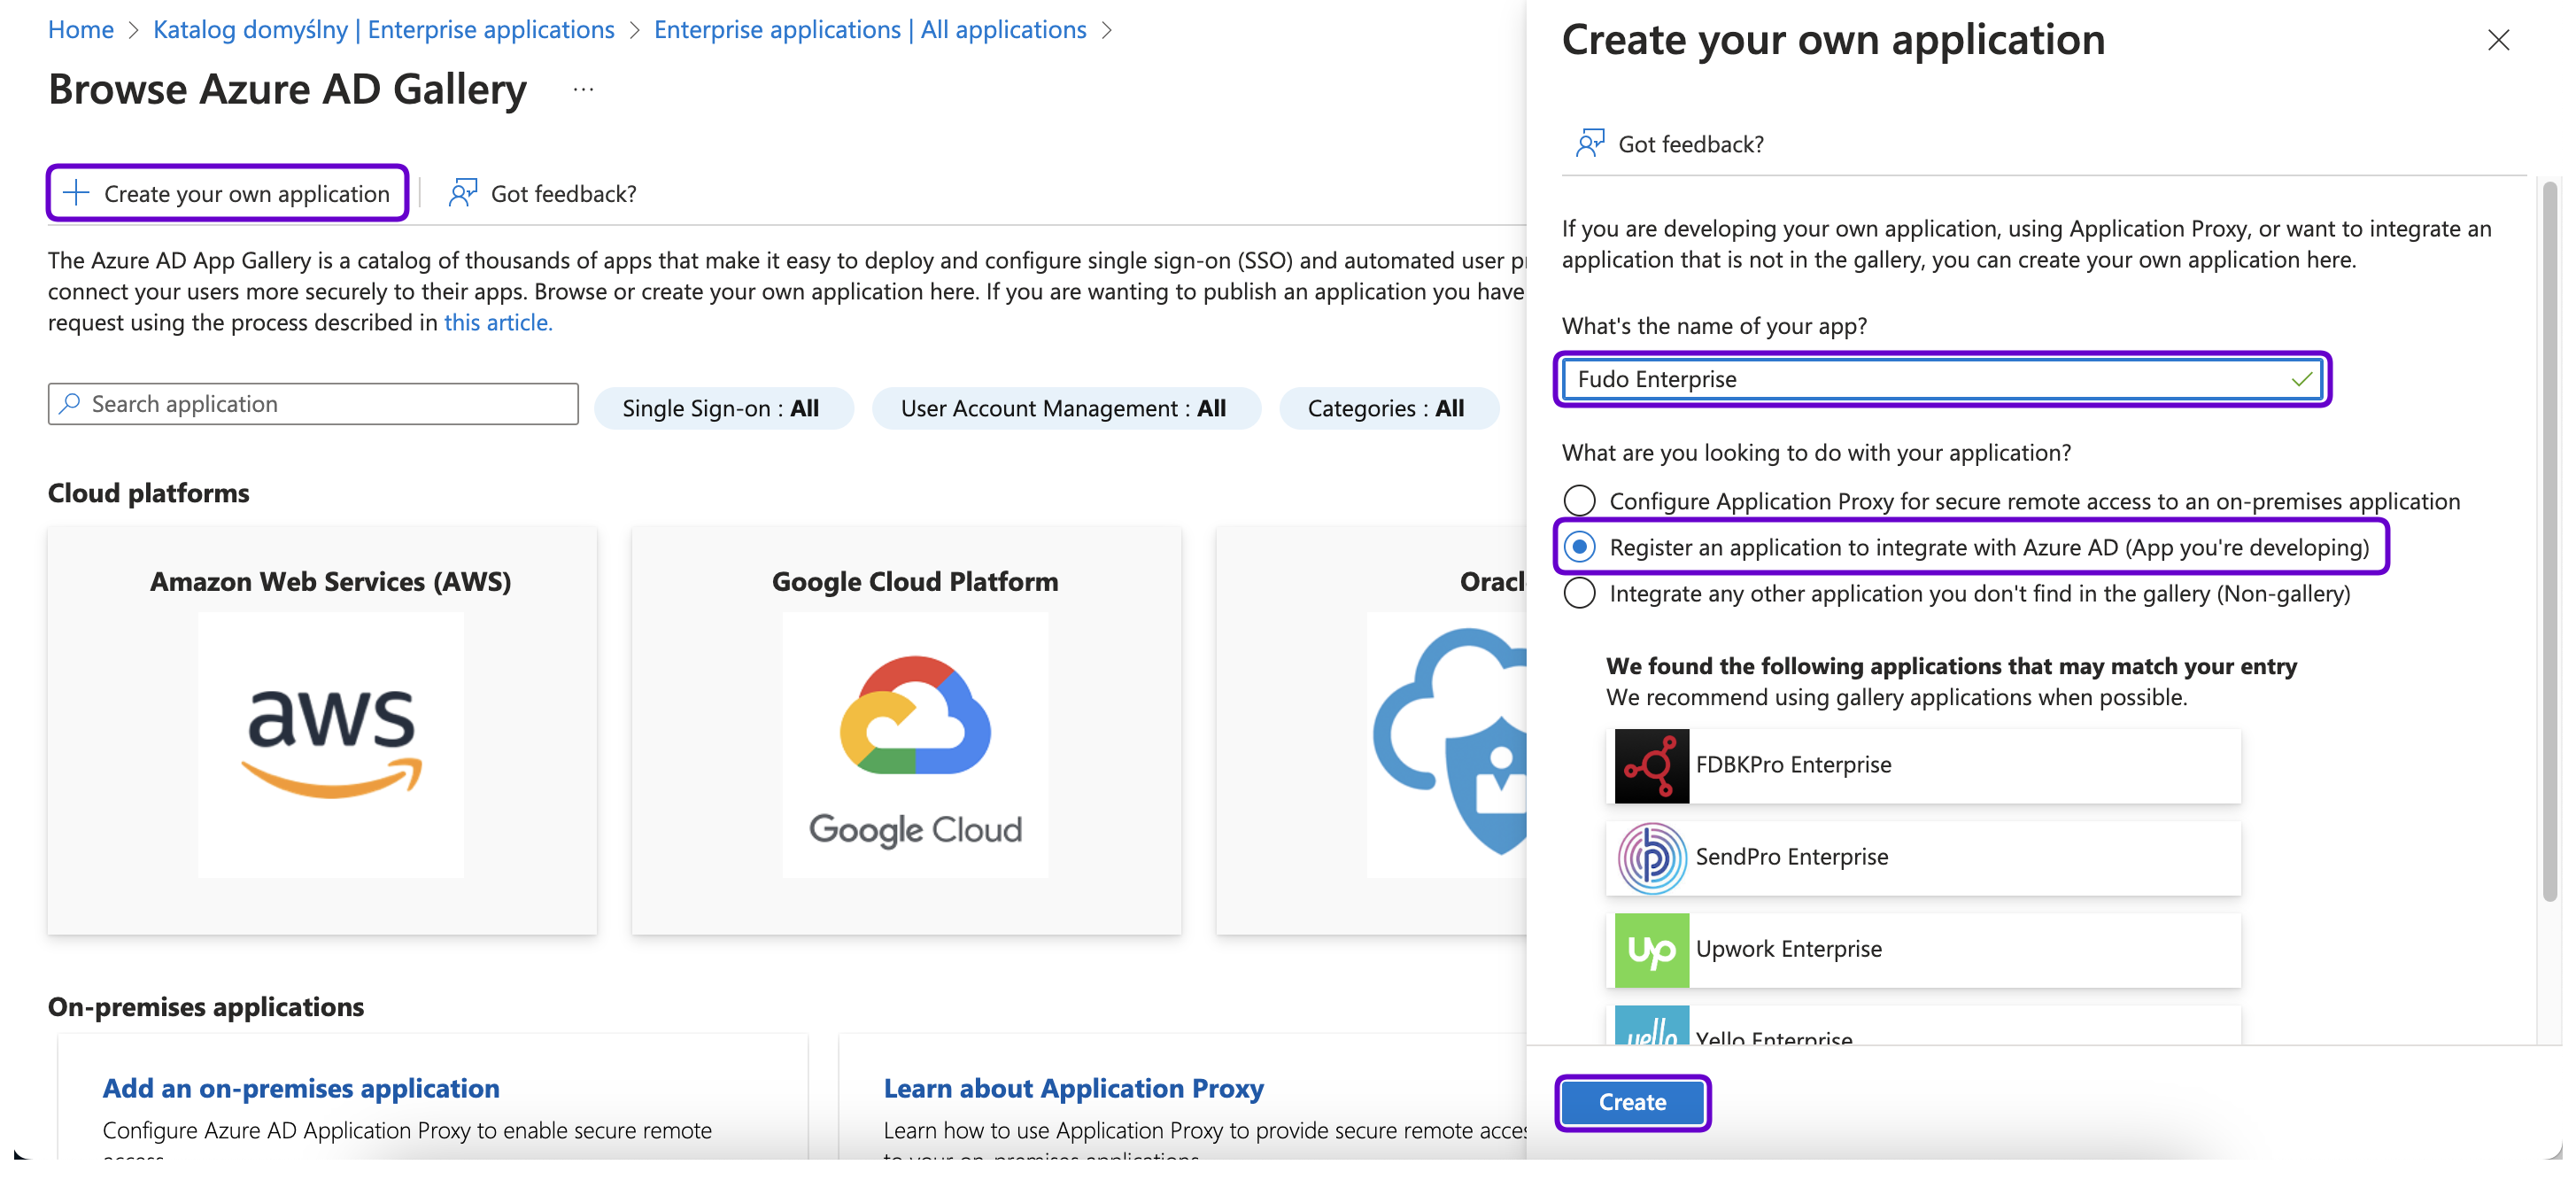
- Click the + Create your own application button.
- In the right-hand dialog box provide the name of your app and chose Register an application to integrate with Microsoft Entra ID (App you’re developing) option.
- Click Create.
- In the next page, under the Supported account types select the Accounts in this organizational directory only (This Directory only - Single tenant) option.
- Under the Redirect URI section select Web from the Select a platform drop-down list and provide the address of the Fudo Enterprise Access Gateway with the
/oidcsuffix. For example,https://10.0.58.239/oidcorhttps://fudo.example.com/oidc.Note
You can find the Access Gateway address under the > menu in the Fudo Enterprise. For more information, please follow the Network settings section.
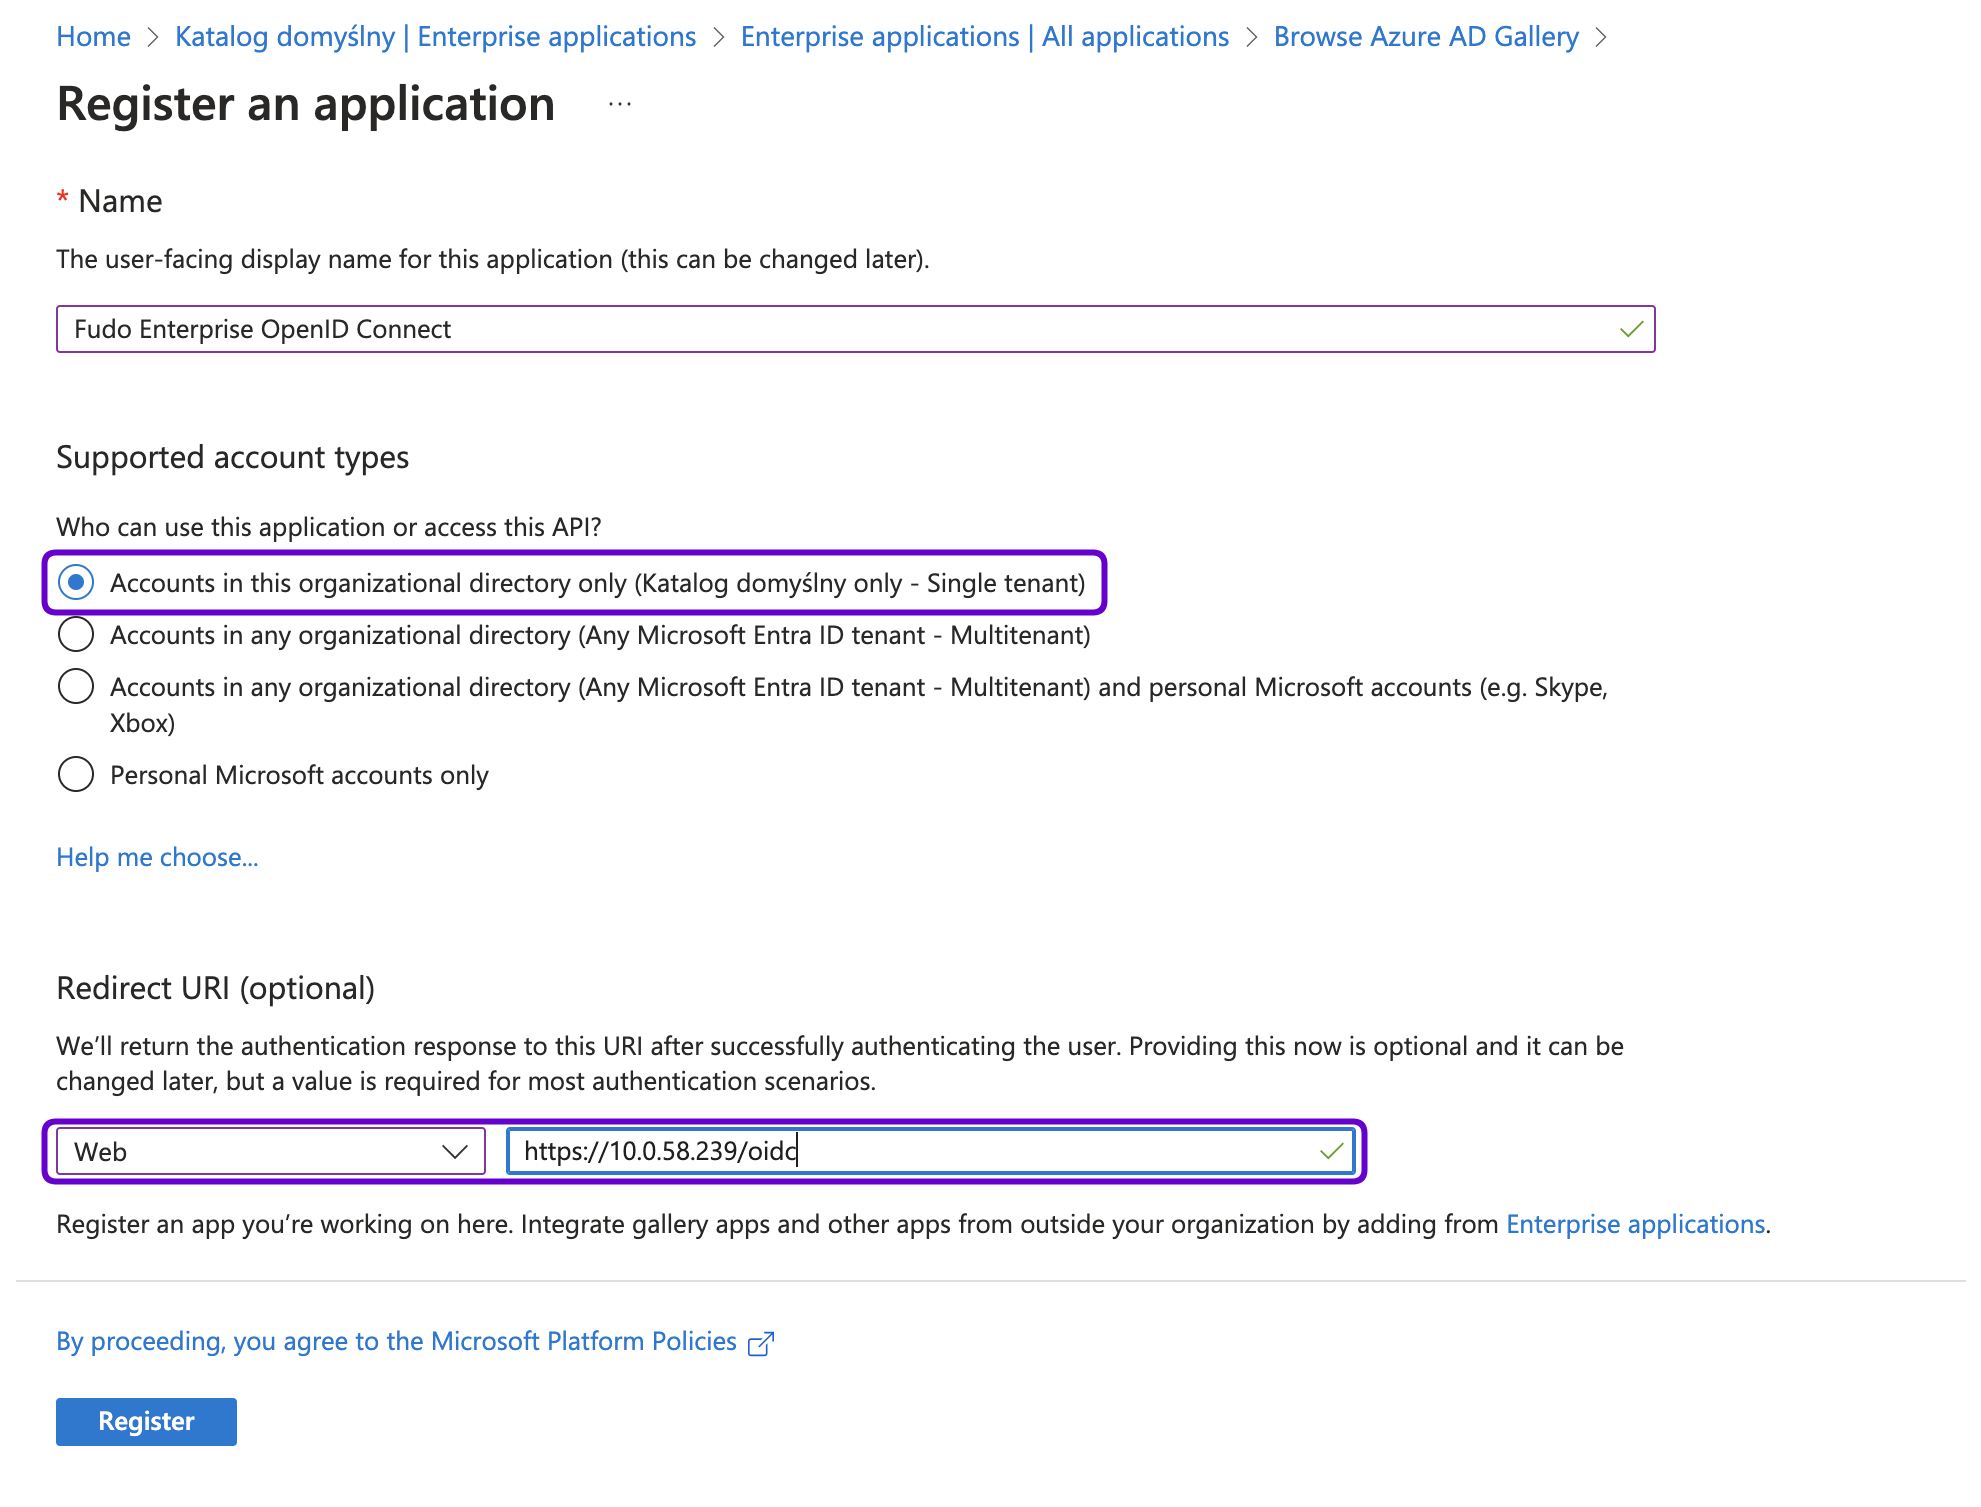
- Click Register to create the application.
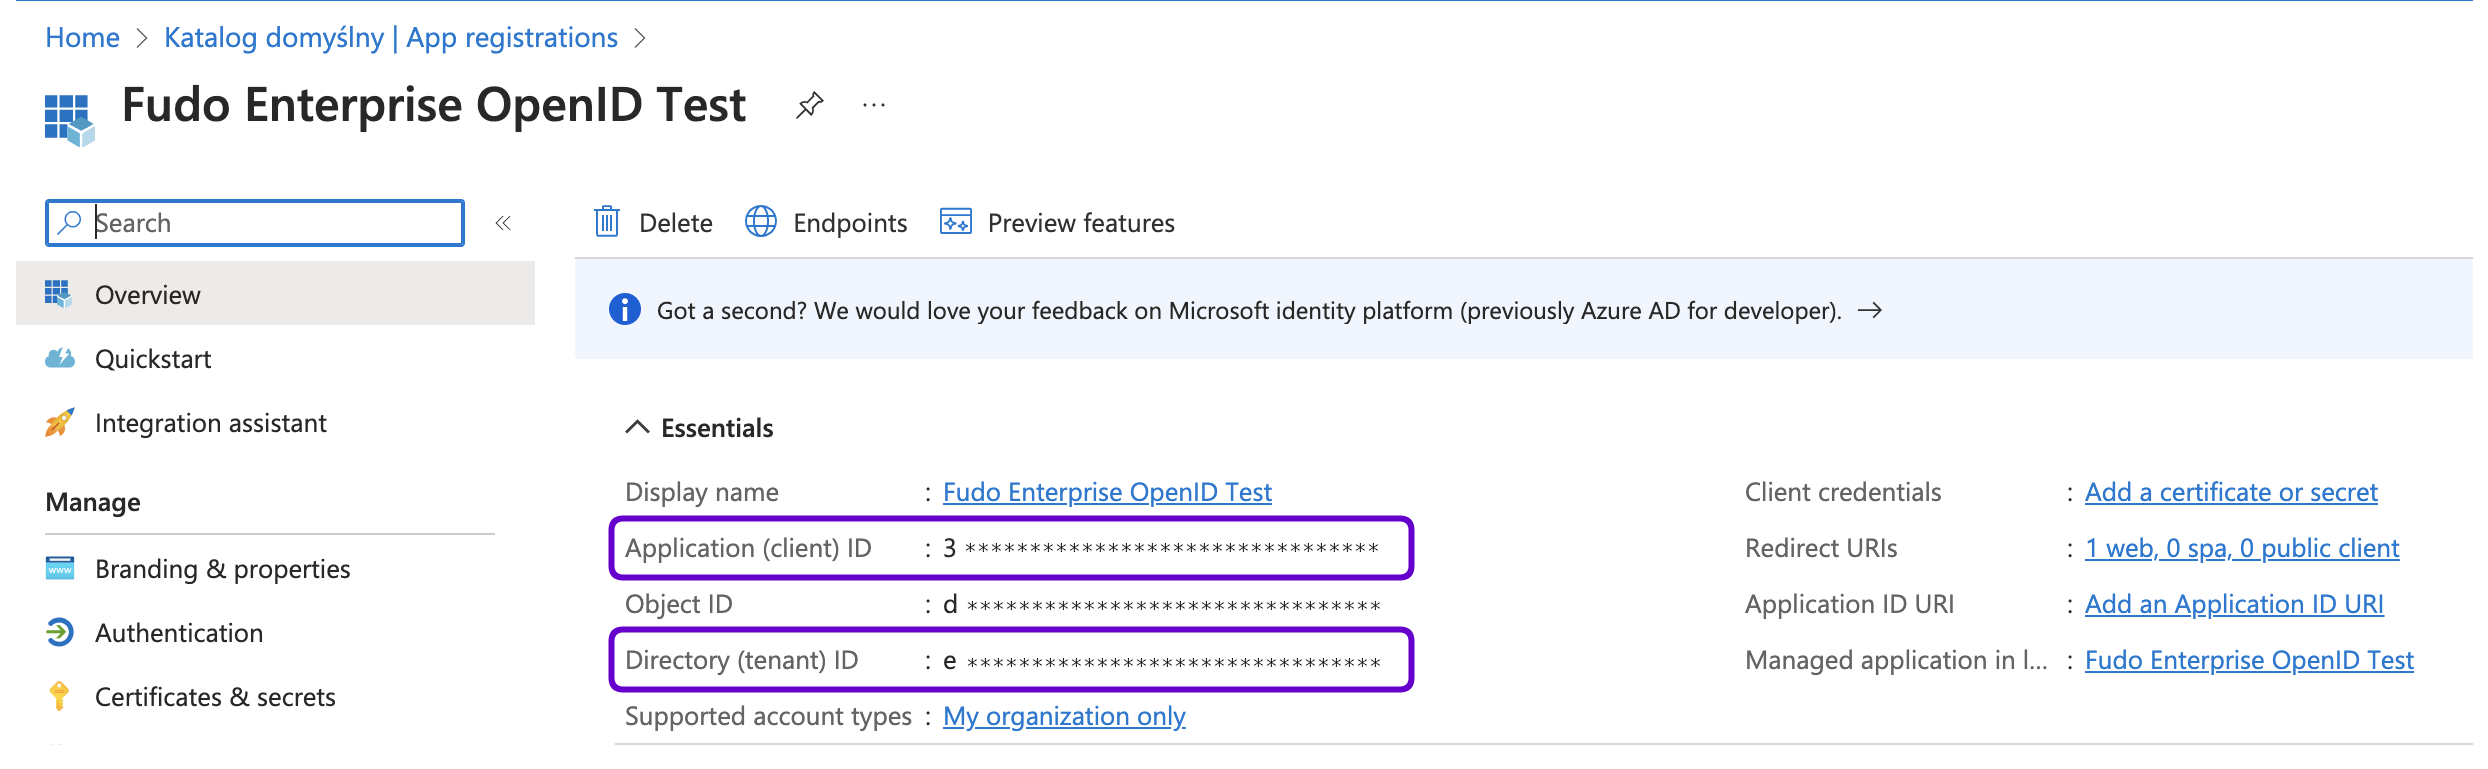
- In the left-hand menu, select Identity > Applications > App registrations.
- Change to All applications tab and find created application on the applications list.
- Click on it’s name to edit the parameters. Note down the Application (client) ID and Directory (tenant) ID as you will need these later.
Configure Authentication Setting
- In the left-hand menu, select Identity > Applications > App registrations.
- Find created application on the applications list and click on it’s name to edit the parameters.
- Under the Manage section, click on Authentication.
- In the Web platform created for Fudo Enterprise add the Redirect URI(s) following to the Admin Panel with the
/oidcsuffix. For example,https://10.0.58.238/oidcorhttps://fudo.example.com/oidc.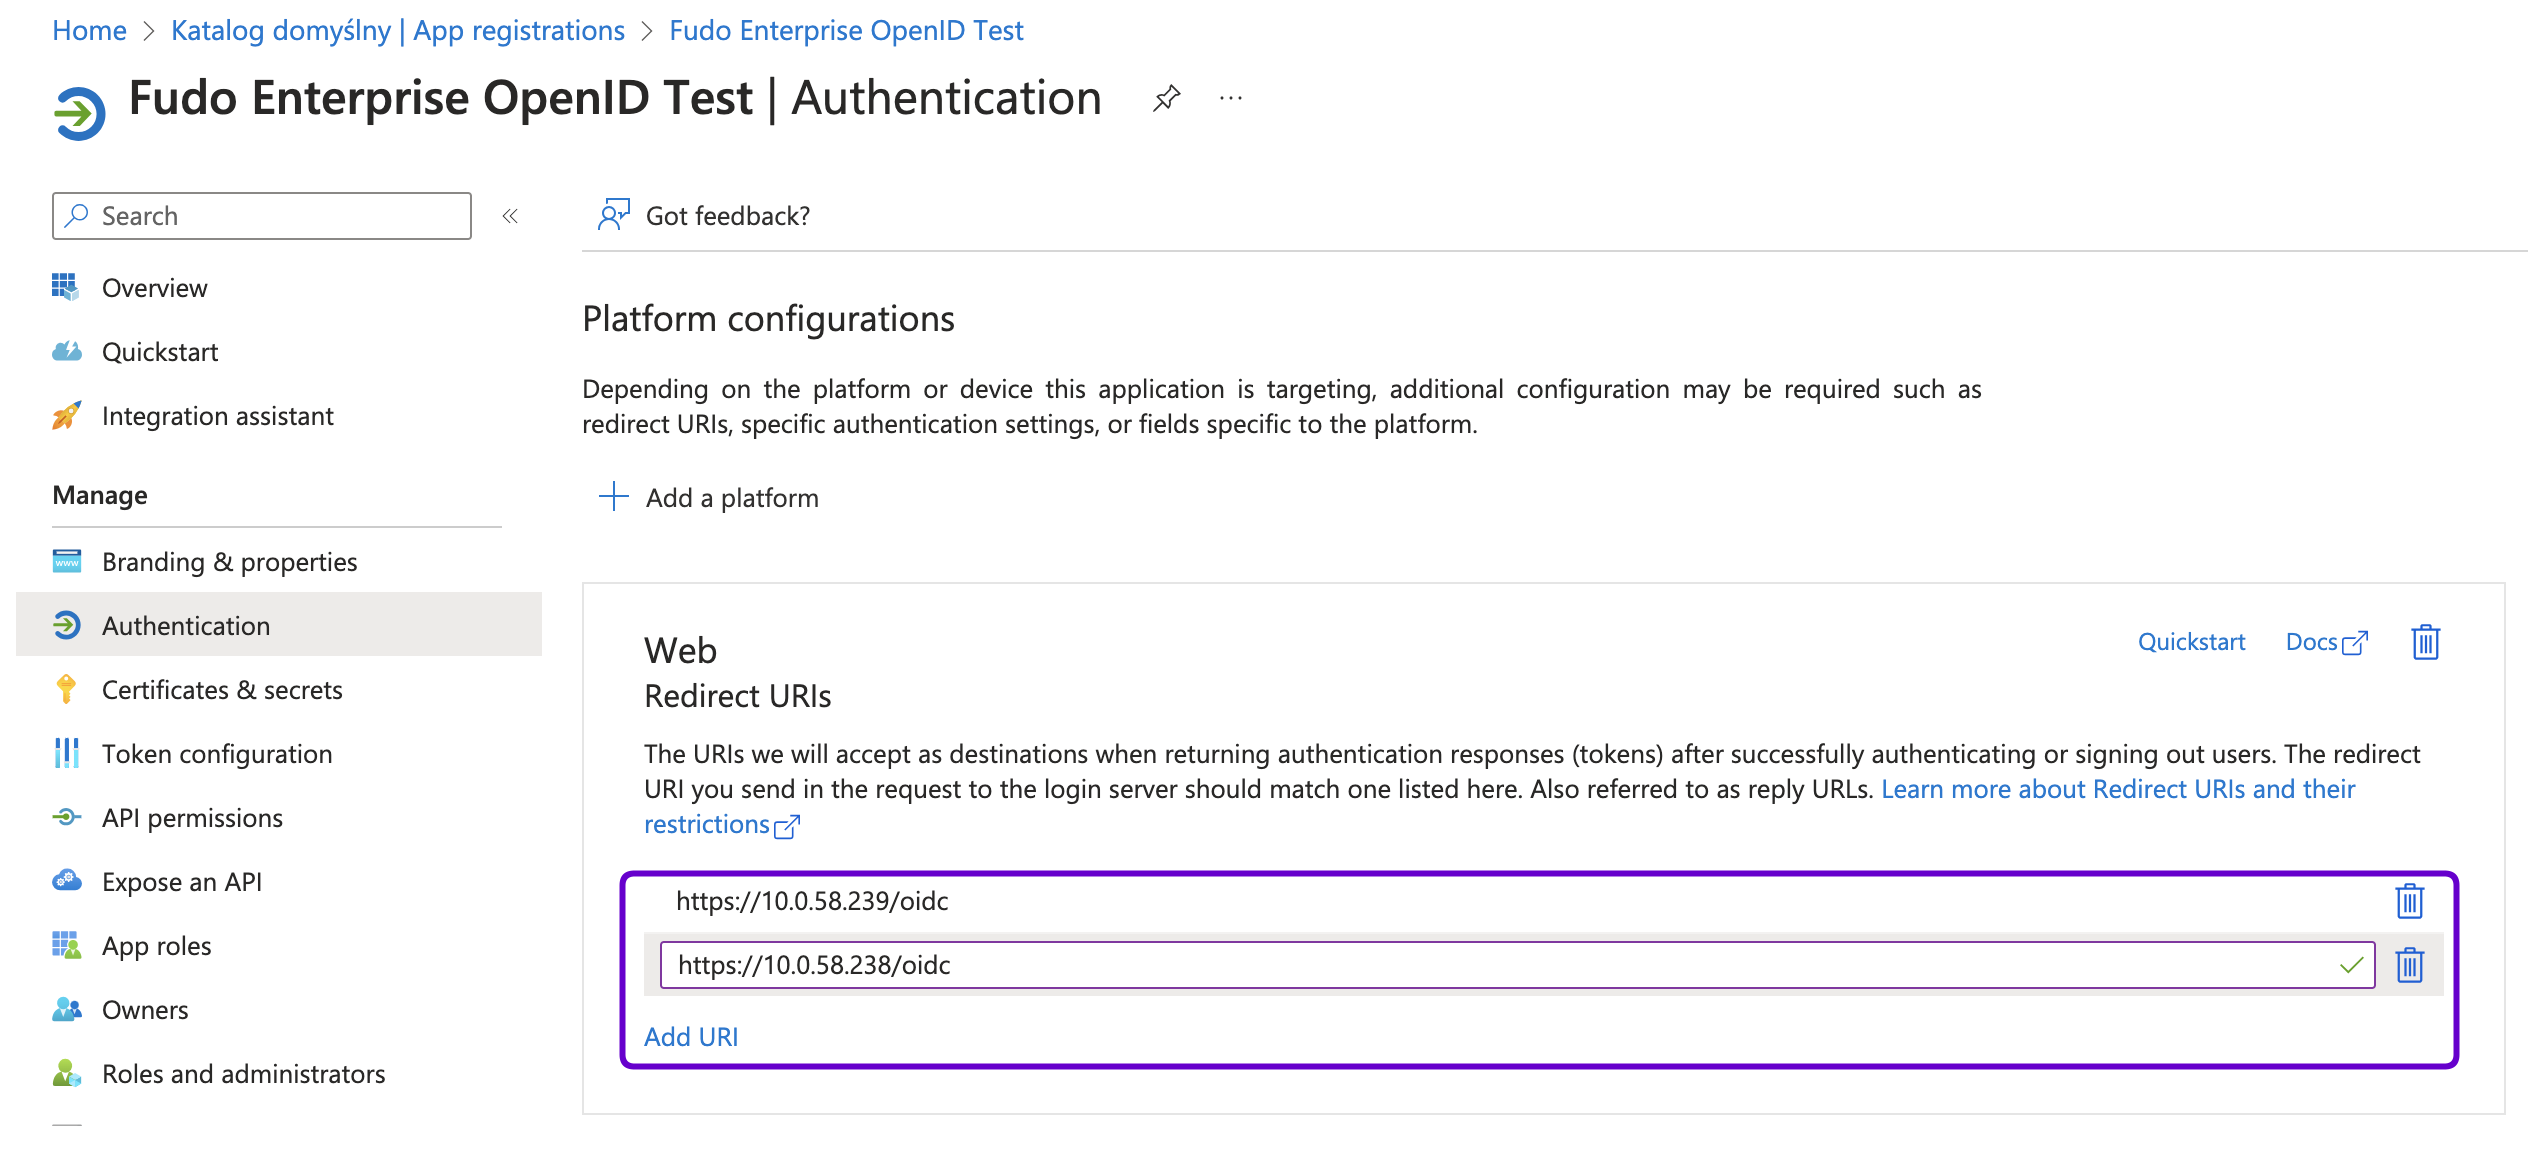
- In the Implicit grant and hybrid flows section, check ID tokens and Access tokens options.

- In the App instance property lock section, click Configure and uncheck the Enable property lock option in the right-hand dialog box. Click Save to close the dialog box.
- Click Save to save your authentication settings.
Generate Client Secret
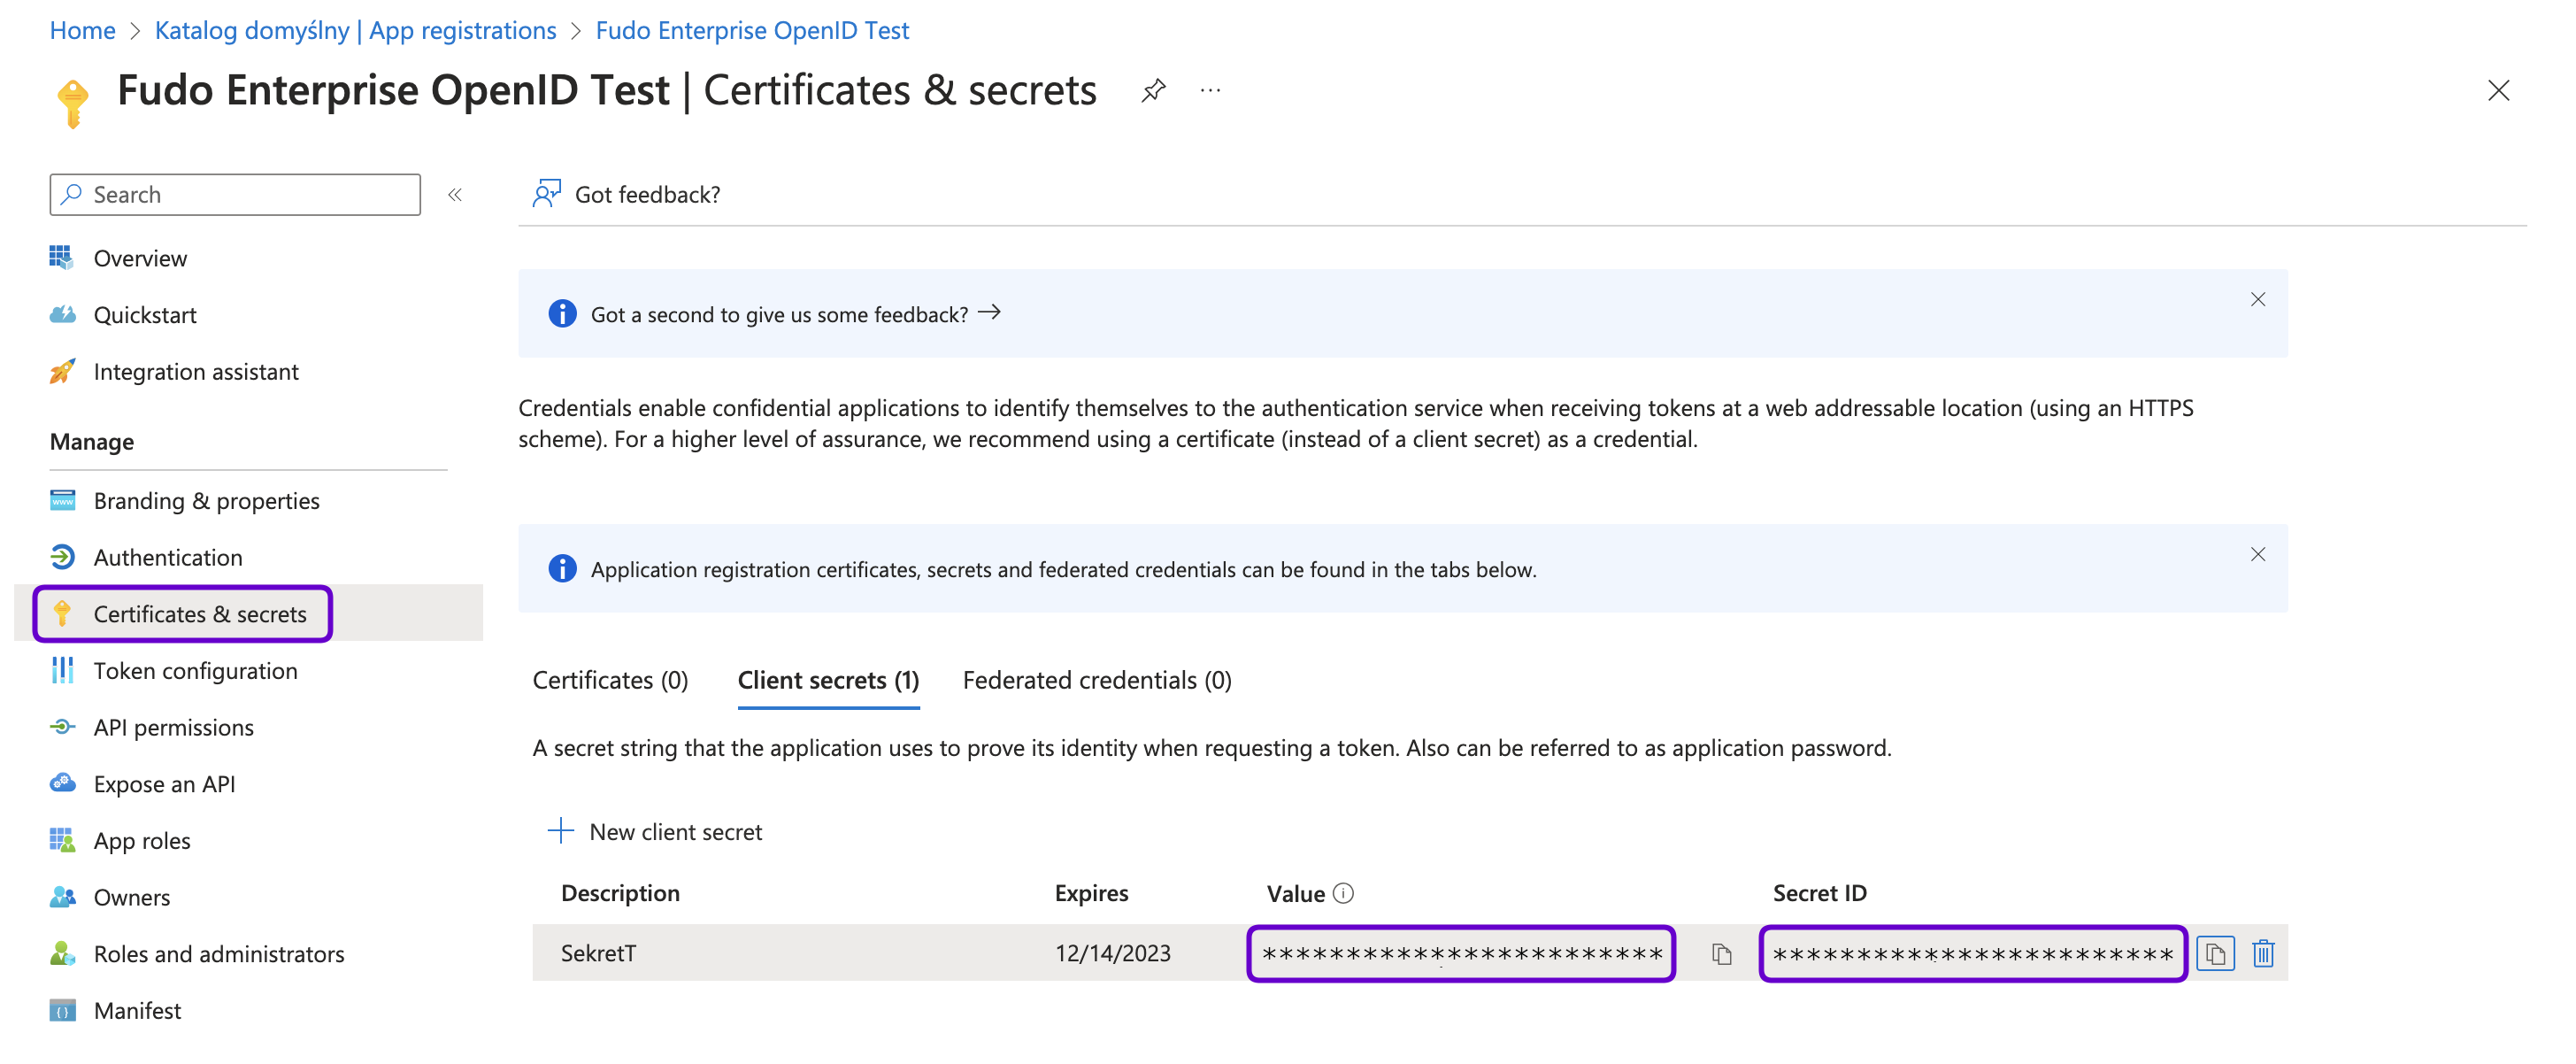
- In your application’s settings, navigate to the Certificates & secrets section.
- Under the Client secrets section, click + New client secret.
- Provide a description, select the desired expiration period, and click Add.
Warning
Note down the generated Secret ID and Value as you will need it for Fudo Enterprise configuration. Once saved, the secret value will no longer be visible.
Get OpenID Connect Configuration URL
- In your application’s settings, navigate to the Overview section.
- Open the Endpoints tab, and look for the OpenID Connect metadata document URL. This is your OpenID Connect Configuration URL. Copy it as you’ll need it for Fudo Enterprise configuration.

Configure OpenID Connect authentication method in Fudo
- Go to your Fudo Enterprise Admin Panel.
- Select > .
- Choose OpenID Connect tab.
- Click .
- Check the Enabled option to globally enable OpenID Connect authentication.
- Provide Name (Entra ID or any other Identity Provider).
- Set the Bind address to Any.
- Input the Configuration URL (the OpenID Connect metadata document URL from Microsoft Entra).
- Provide the Client ID (the Secret ID from Microsoft Entra).
- Provide the Client secret (the certificate Value from Microsoft Entra).
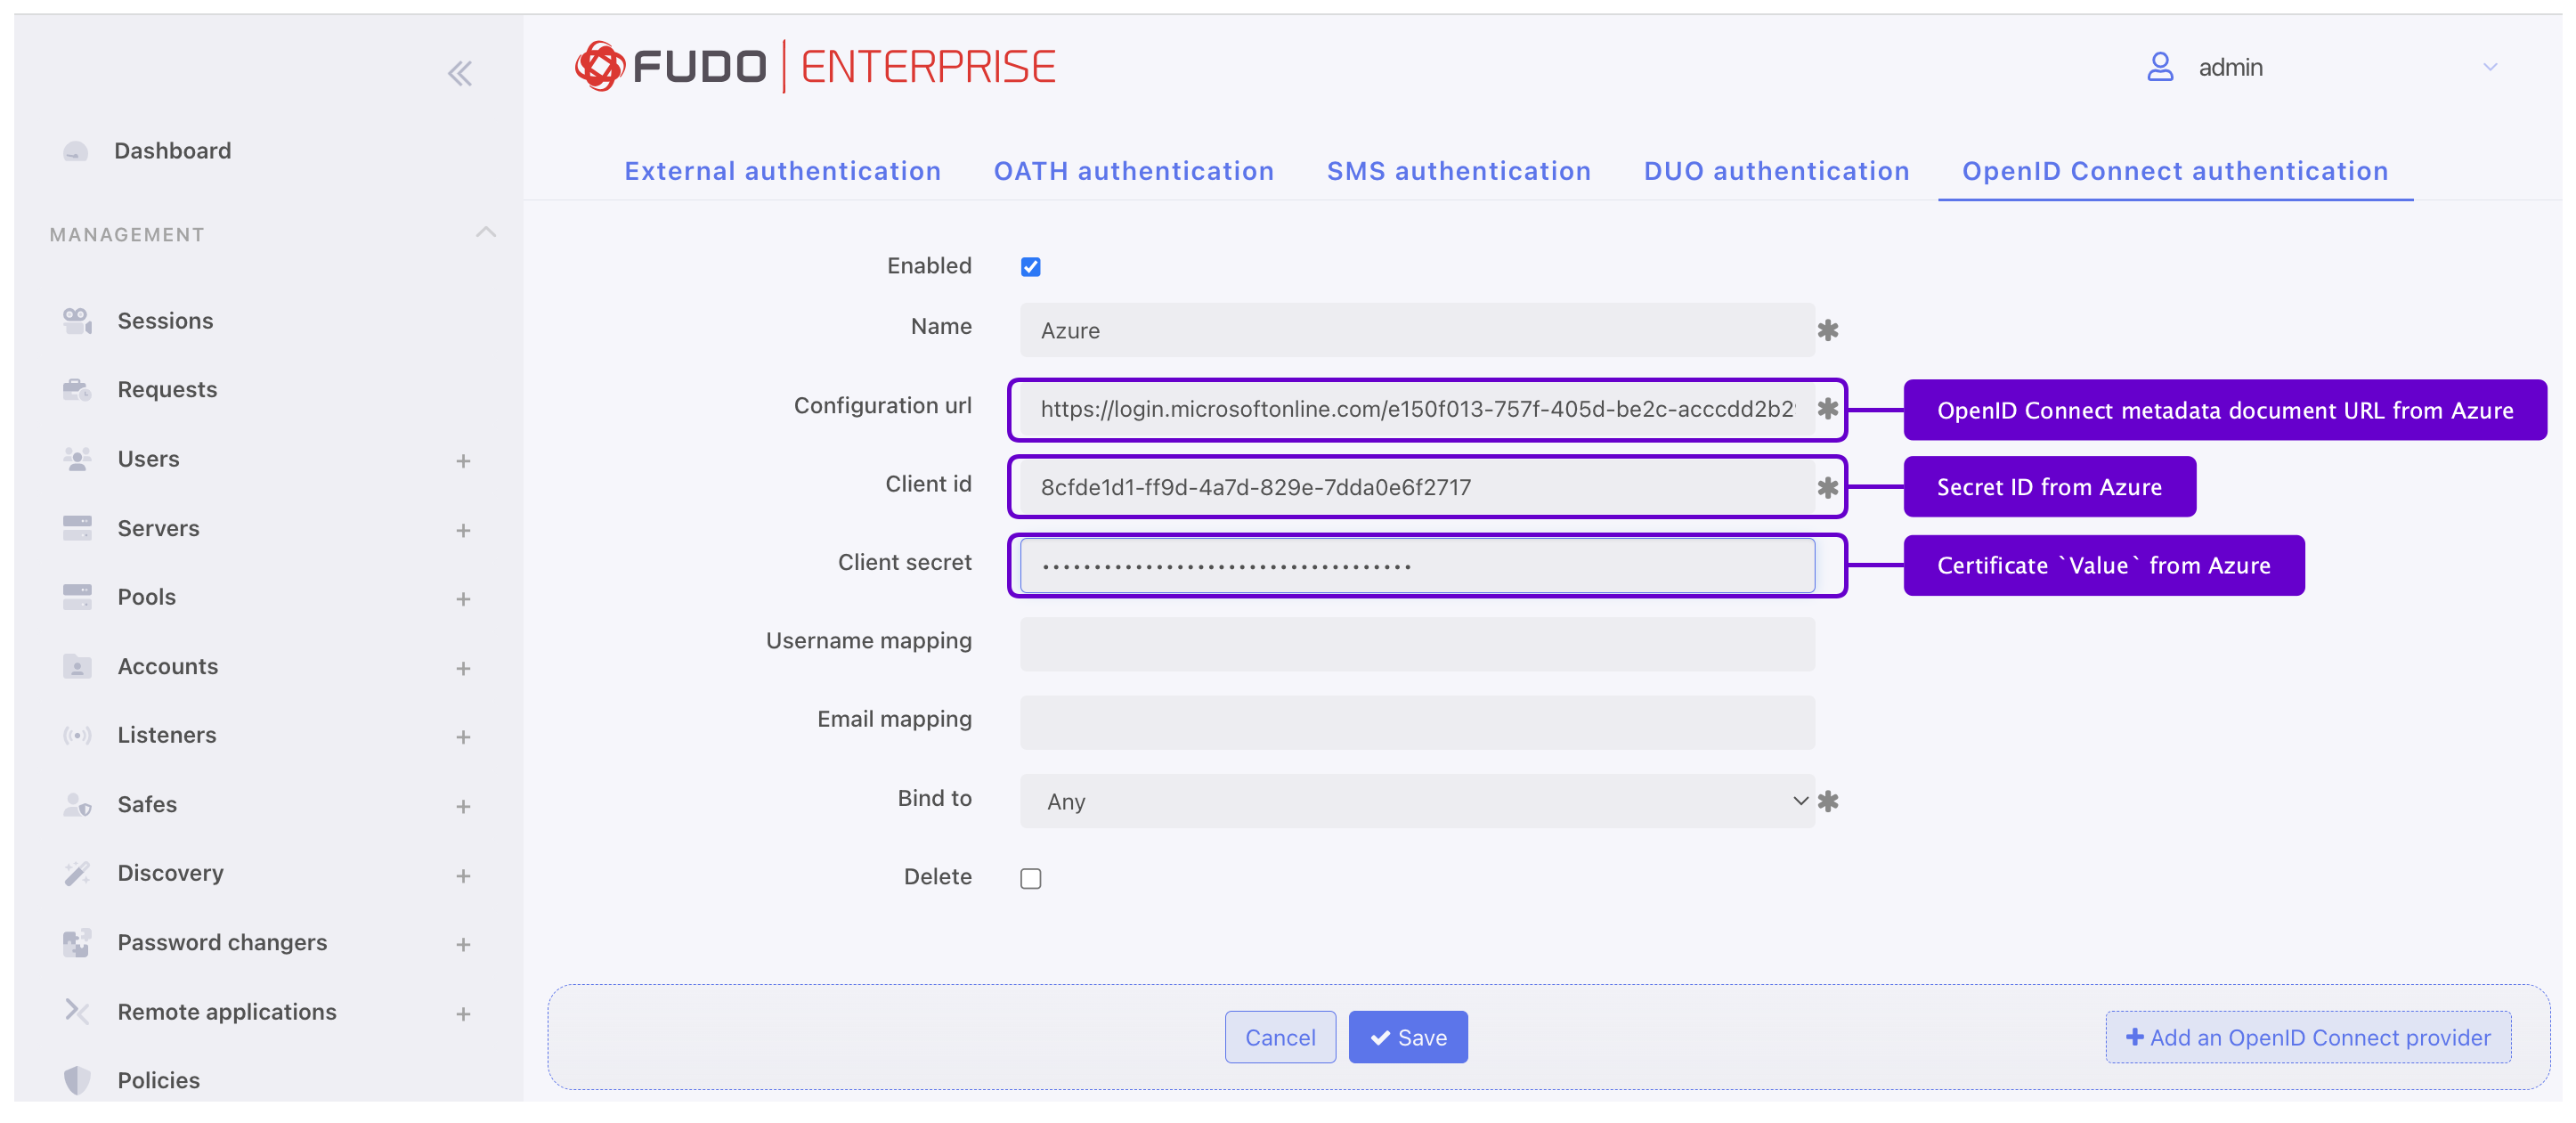
- Add Username mapping and Email mapping (optional). Those fields are useful when user’s name has different naming convention.
- Click .
Note
To learn more about the algorithm used to determine the user’s identity, visit OpenID Connect authentication definition section.
Create new user in Fudo
- Select > and then click .
- Enter user name.
- In the User Data tab, under the User info section, in the Email field enter the email address used during user creation in Microsoft Entra - in this case
user1@fudosecurity.com.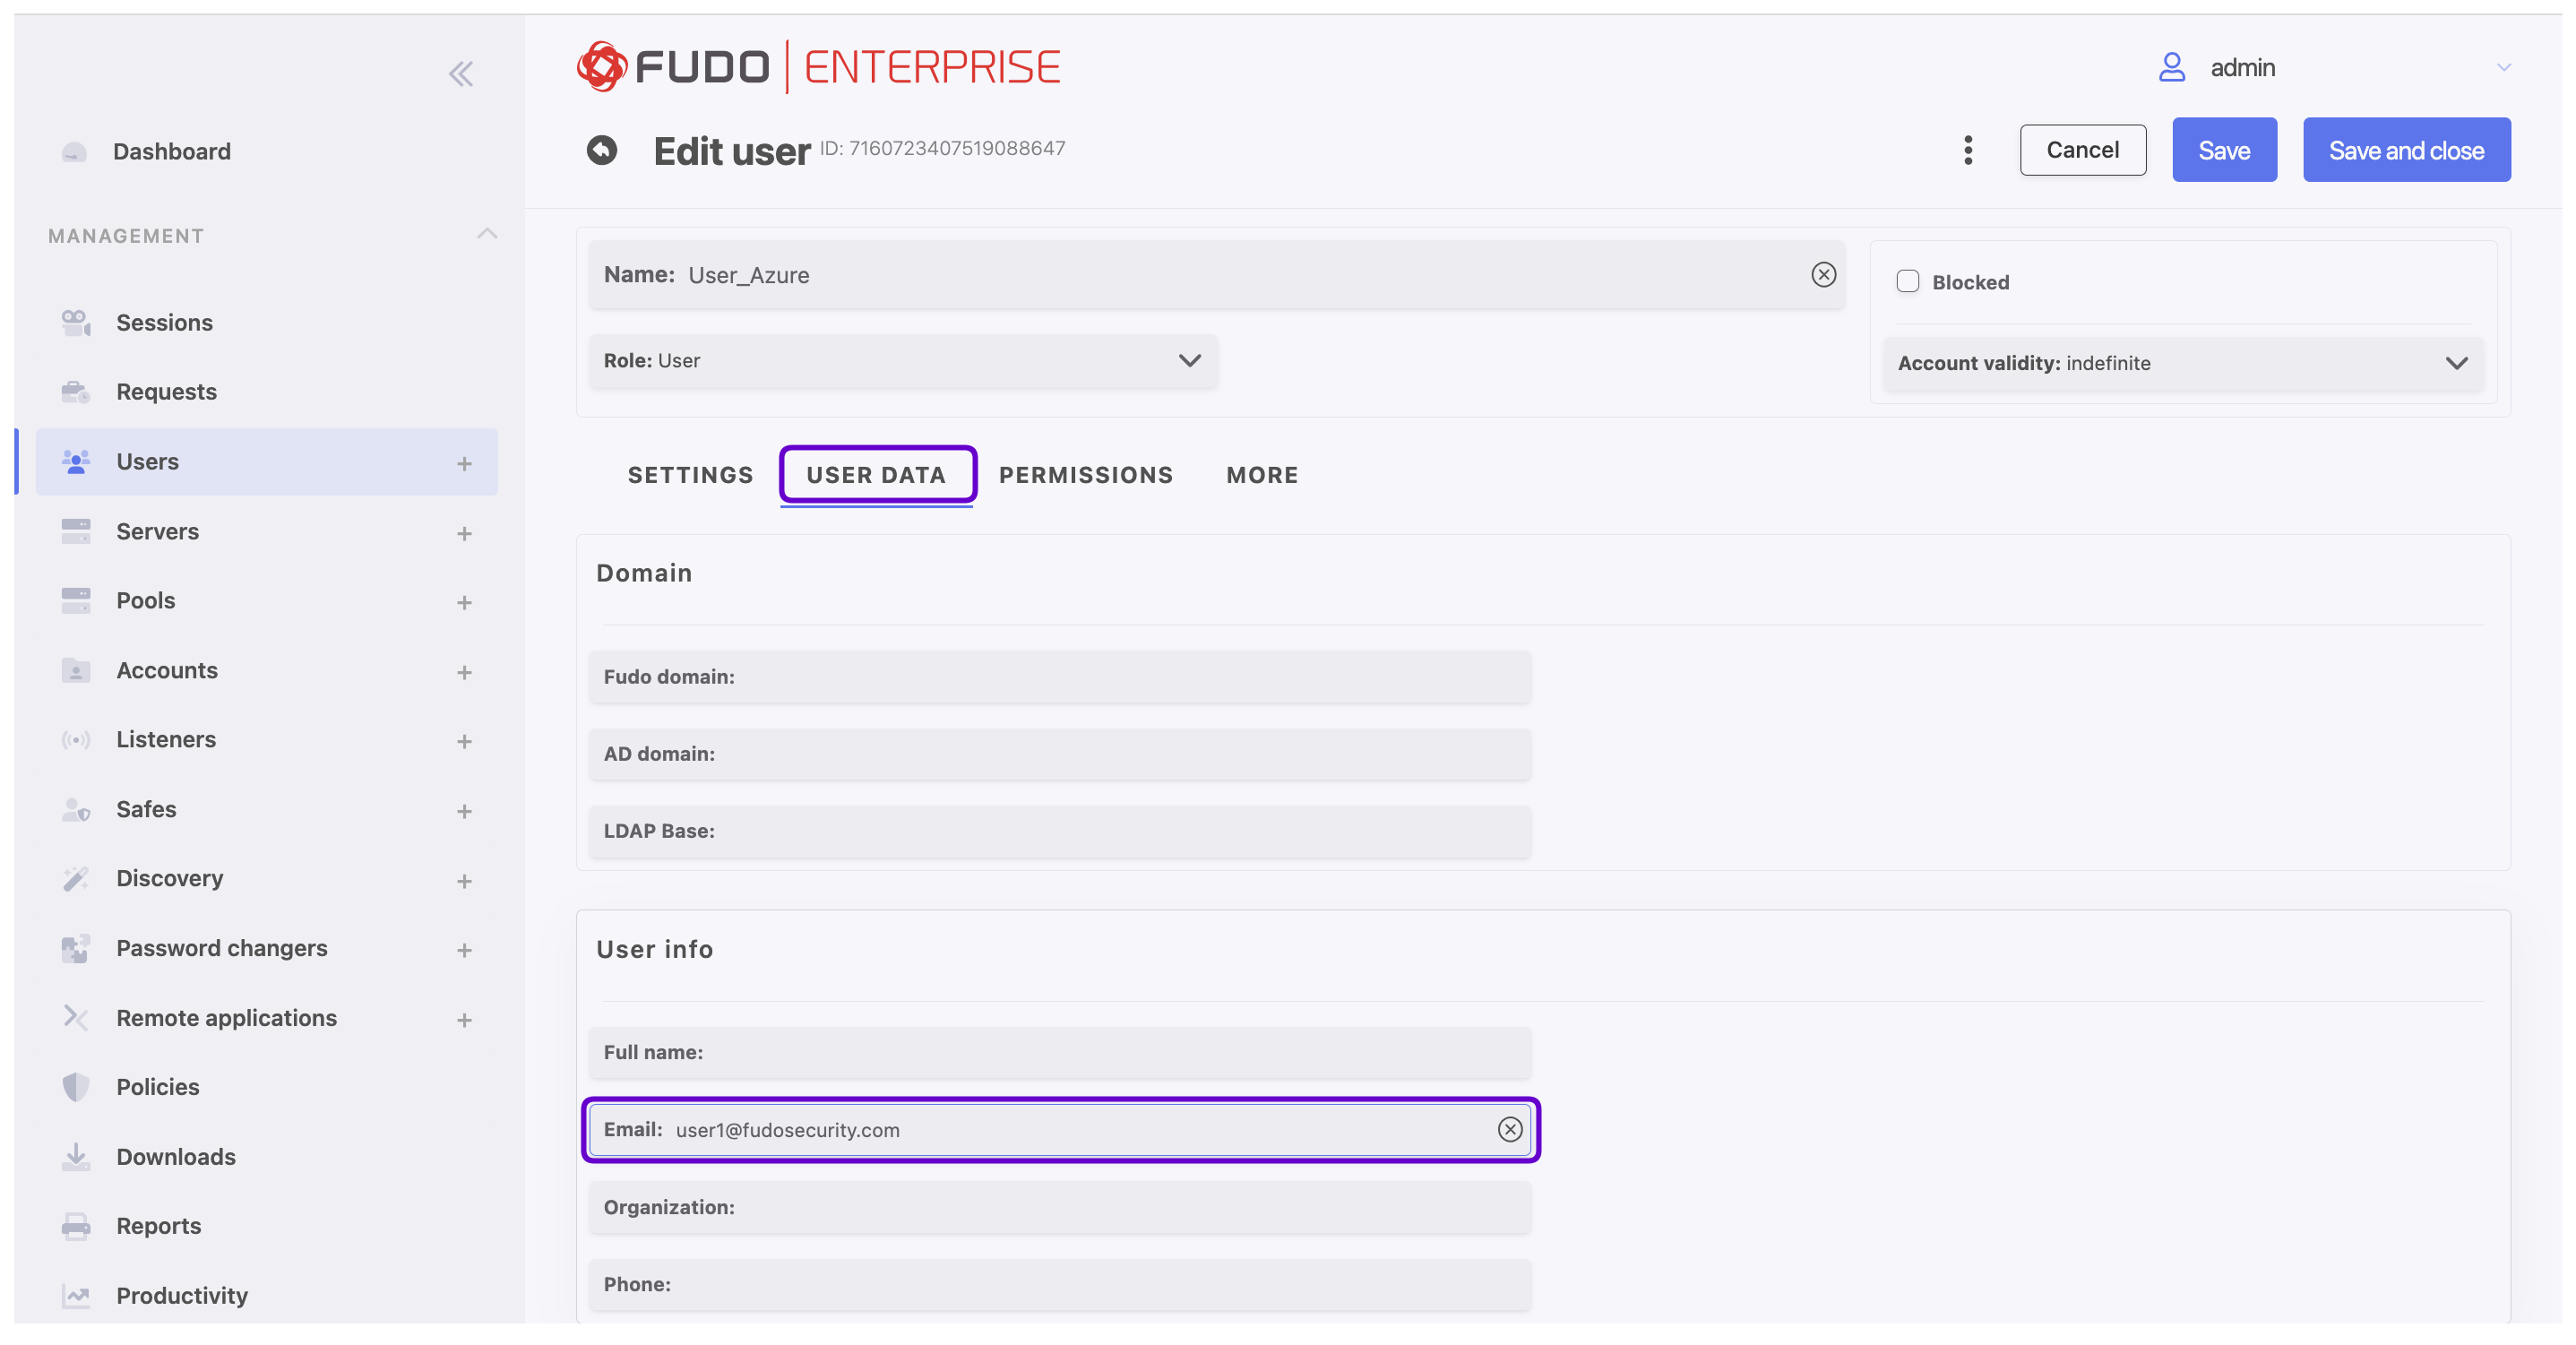
- Fill in the rest of the parameters according to your needs.
- Click .
Note
This address is utilized to associate Fudo Enterprise users with their corresponding accounts created in Microsoft Entra. Ensure that there is no duplication of email addresses among users.
Testing
You can now test the OpenID Connect authentication by attempting to log in to Fudo Enterprise. Click on created Microsoft Entra authentication method button under the default Login button.

Related topics: