Timestamping selected sessions
Note
To timestamp sessions, first you have to enable and configure the timestamping feature. Go to > and follow the instructions in the Trusted time-stamping section.
To timestamp selected sessions, proceed as follows.
- Select > .
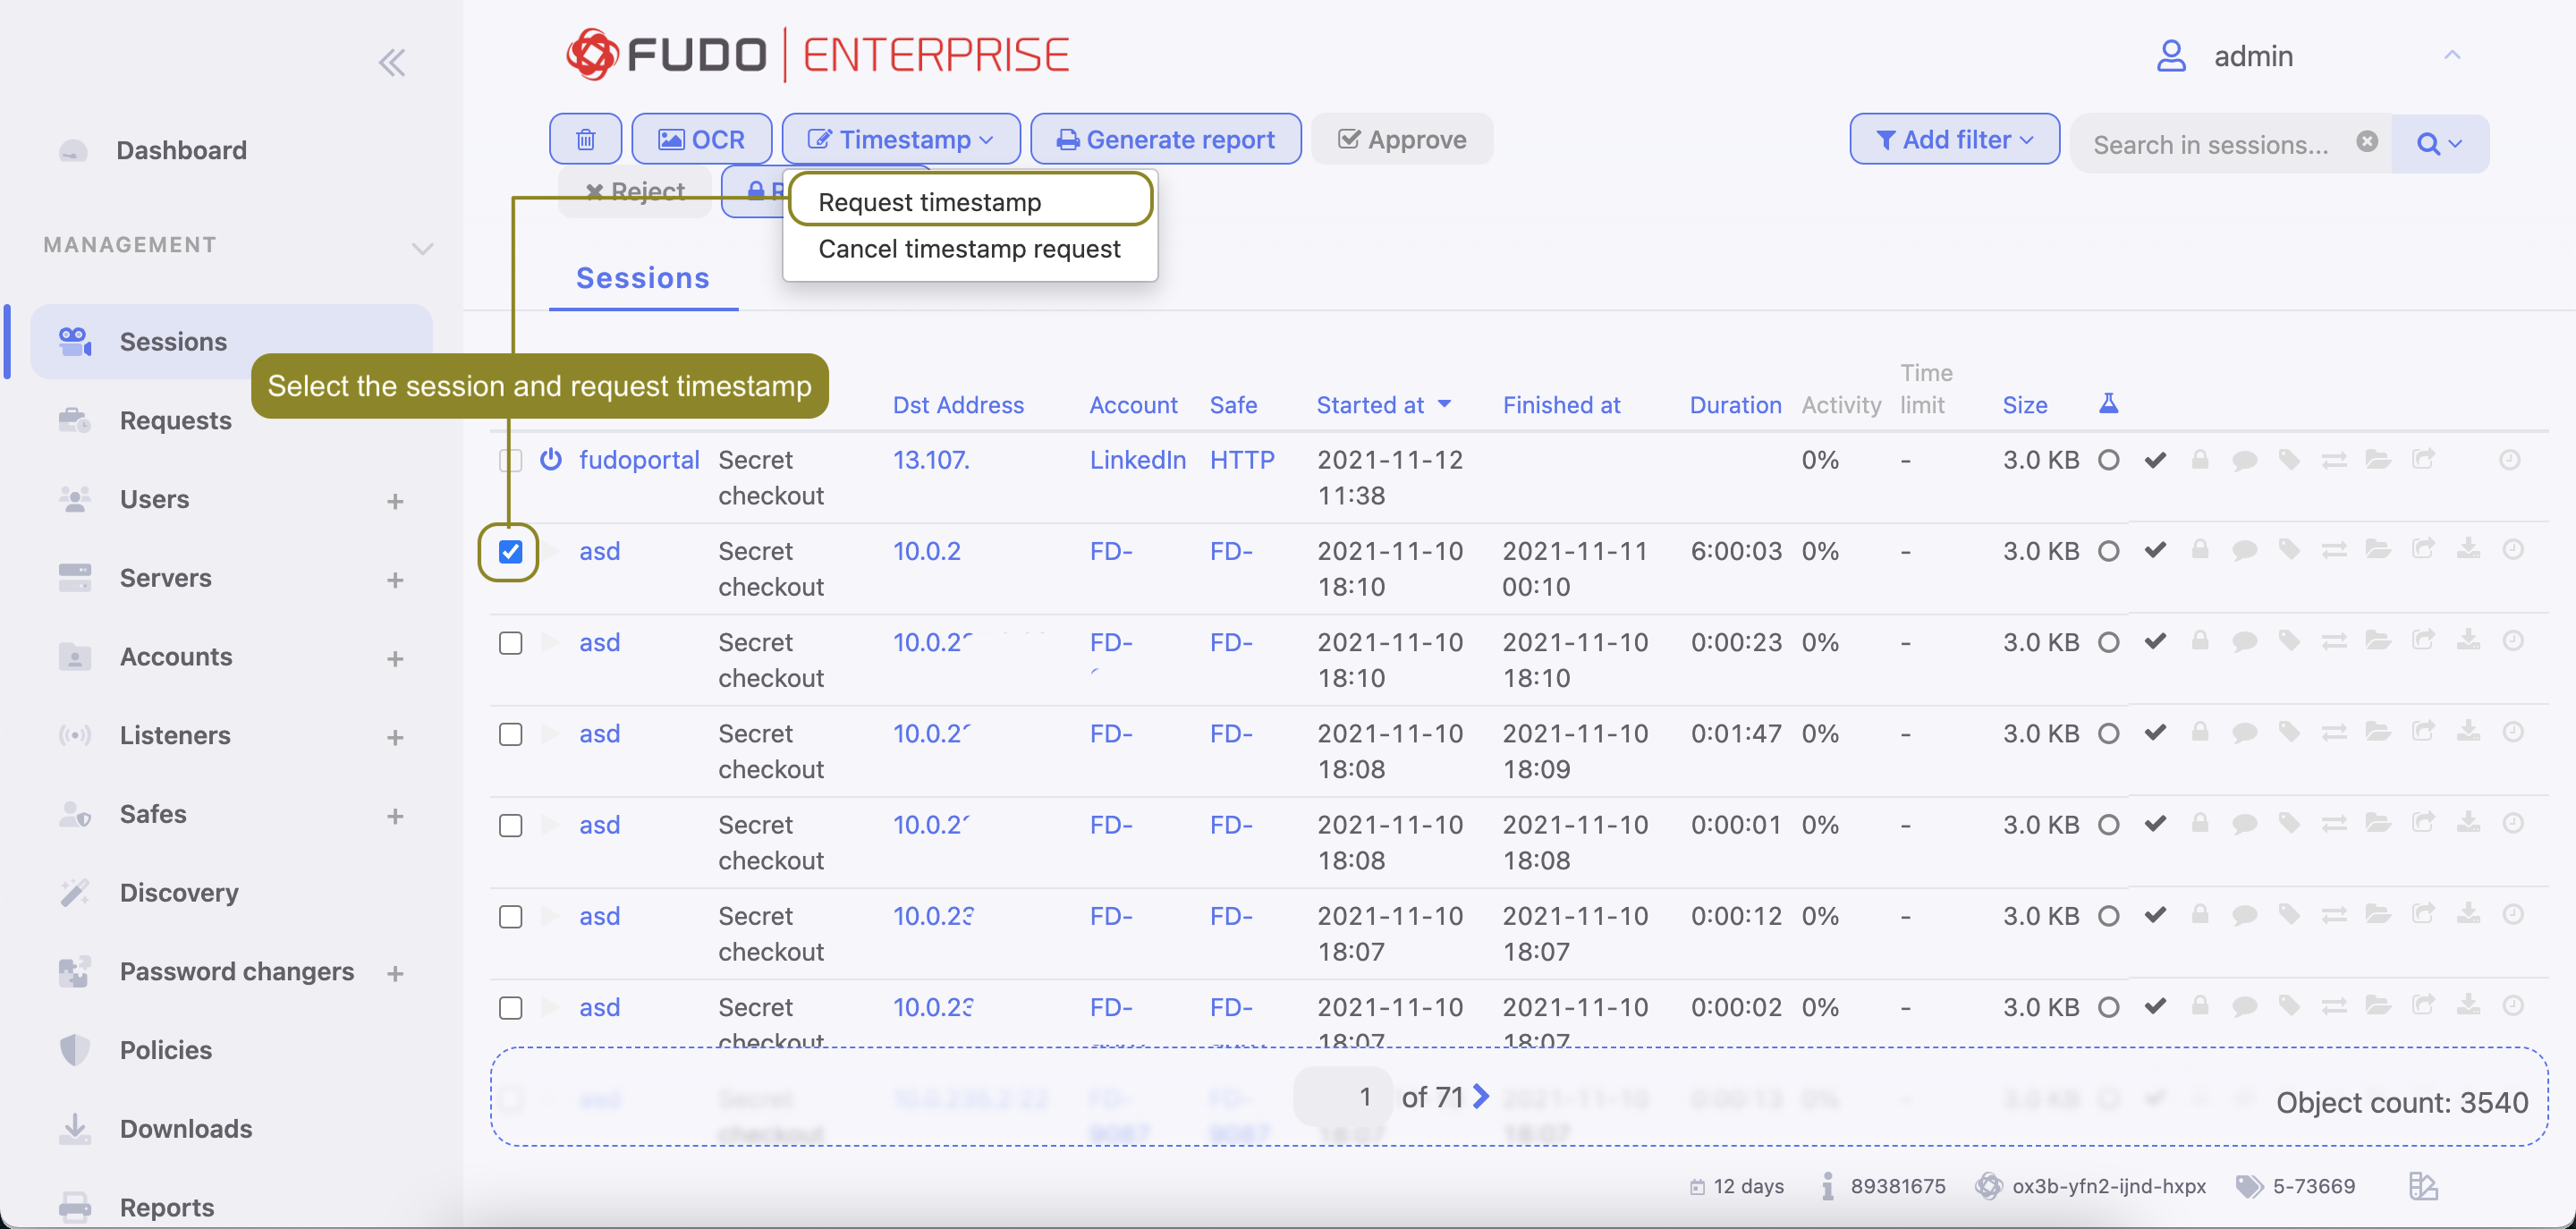
- Select desired sessions, click and select Request timestamp.

- Click .
Note
Once the timestamping option is enabled, an additional column will appear on the session list. Timestamped sessions are marked with an active clock icon . By clicking on it, you can view detailed timestamp information and download the signature.
Cancelling sessions timestamping
To cancel sessions timestamping, proceed as follows.
- Select > .
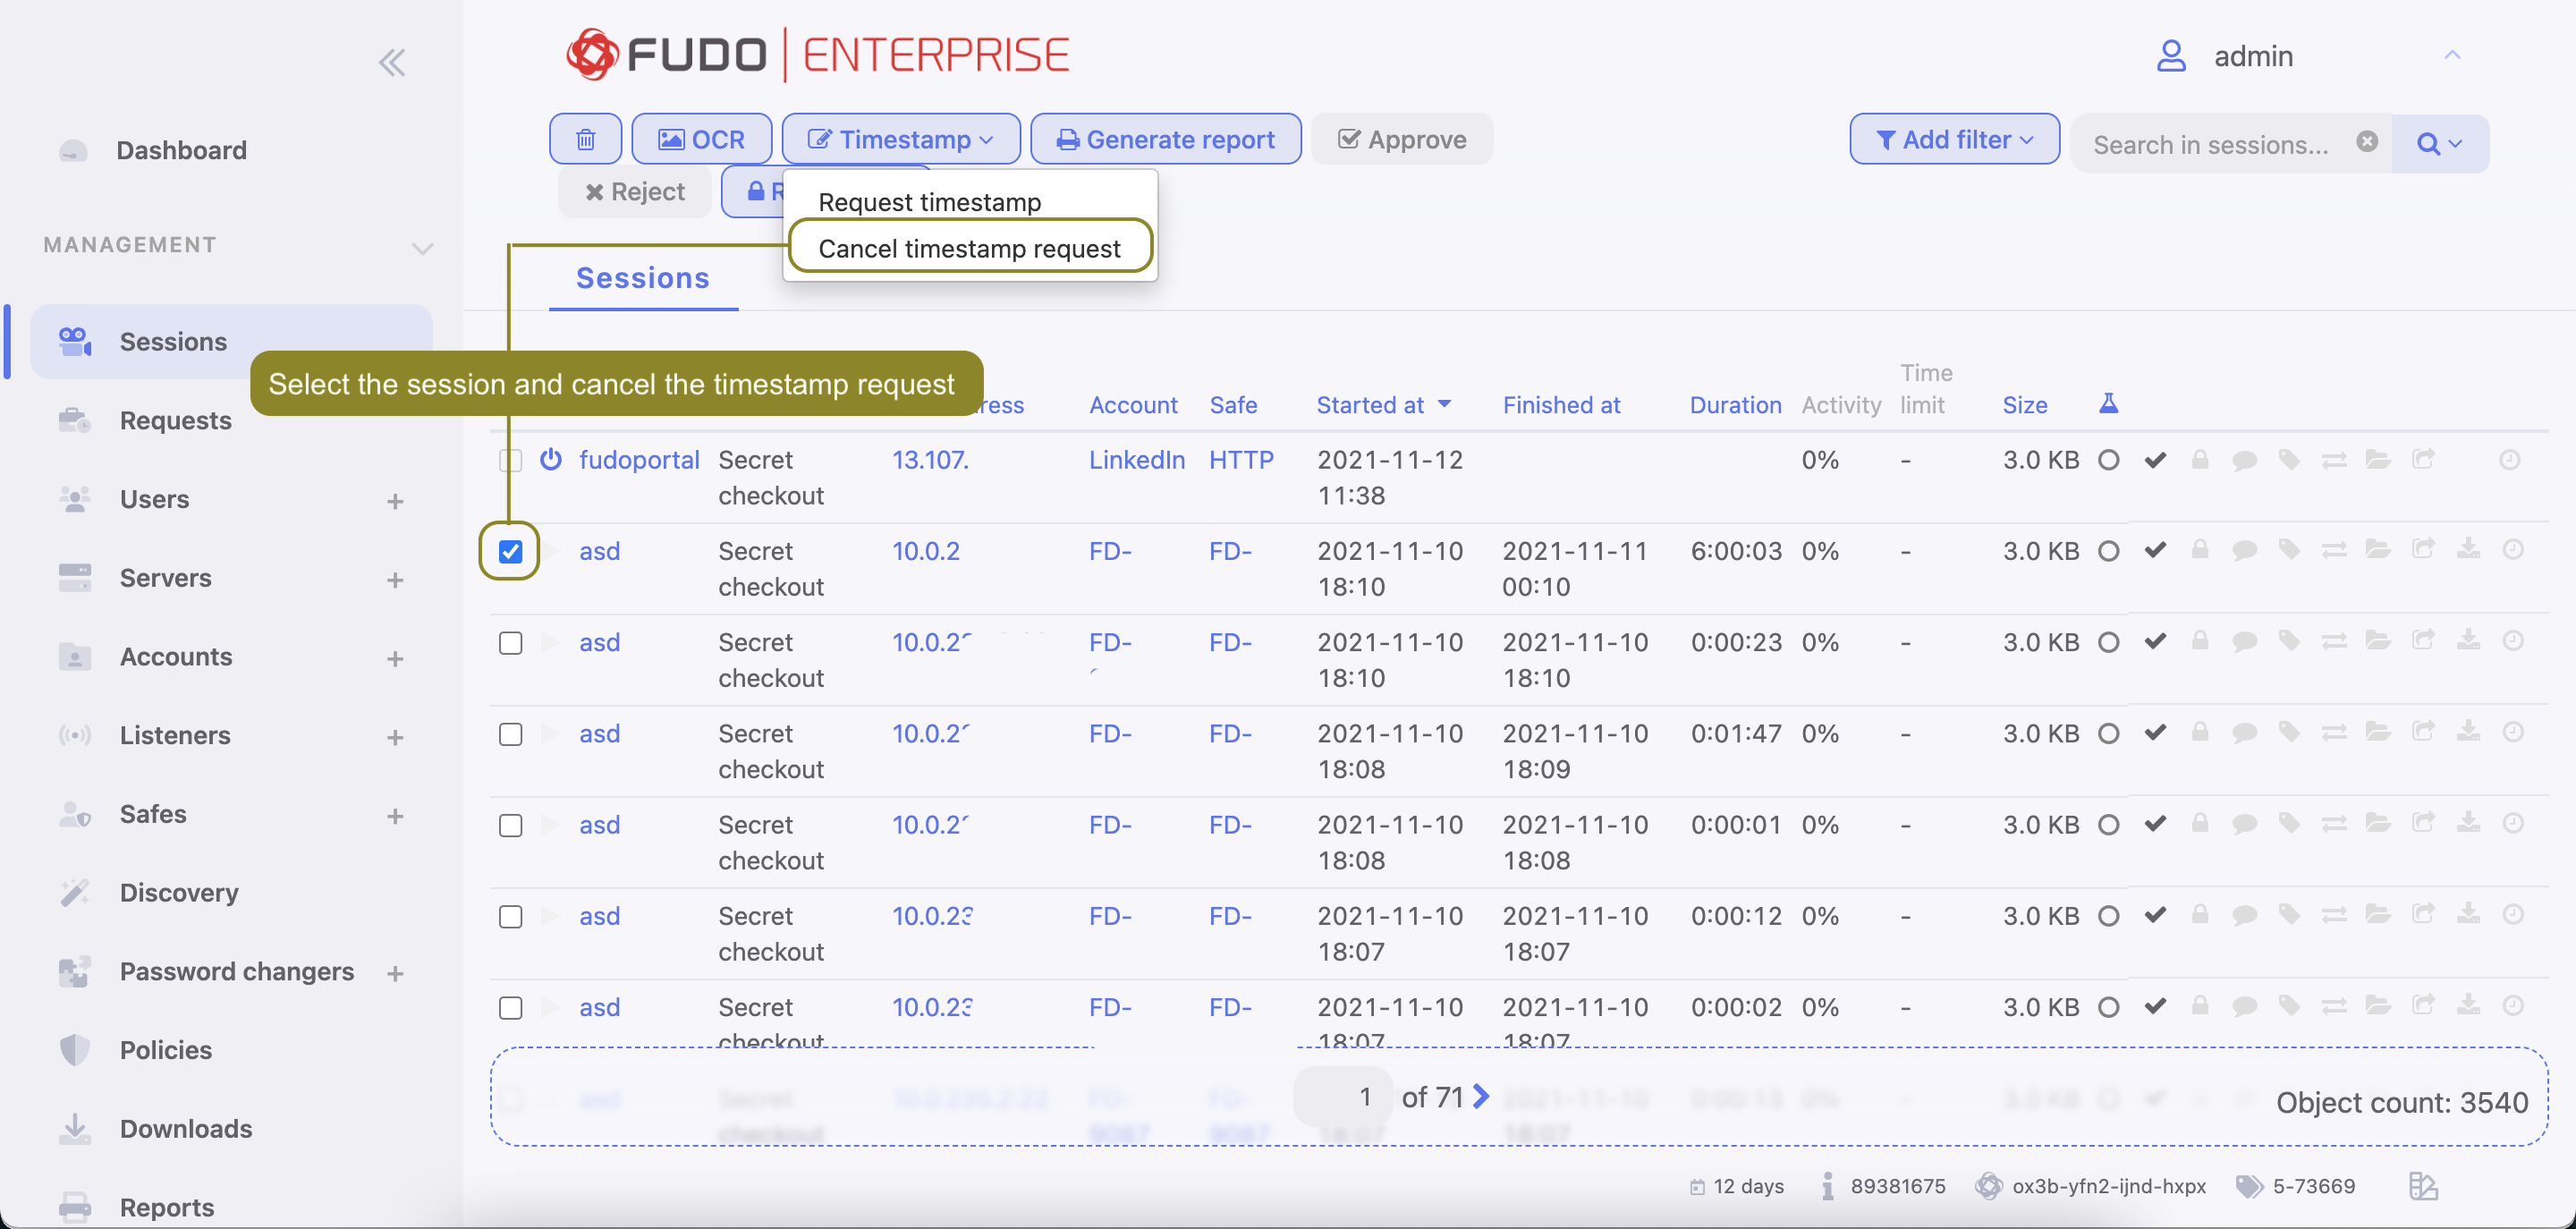
- Select desired sessions, click and select Cancel timestamp request.

- Click .
Related topics: