Creating an HTTP server
Note
- A server object can be linked to only one anonymous account.
- A server object can be linked to only one forward account.
Warning
HTTP rendering is a CPU intensive process and may have negative impact on system’s performance. A physical appliance is recommended for monitoring rendered HTTP connections with the following limitations regarding the maximum number of concurrent rendered HTTP sessions.
| Model | Maximum recommended number of concurrent HTTP sessions* |
|---|---|
| F100x | 2 |
| F300x | 5 |
| F500x | 10 |
*The actual value depends on the Fudo Enterprise instance configuration.
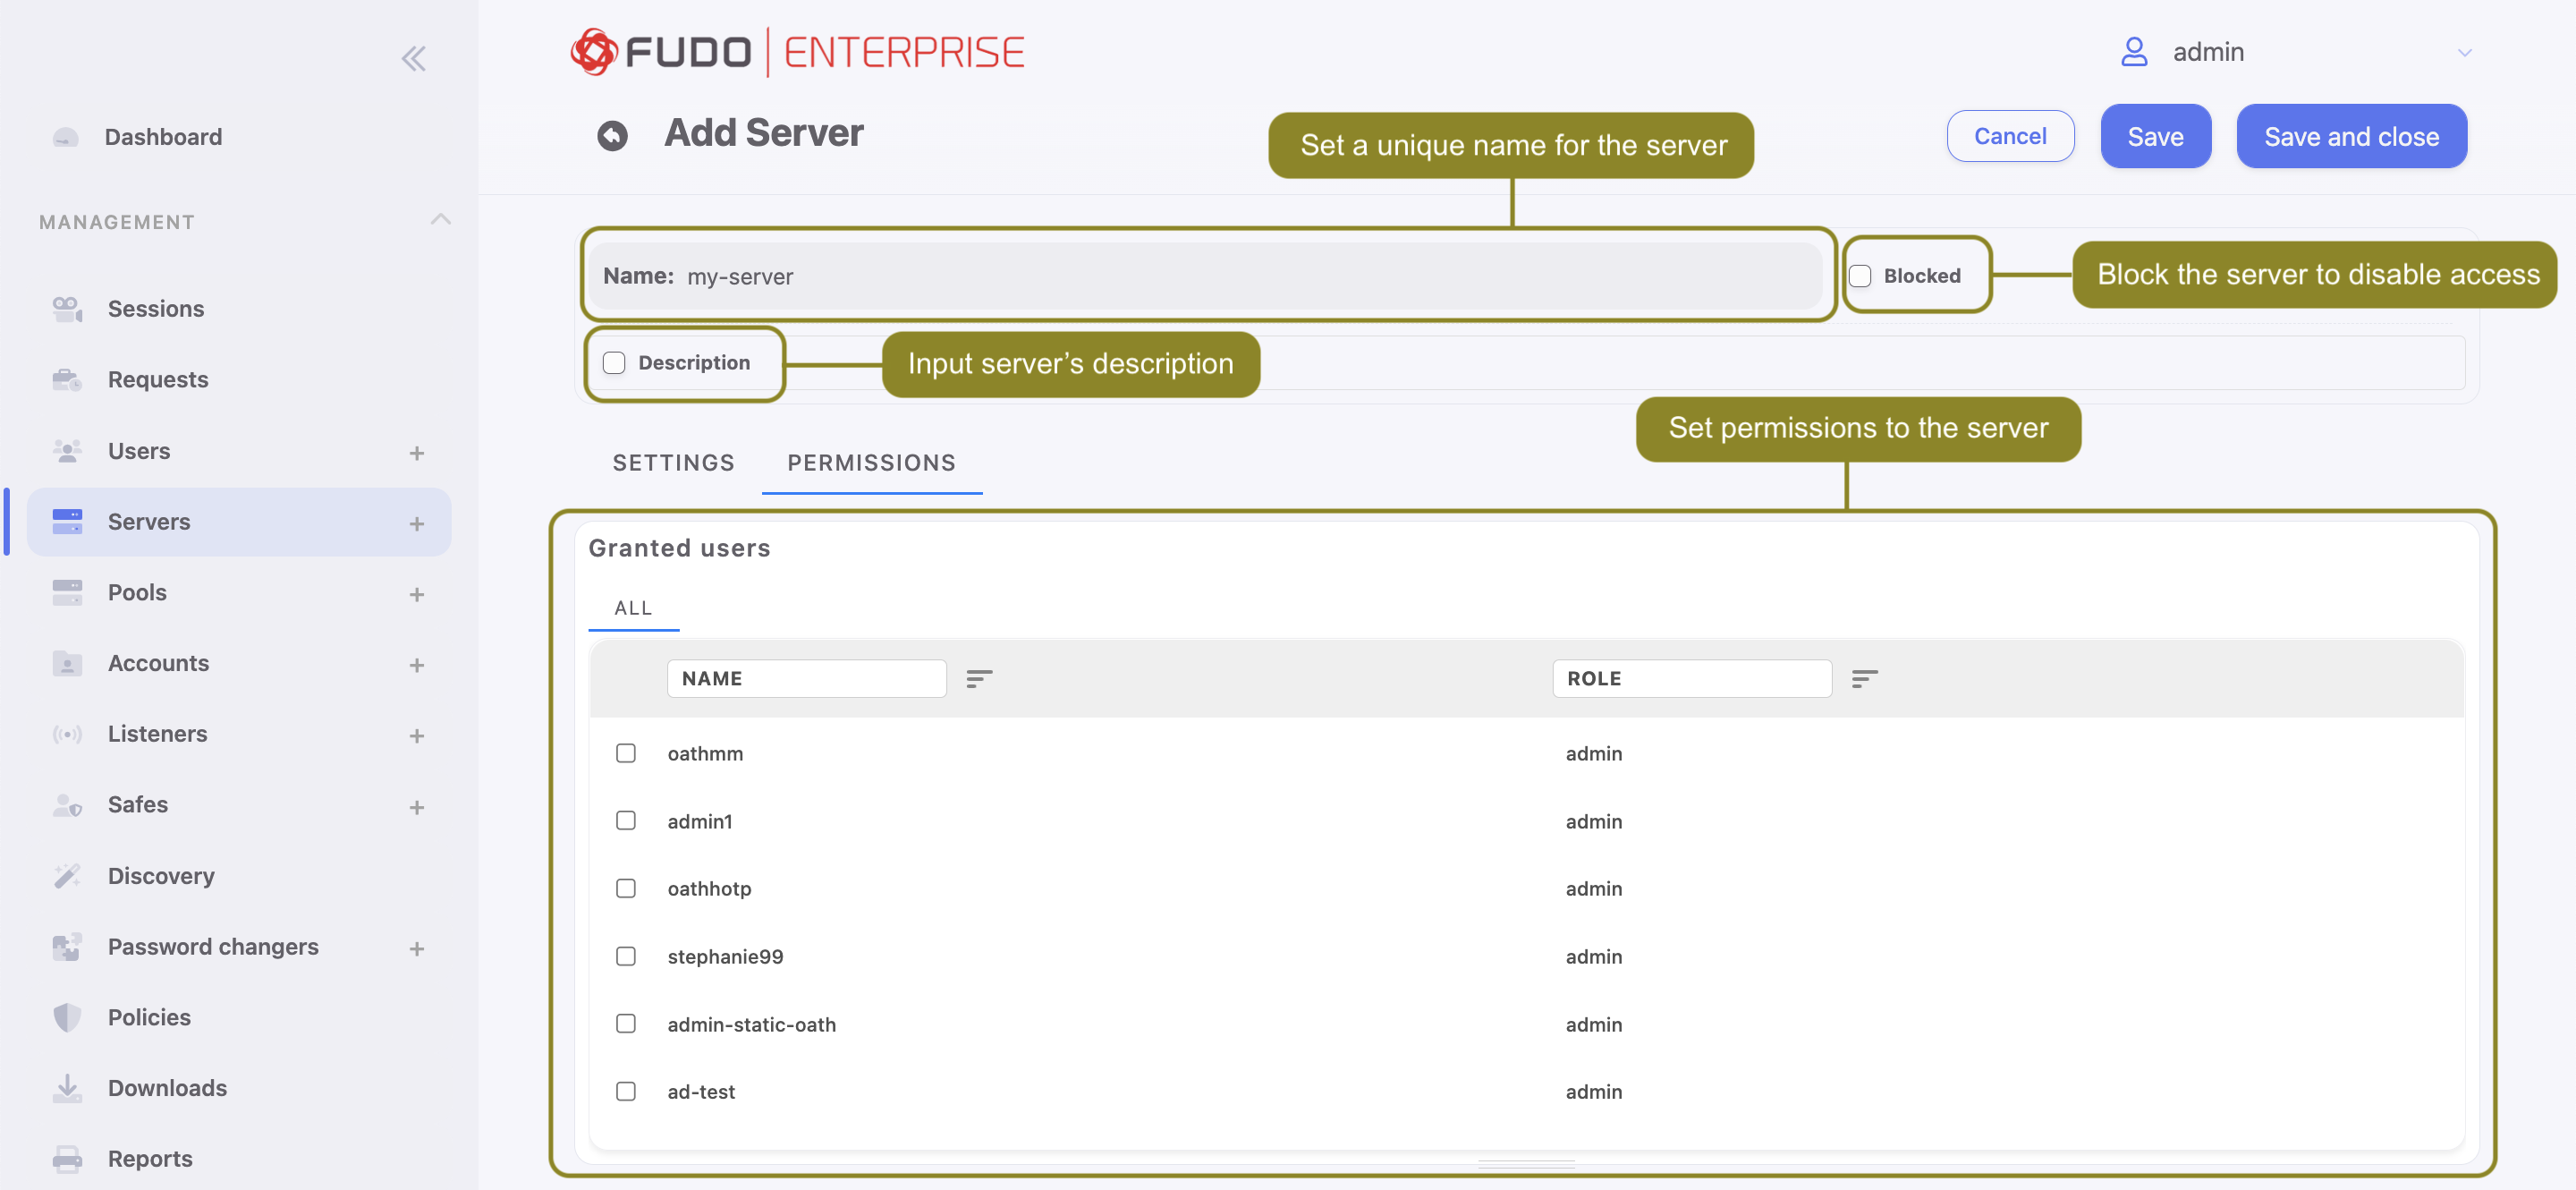
- Click + icon in the main menu next to the tab, or
Select > and then click .
- Enter server’s unique name.
- Select Blocked option to disable access to server after it’s created.
- Optionally, click the Description checkbox and provide a text that will help identifying this server object.
- In the Permissions section, add users allowed to manage this object.
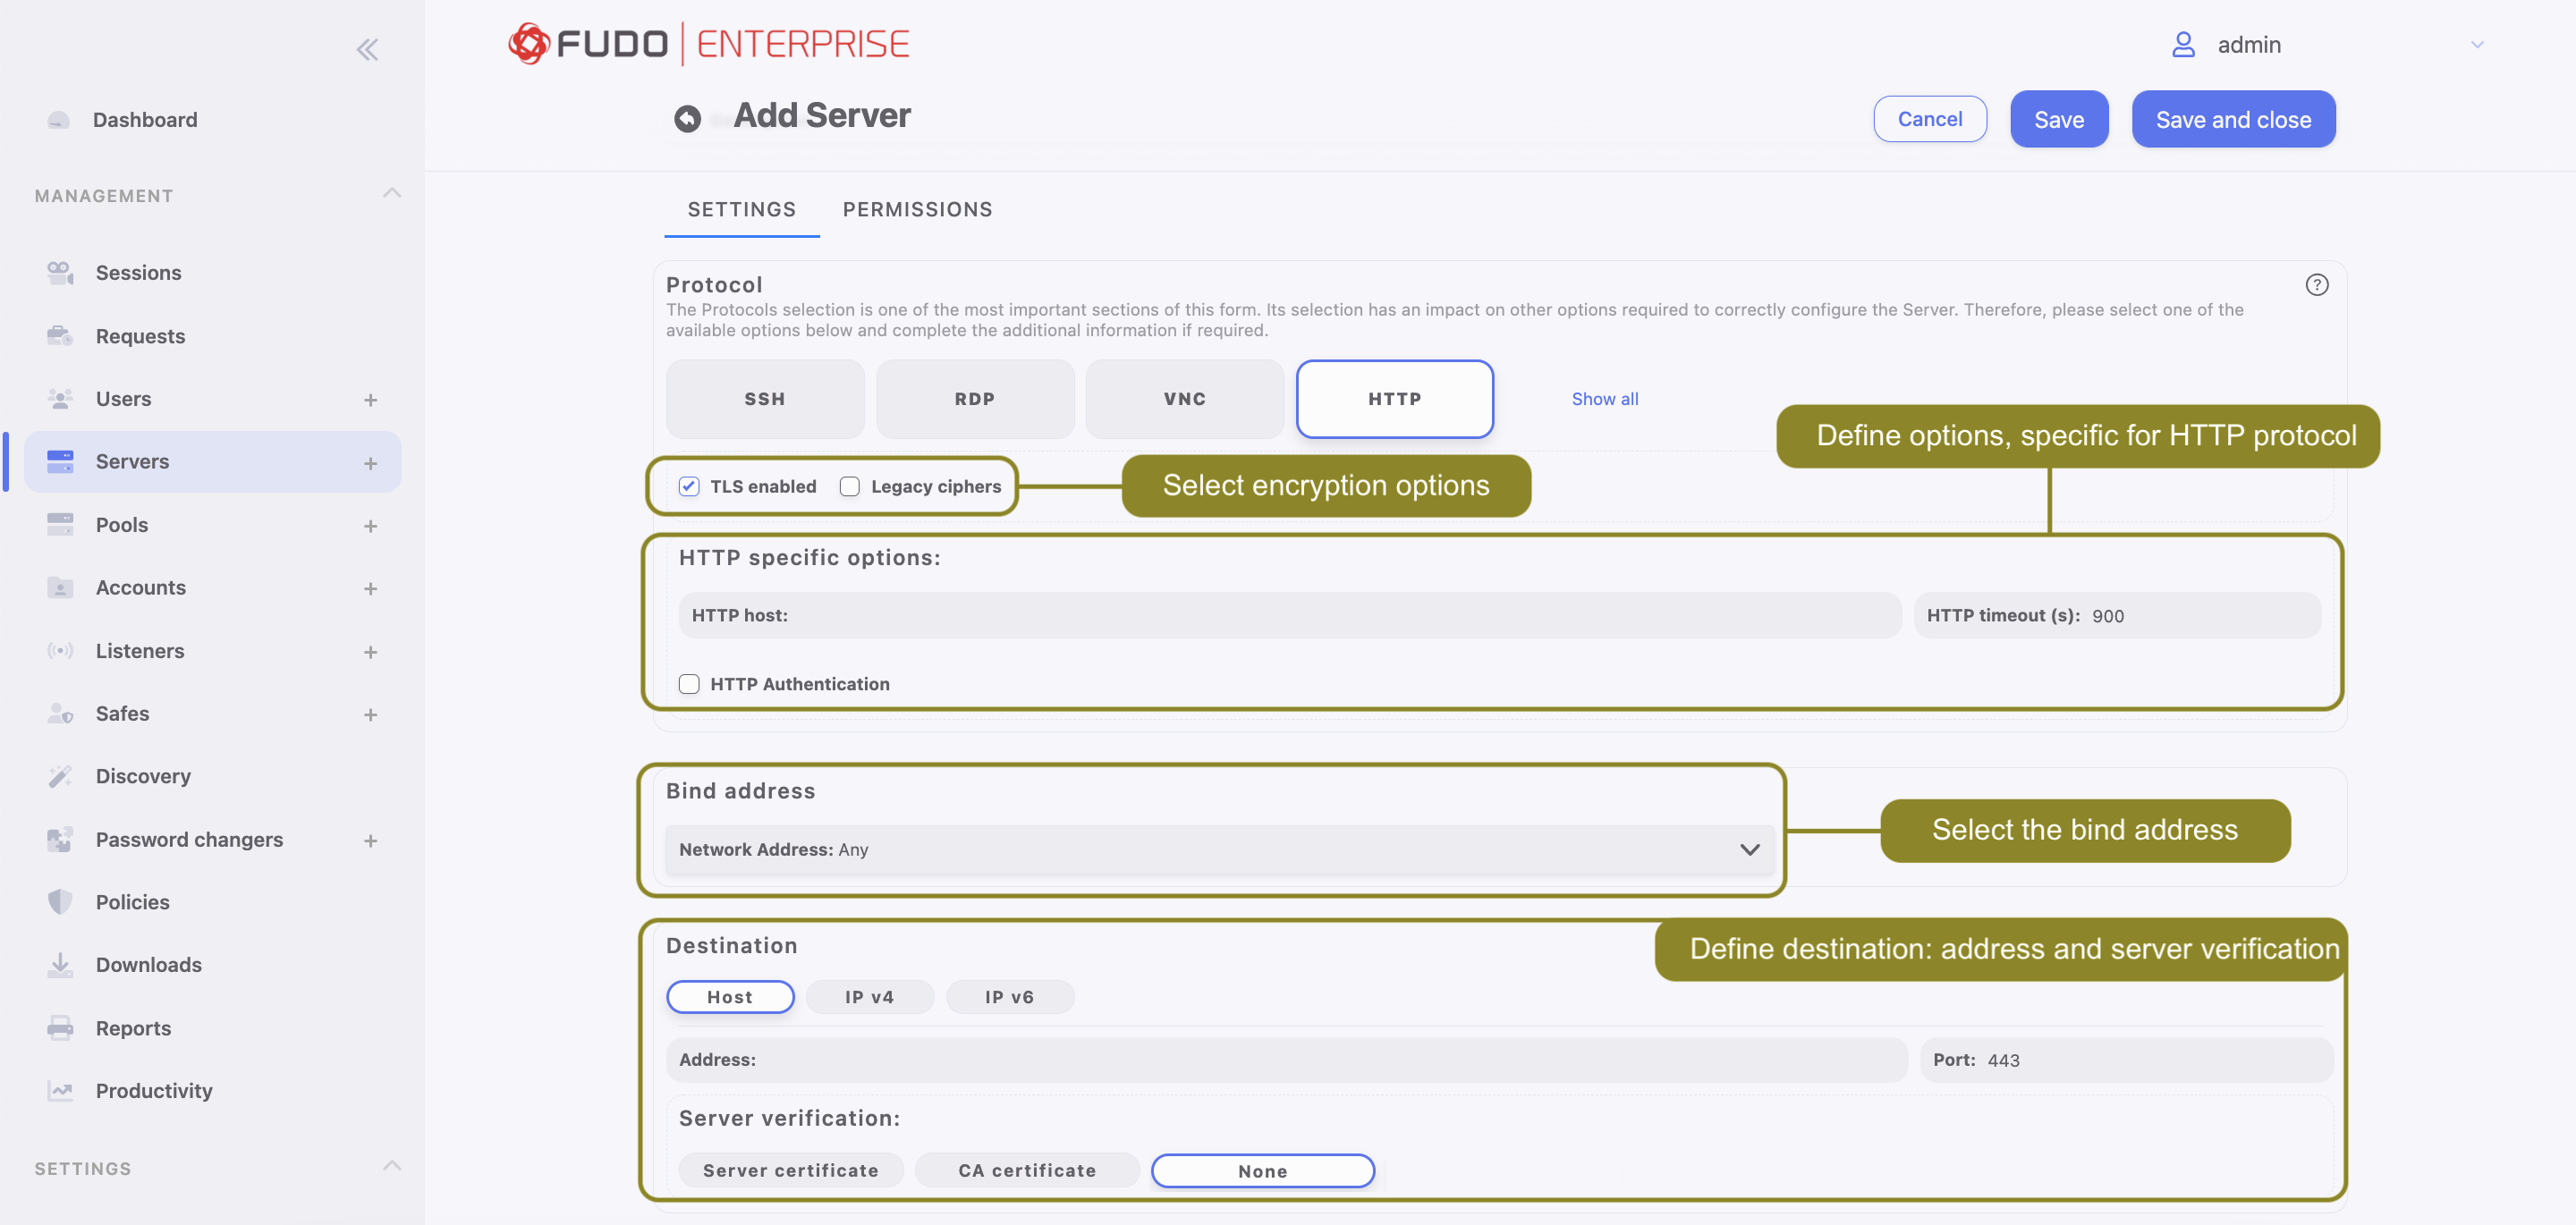
- In the Settings section on the list of available protocols select
HTTP.
Warning
After server’s definition is saved, protocol’s field is uneditable.
Select the TLS enabled to connect to monitored server over TLS.
- Select Legacy ciphers option to allow negotiating older encryption algorithms (DSA(1024), RSA(1024)) when establishing connections.
- In the HTTP host field provide the HTTP host header value.
Note
The HTTP host header determines the requested content in case there are many web sites hosted on the specified server.
- Enter value of the HTTP timeout parameter, determining the time period of inactivity (expressed in seconds), after which the user will have to authenticate again.
Click the HTTP Authentication option to enable additional verification process and select one of the available platforms. If
Noneis selected, provide custom login page details:- Login page URL,
- Username and Password,
- optionally, check the Press the enter key prior to password option.
Note
HTTP authentication is active only when the Render sessions option is enabled in the HTTP listener settings. To enable Render sessions option, please refer to the Creating a HTTP listener topic.
- From the Bind address drop-down list, select Fudo Enterprise IP address used for communicating with this server.
Note
- The Bind address drop-down list elements are IP address defined in the Network configuration menu (Network interfaces configuration) or labeled IP addresses (Labeled IP addresses).
- In case of cluster configuration, select a labeled IP address from the Bind address drop-down list and make sure that other nodes have IP addresses assigned to this label. For more information refer to the Labeled IP addresses topic.
- In the Destination section select
Host,IPv4orIPv6. Enter server’s IP address.
Note
Depending on selected option, default values for the Mask and Port fields are filled out automatically. This way the Fudo Enterprise system detects server as one with unique address. In order to set up address for entire subnet, provide a dedicated value for the Address and the Mask fields.
- If the TLS enabled was checked, in the Server verification section select one of the following options:
Server certificateorCA certificateand provide respective certificate data. SelectNoneto disable server verification.
- Click or .
Related topics: