Creating a Citrix server
- Click + icon in the main menu next to the tab, or
Select > and then click and select Static server.
- Enter server’s unique name.
- Enter optional description, which will help identifying this server object.
- Select Blocked option to disable access to server after it’s created.
- Select
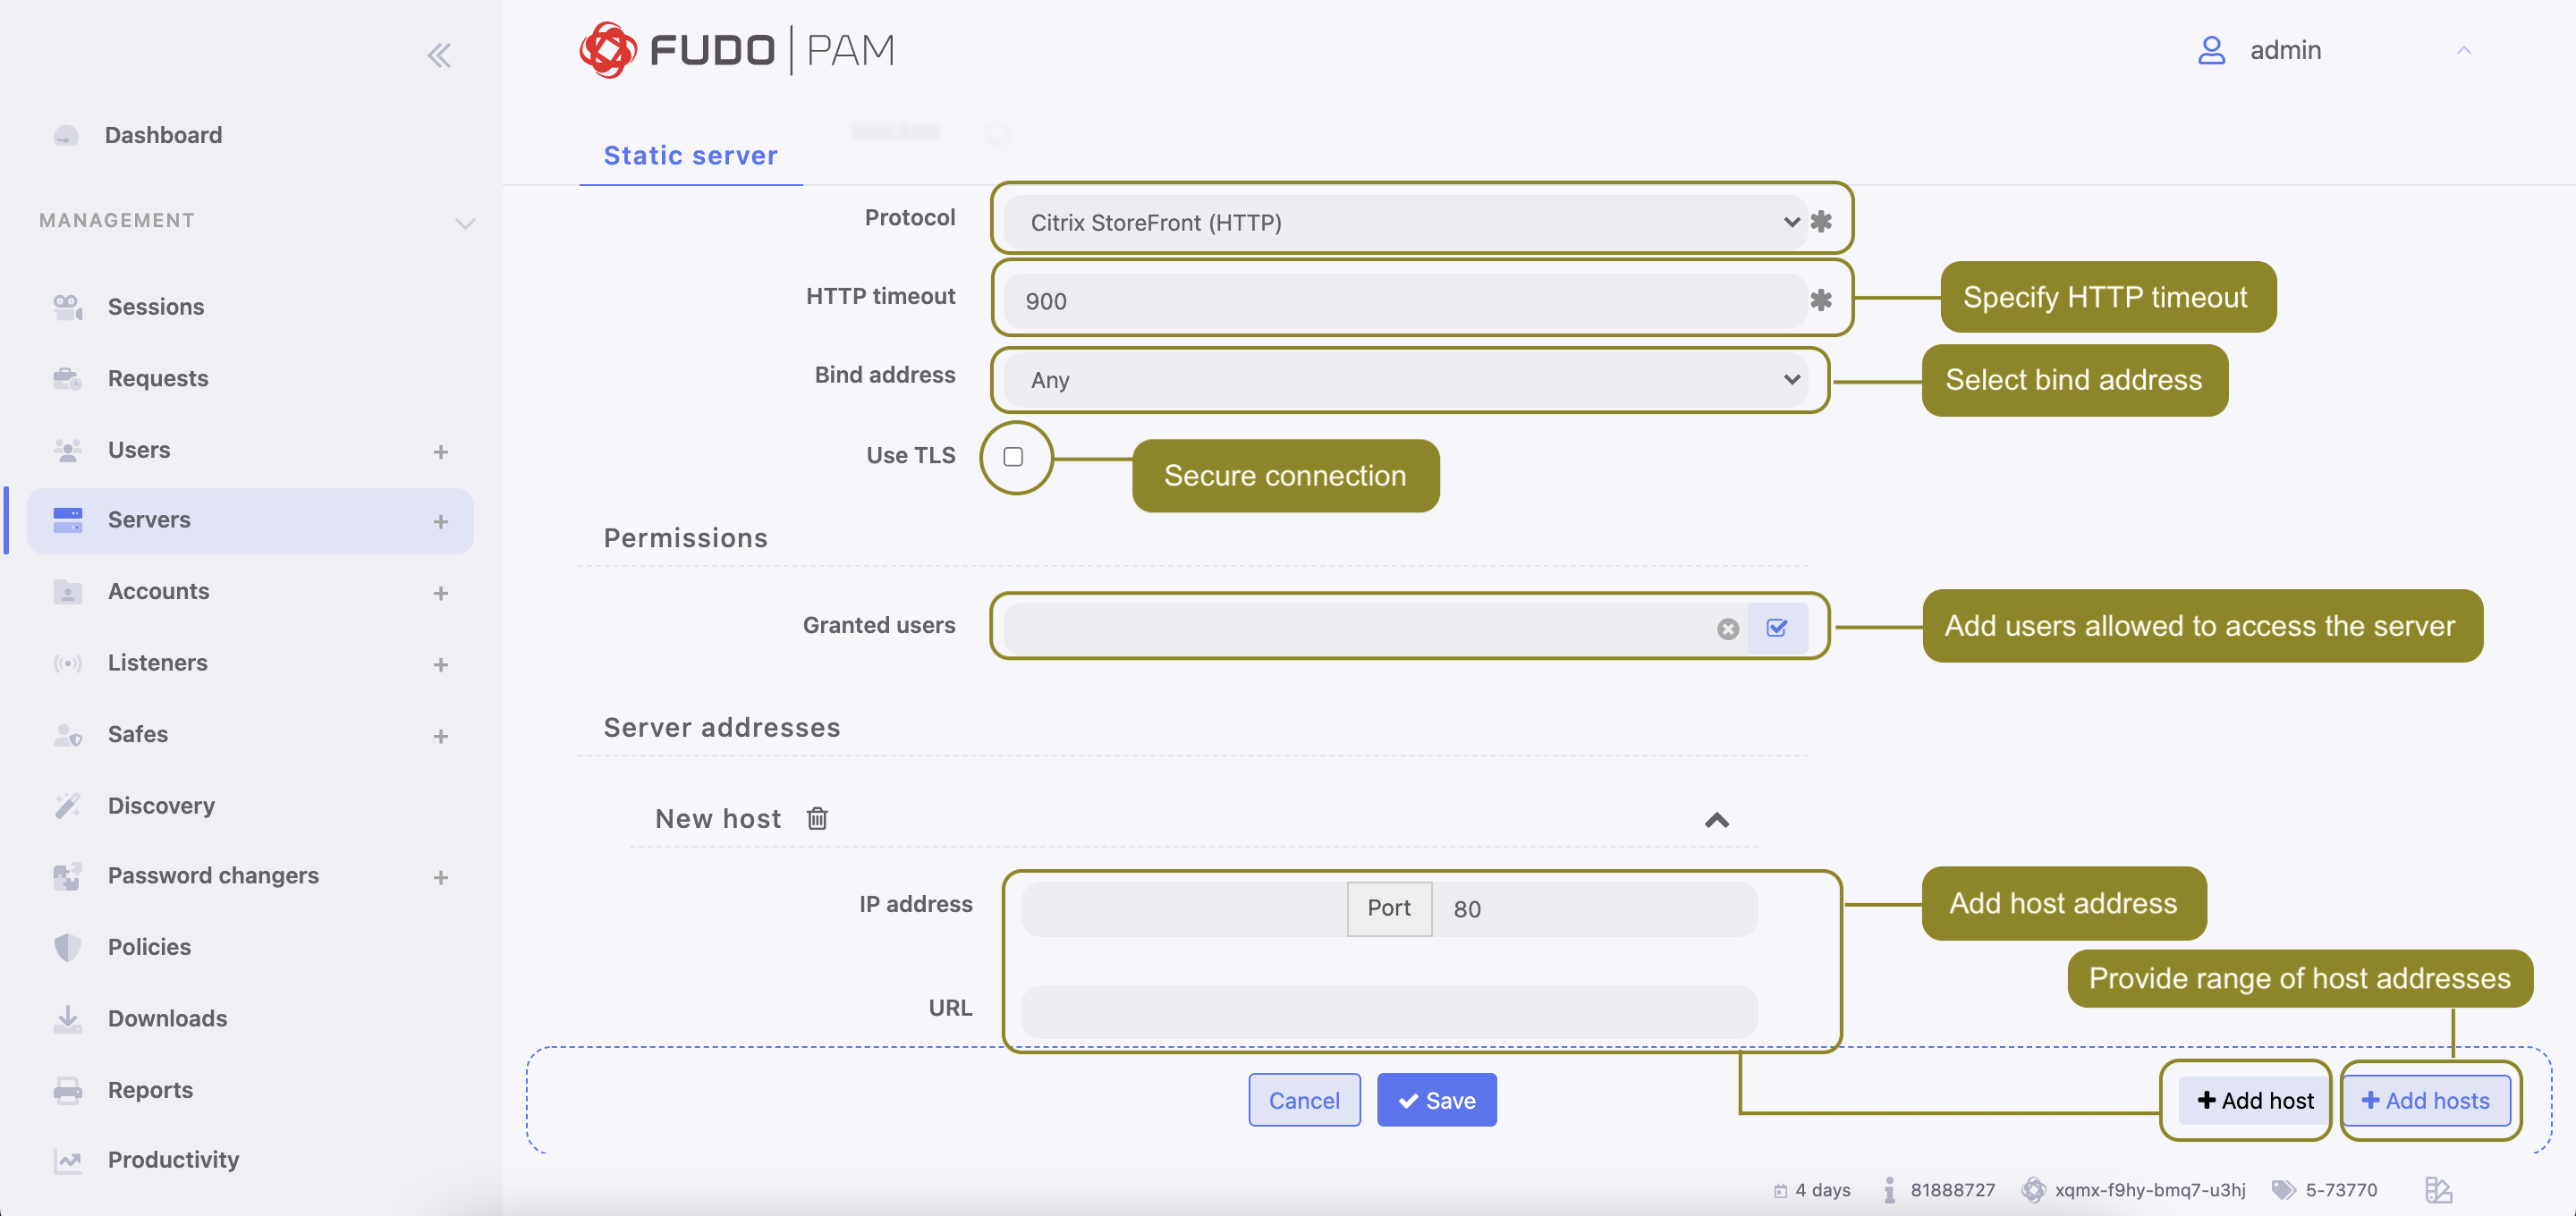
Citrix StoreFront (HTTP)from the Protocol drop-down list. - Enter value of the HTTP timeout parameter, determining the time period of inactivity (expressed in seconds), after which the user will have to authenticate again.
- From the Bind address drop-down list, select Fudo PAM IP address used for communicating with this server.
Note
- The Bind address drop-down list elements are IP address defined in the Network configuration menu (Network interfaces configuration) or labeled IP addresses (Labeled IP addresses).
- In case of cluster configuration, select a labeled IP address from the Bind address drop-down list and make sure that other nodes have IP addresses assigned to this label. For more information refer to the Labeled IP addresses topic.
- Select the Use TLS option to connect to monitored server over TLS.
- Select Legacy ciphers option to allow negotiating older encryption algorithms (DSA(1024), RSA(1024)) when establishing connections.
- In the CA certificate field, click i to upload a certificate.
- In the Permissions section, add users allowed to manage this object.
- Click an button in order to add an address into the Server adresses section.
- Enter server’s IP address and port number.
- If Use TLS option above was chosen, additionally click
to download server key or paste the certificate into the text area.
- In the URL field, enter Citrix StoreFront base URL.
- Click an button in order to add a range of IP addresses.
- Enter a starting IP address and an ending IP address.
- Enter a port number.
- Click Add hosts.
- Click .
Related topics: