Connecting via the access request
A user can send a request for access to the resources via the Access Gateway.
Sending access request
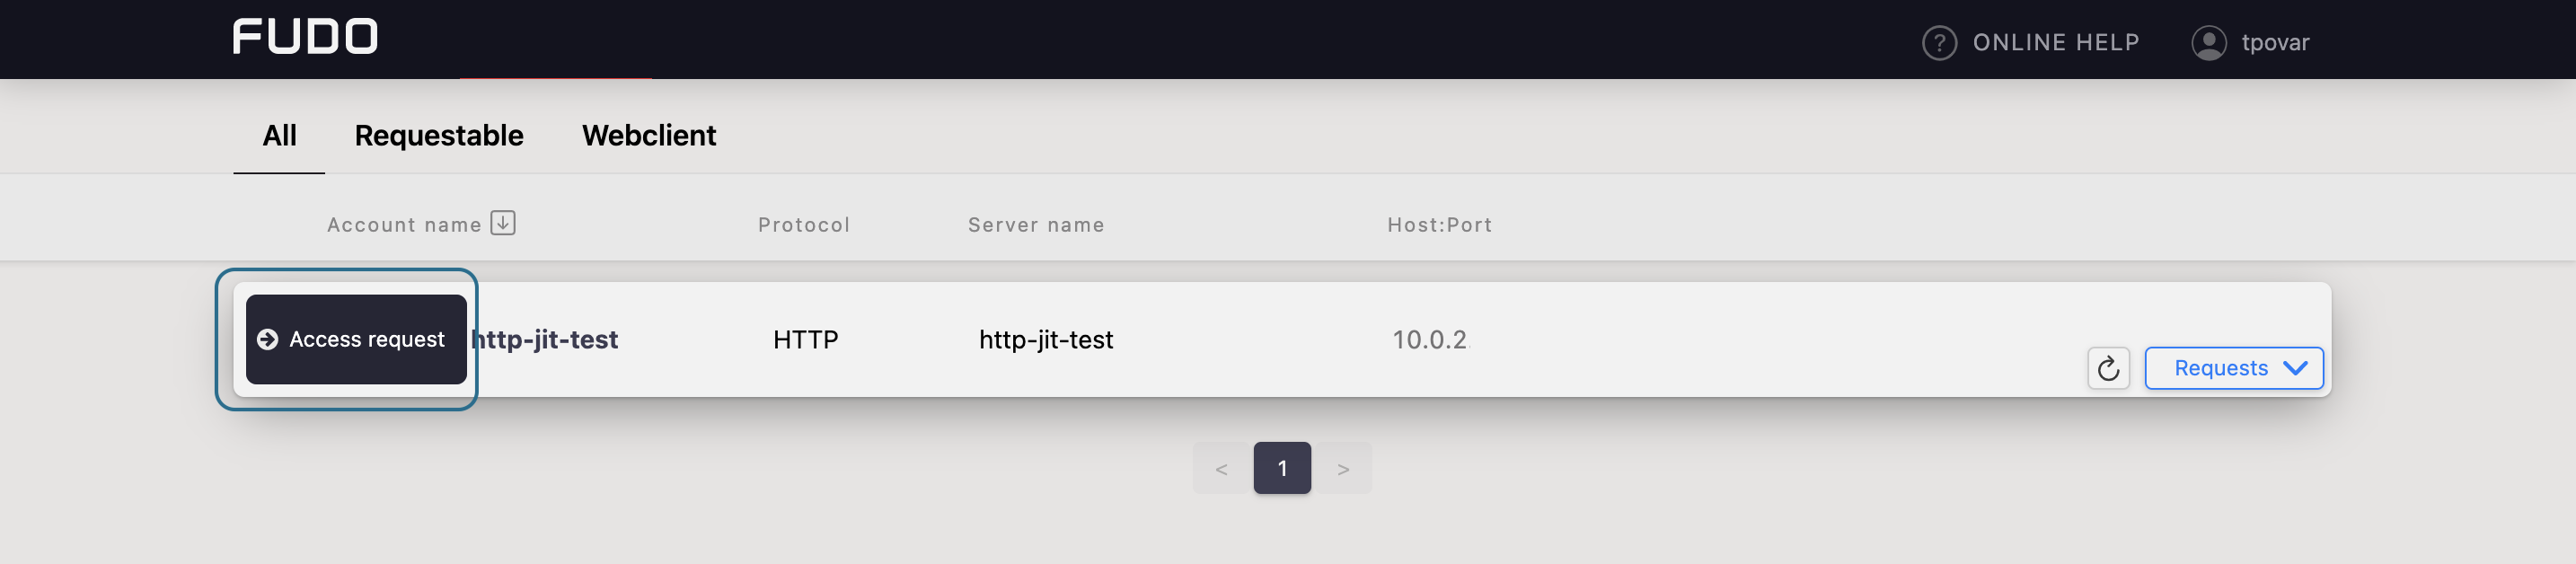
In order to send a request, hover your mouse over the particular account to see more options. Next, follow the steps:
- Click the button.
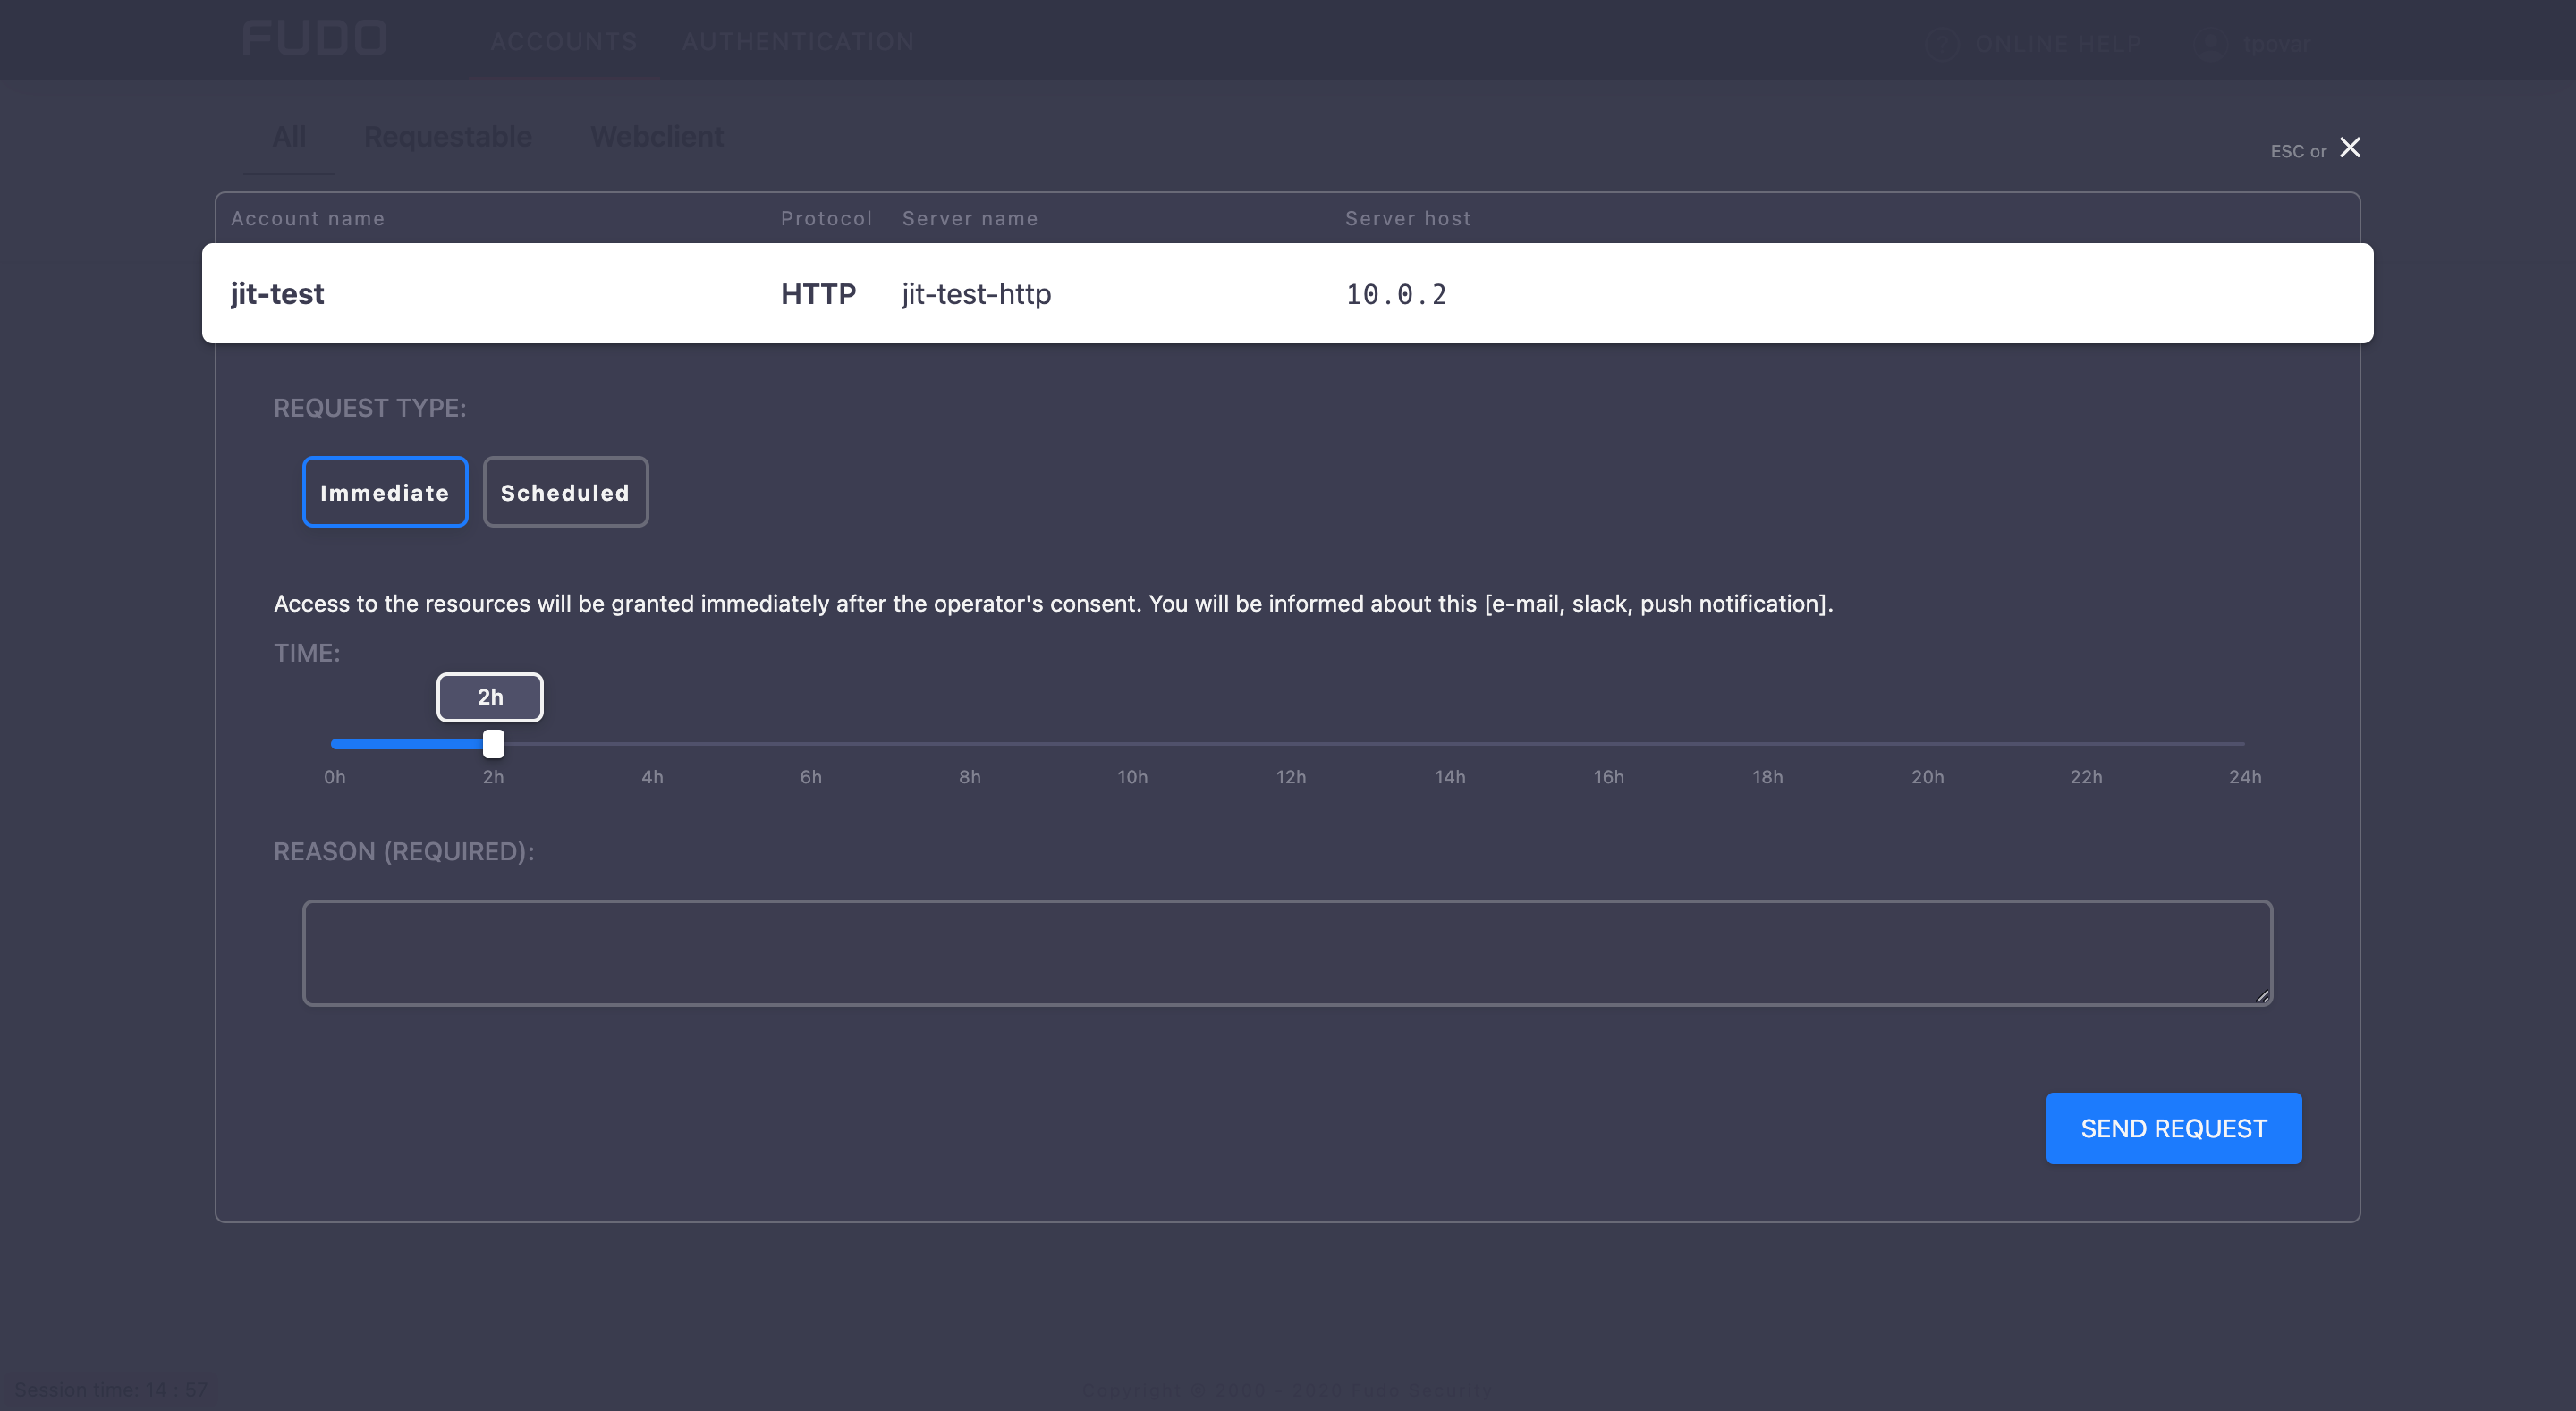
- Choose a type of the request: immediate or scheduled.
Immediate requests can be set from now up to the next 24 hours.
When a user sends an immediate request, its access time starts when the request is accepted. Then, the user has 24 hours to start their session. When the user starts the session, the system counts the session time, which the user had requested, and terminates connection when the requested session time is over. If the user does not use the access and does not connect for 24 hours after access is granted, the access becomes expired.
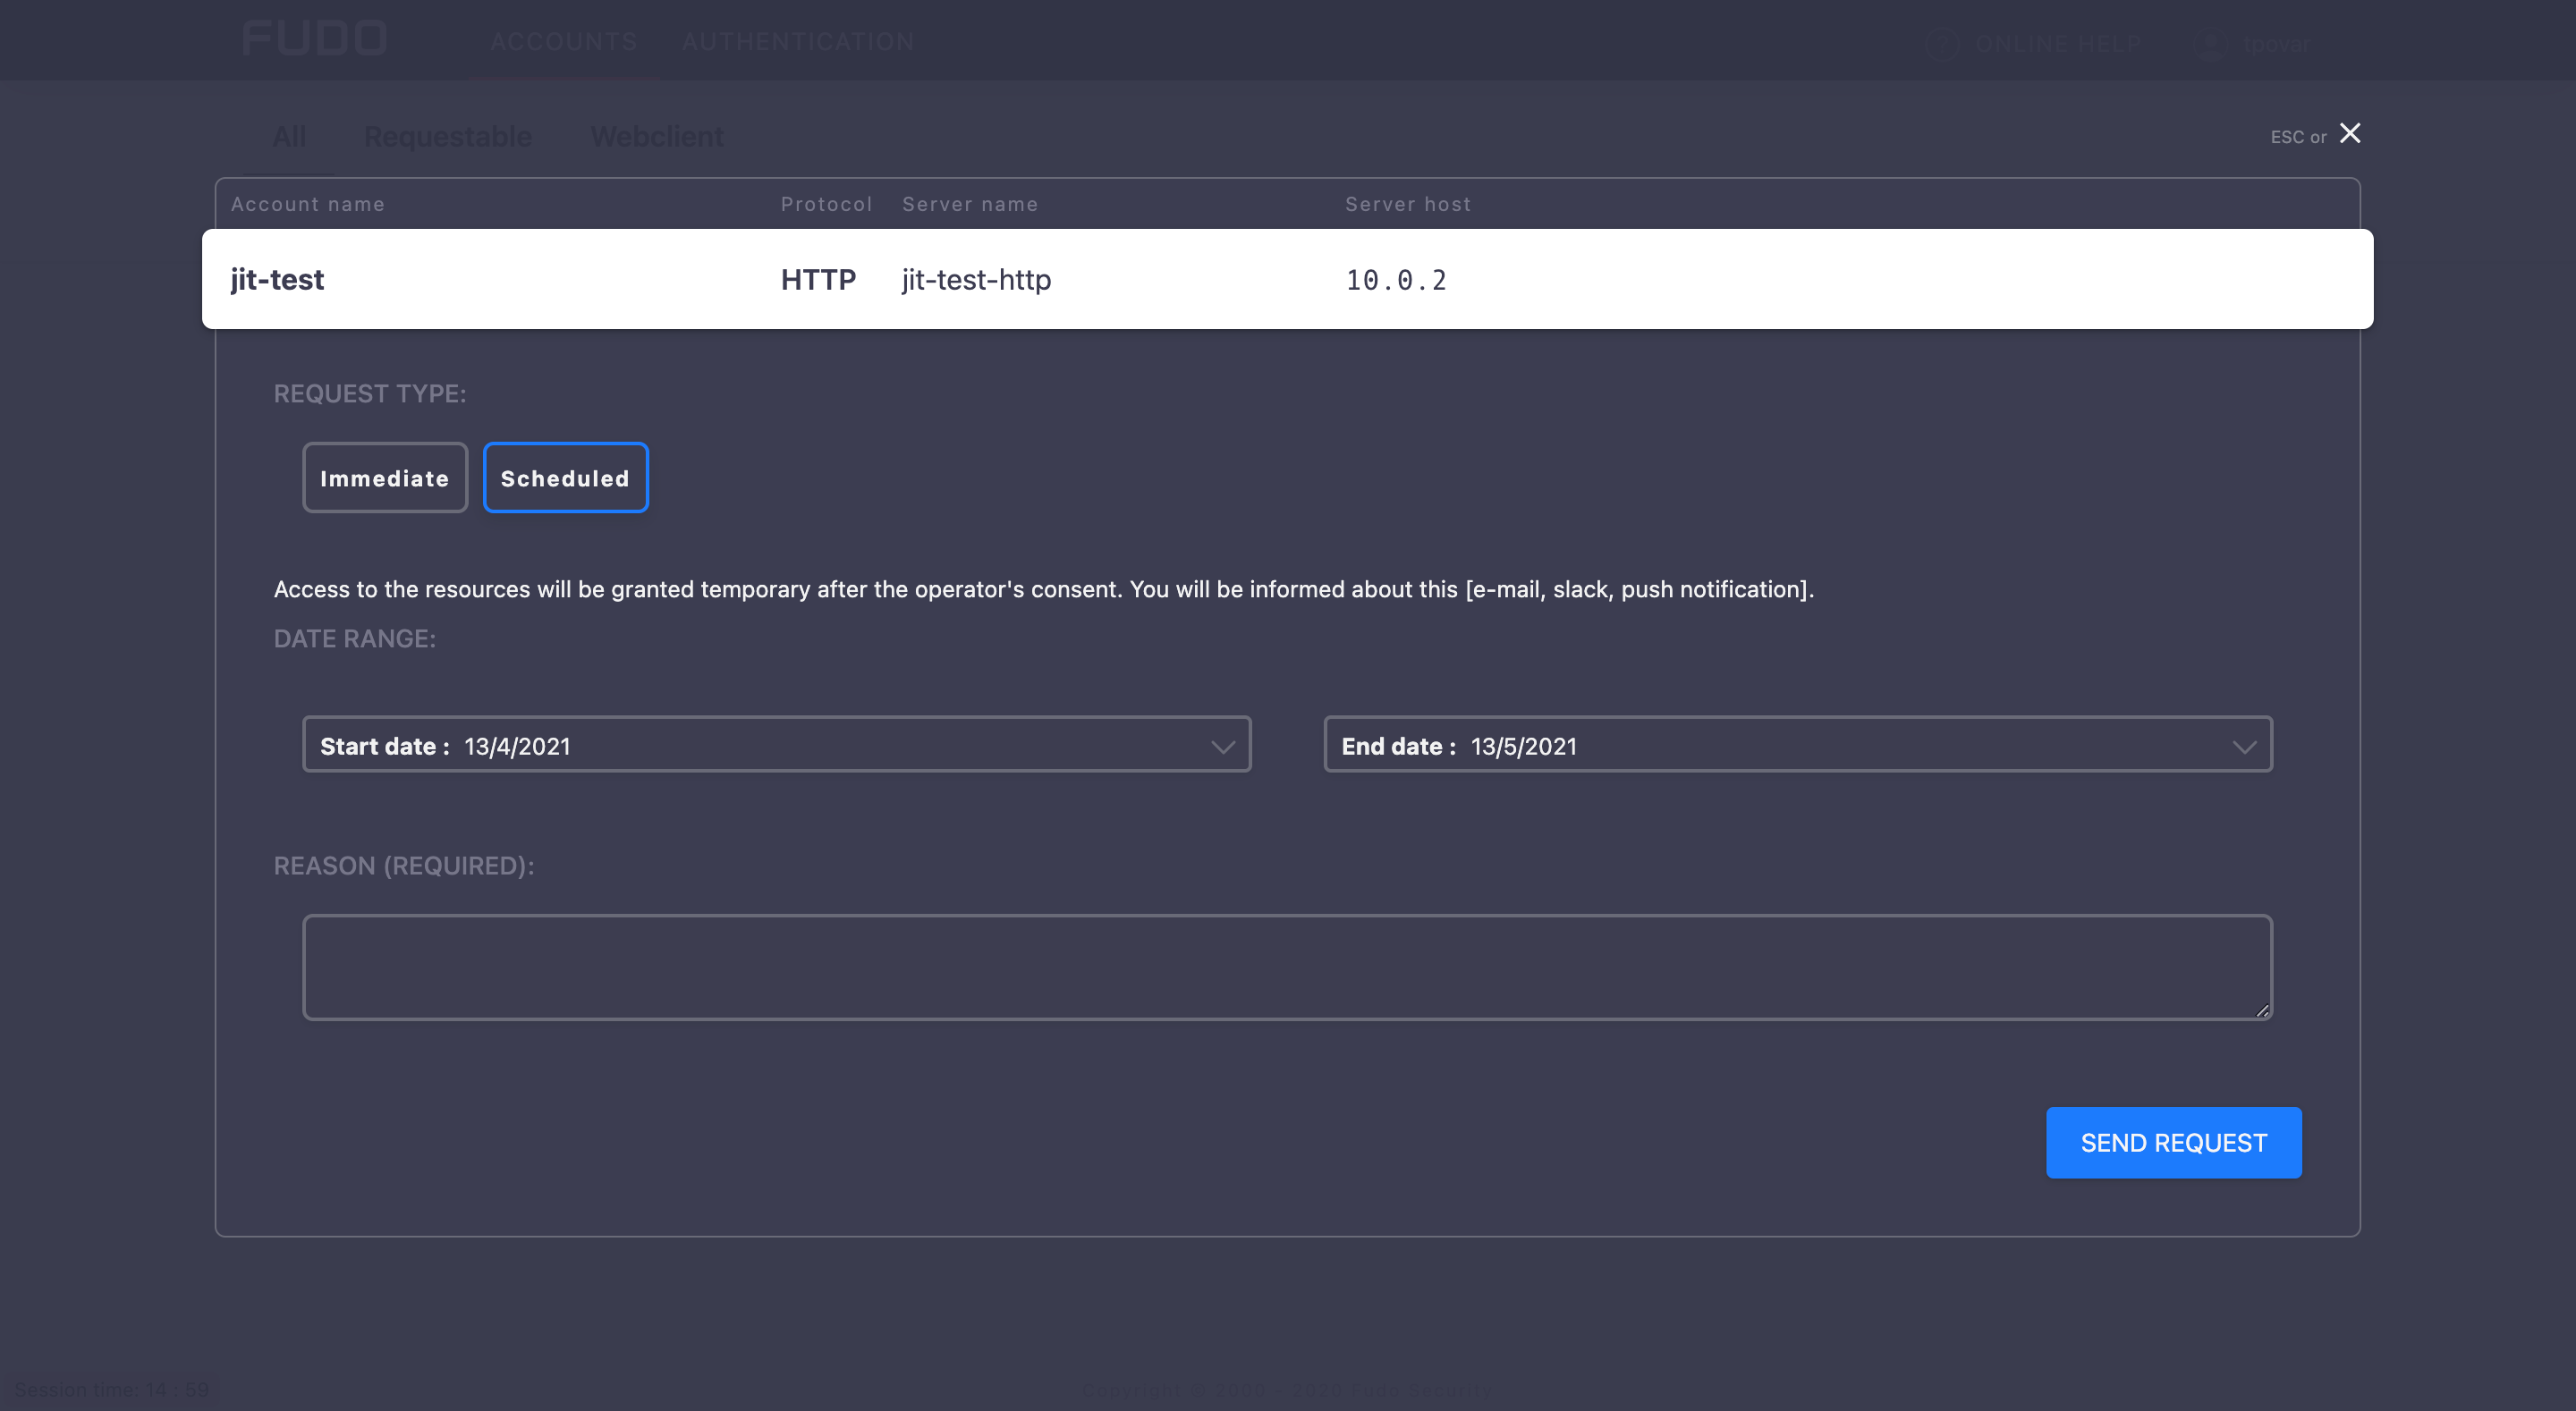
For the scheduled type of requests, the user chooses a start date and an end date, which means access will be granted for a whole day from the start date till the end date.
Note
For both types of requests, the Reason field is required in order to activate the sending.
- Define the request time.
- Click button.
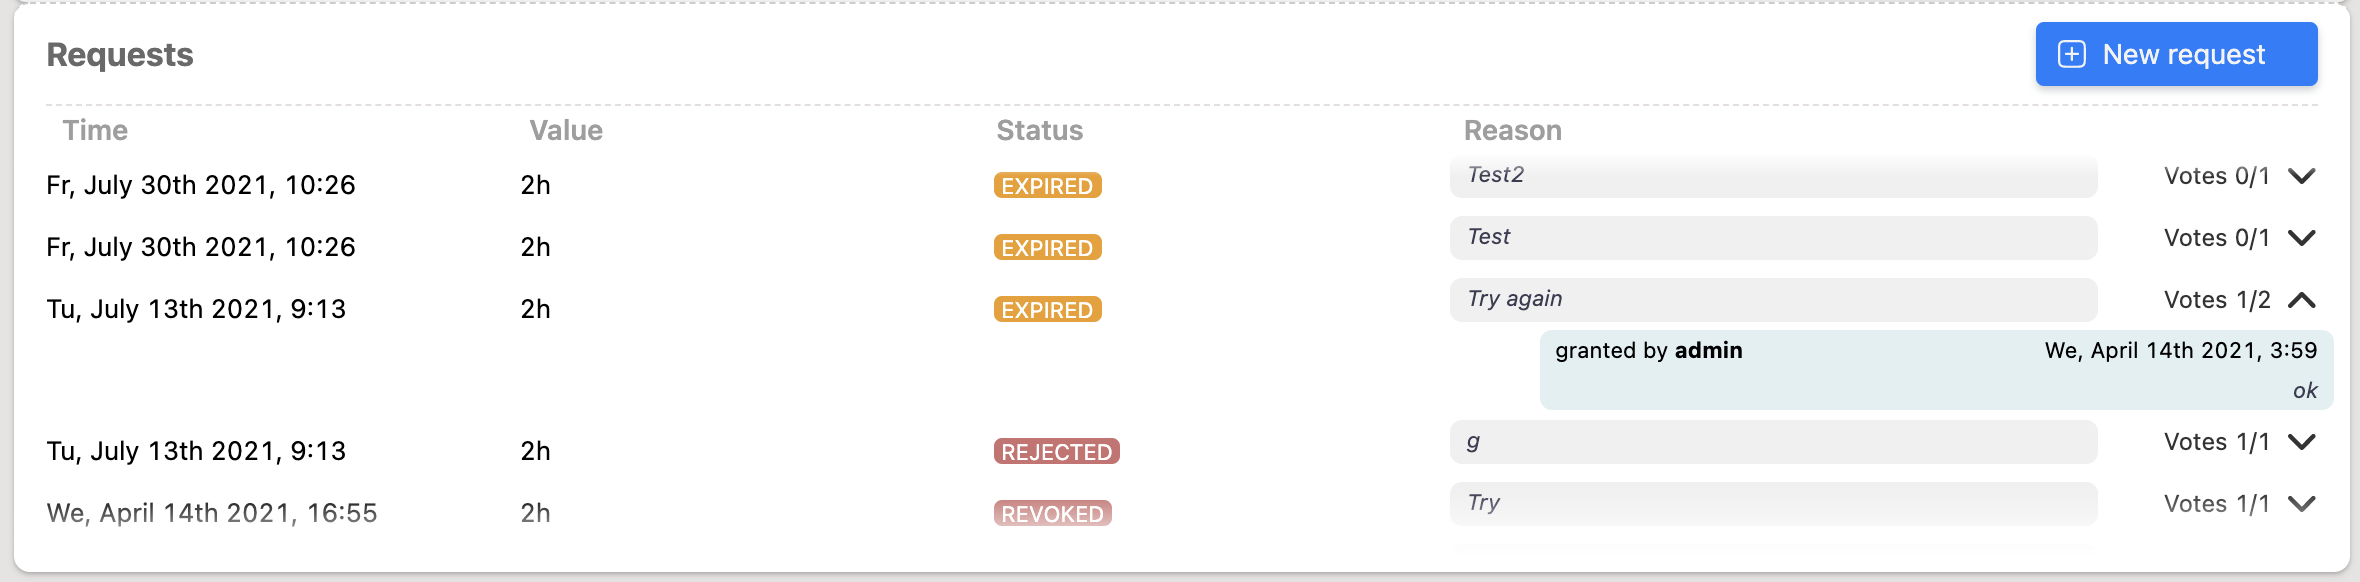
Watching request status
Status of the pending requests, as well as the requests history, are available under the drop-down list, having a mouse over the account.
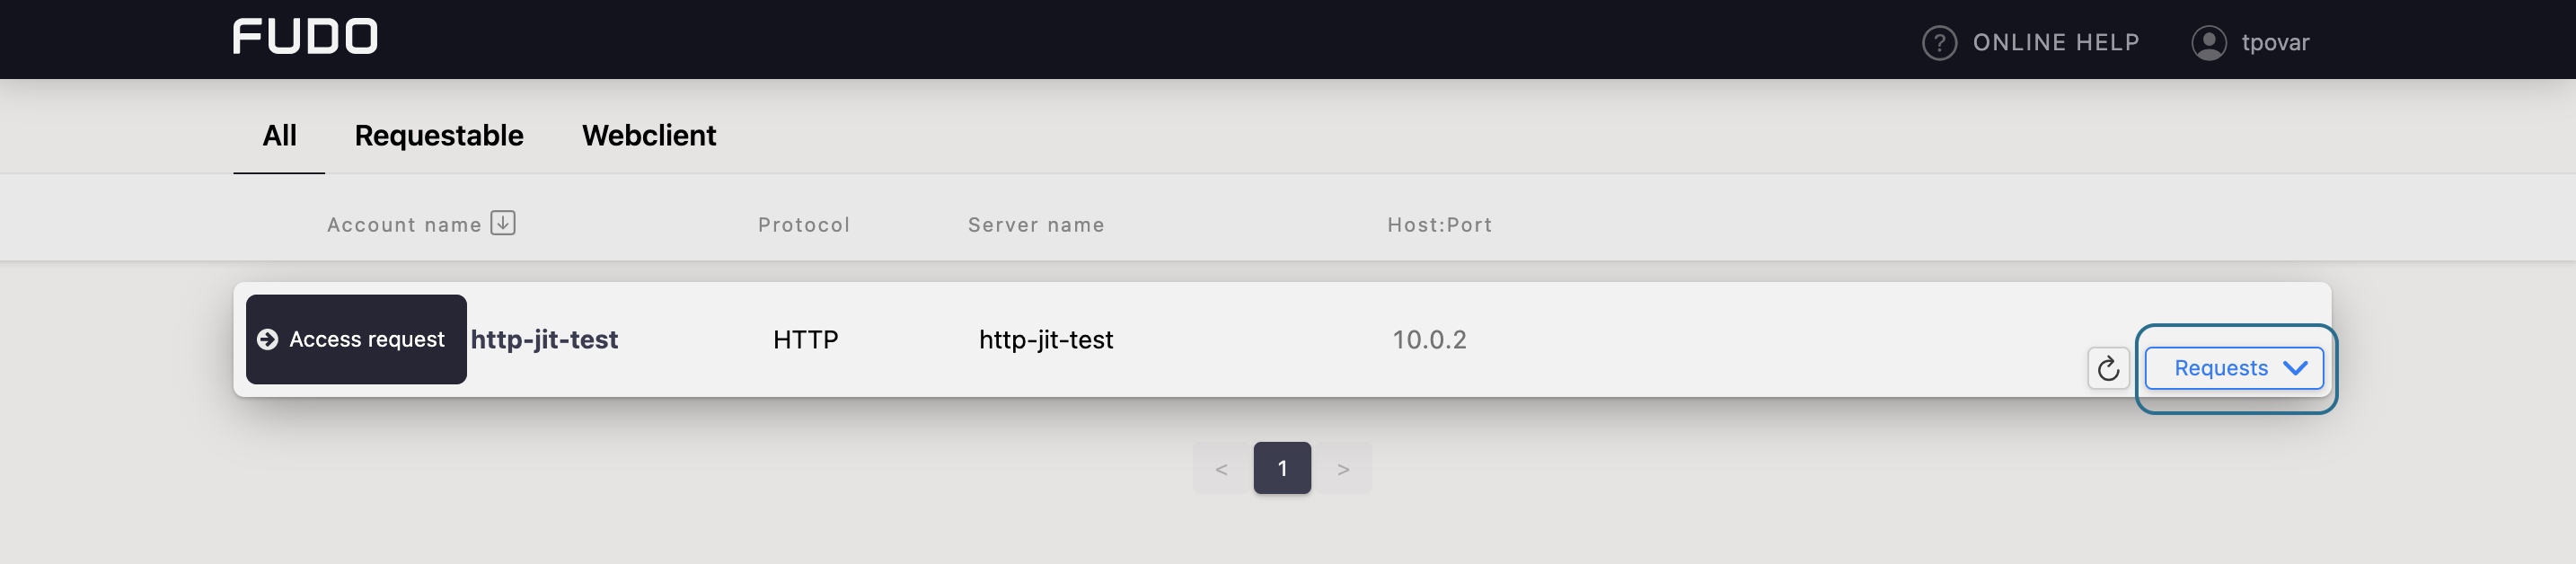
Here you can observe the process of voting, including seeing a number of required votes and how much voices is left for access to be granted.
Note
When the access has been already granted, the user can send another request from the requests history bar by selecting the button.