Connecting over RDP, VNC and SSH in browser
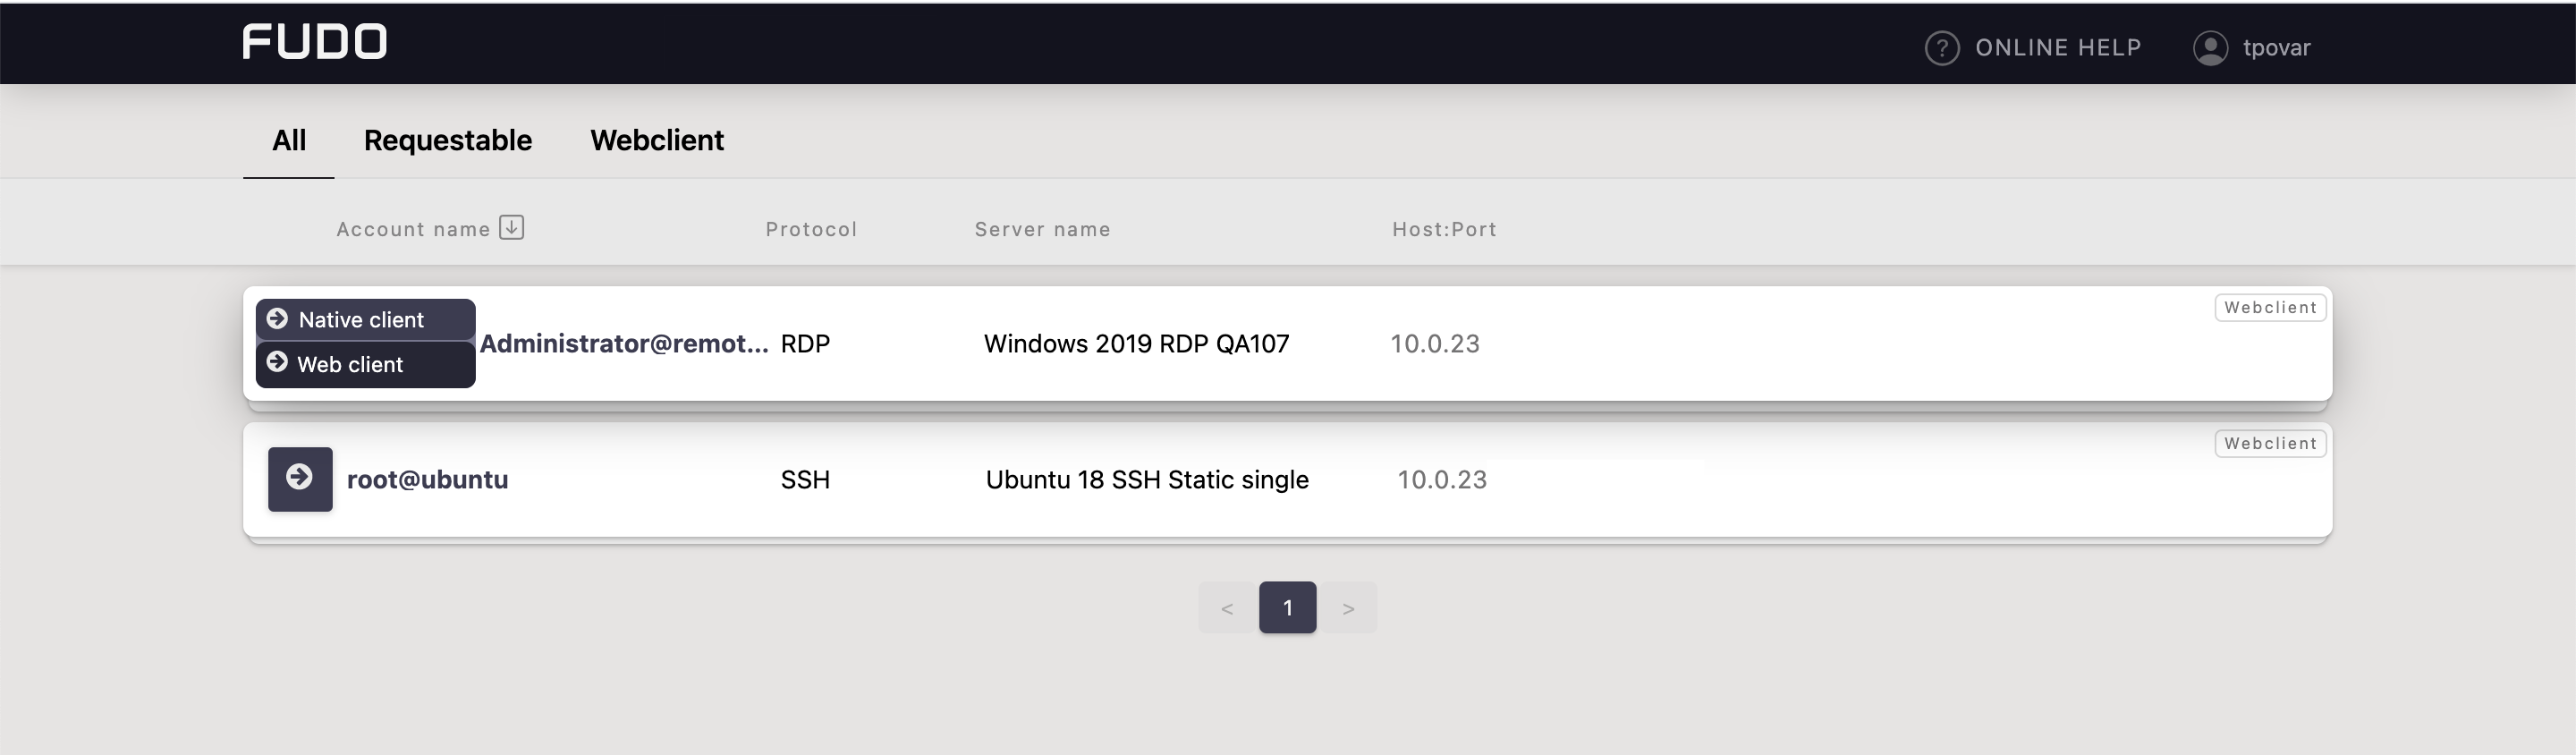
Connecting over RDP, VNC and SSH in browser is available via the Webclient feature. Filter the Webclient-supported accounts by choosing the Webclient tab.
Note
Connecting to the server over RDP protocol in browser, select one of the available keyboard layouts:
- English (US),
- German,
- German (Swiss),
- Norwegian, and
- Turkish-Q.
Follow the steps to use the Webclient feature for RDP, VNC or SSH connection:
- Find desired account and server, hover your mouse over to display more options.
- Click the button next to the account you want to use to connect to the server.
Note
Each session is opened in a separate browser tab.
Providing a Login Reason in an RDP Session
If an RDP session is initiated using an account added to a Safe with the Login reason option enabled, the user will be prompted to provide a reason before logging in to the target system.
Pasting the Login Reason Text From the Clipboard:
To simplify entering the login reason, you can use the Clipboard feature available in the top-right corner of the User Portal interface.
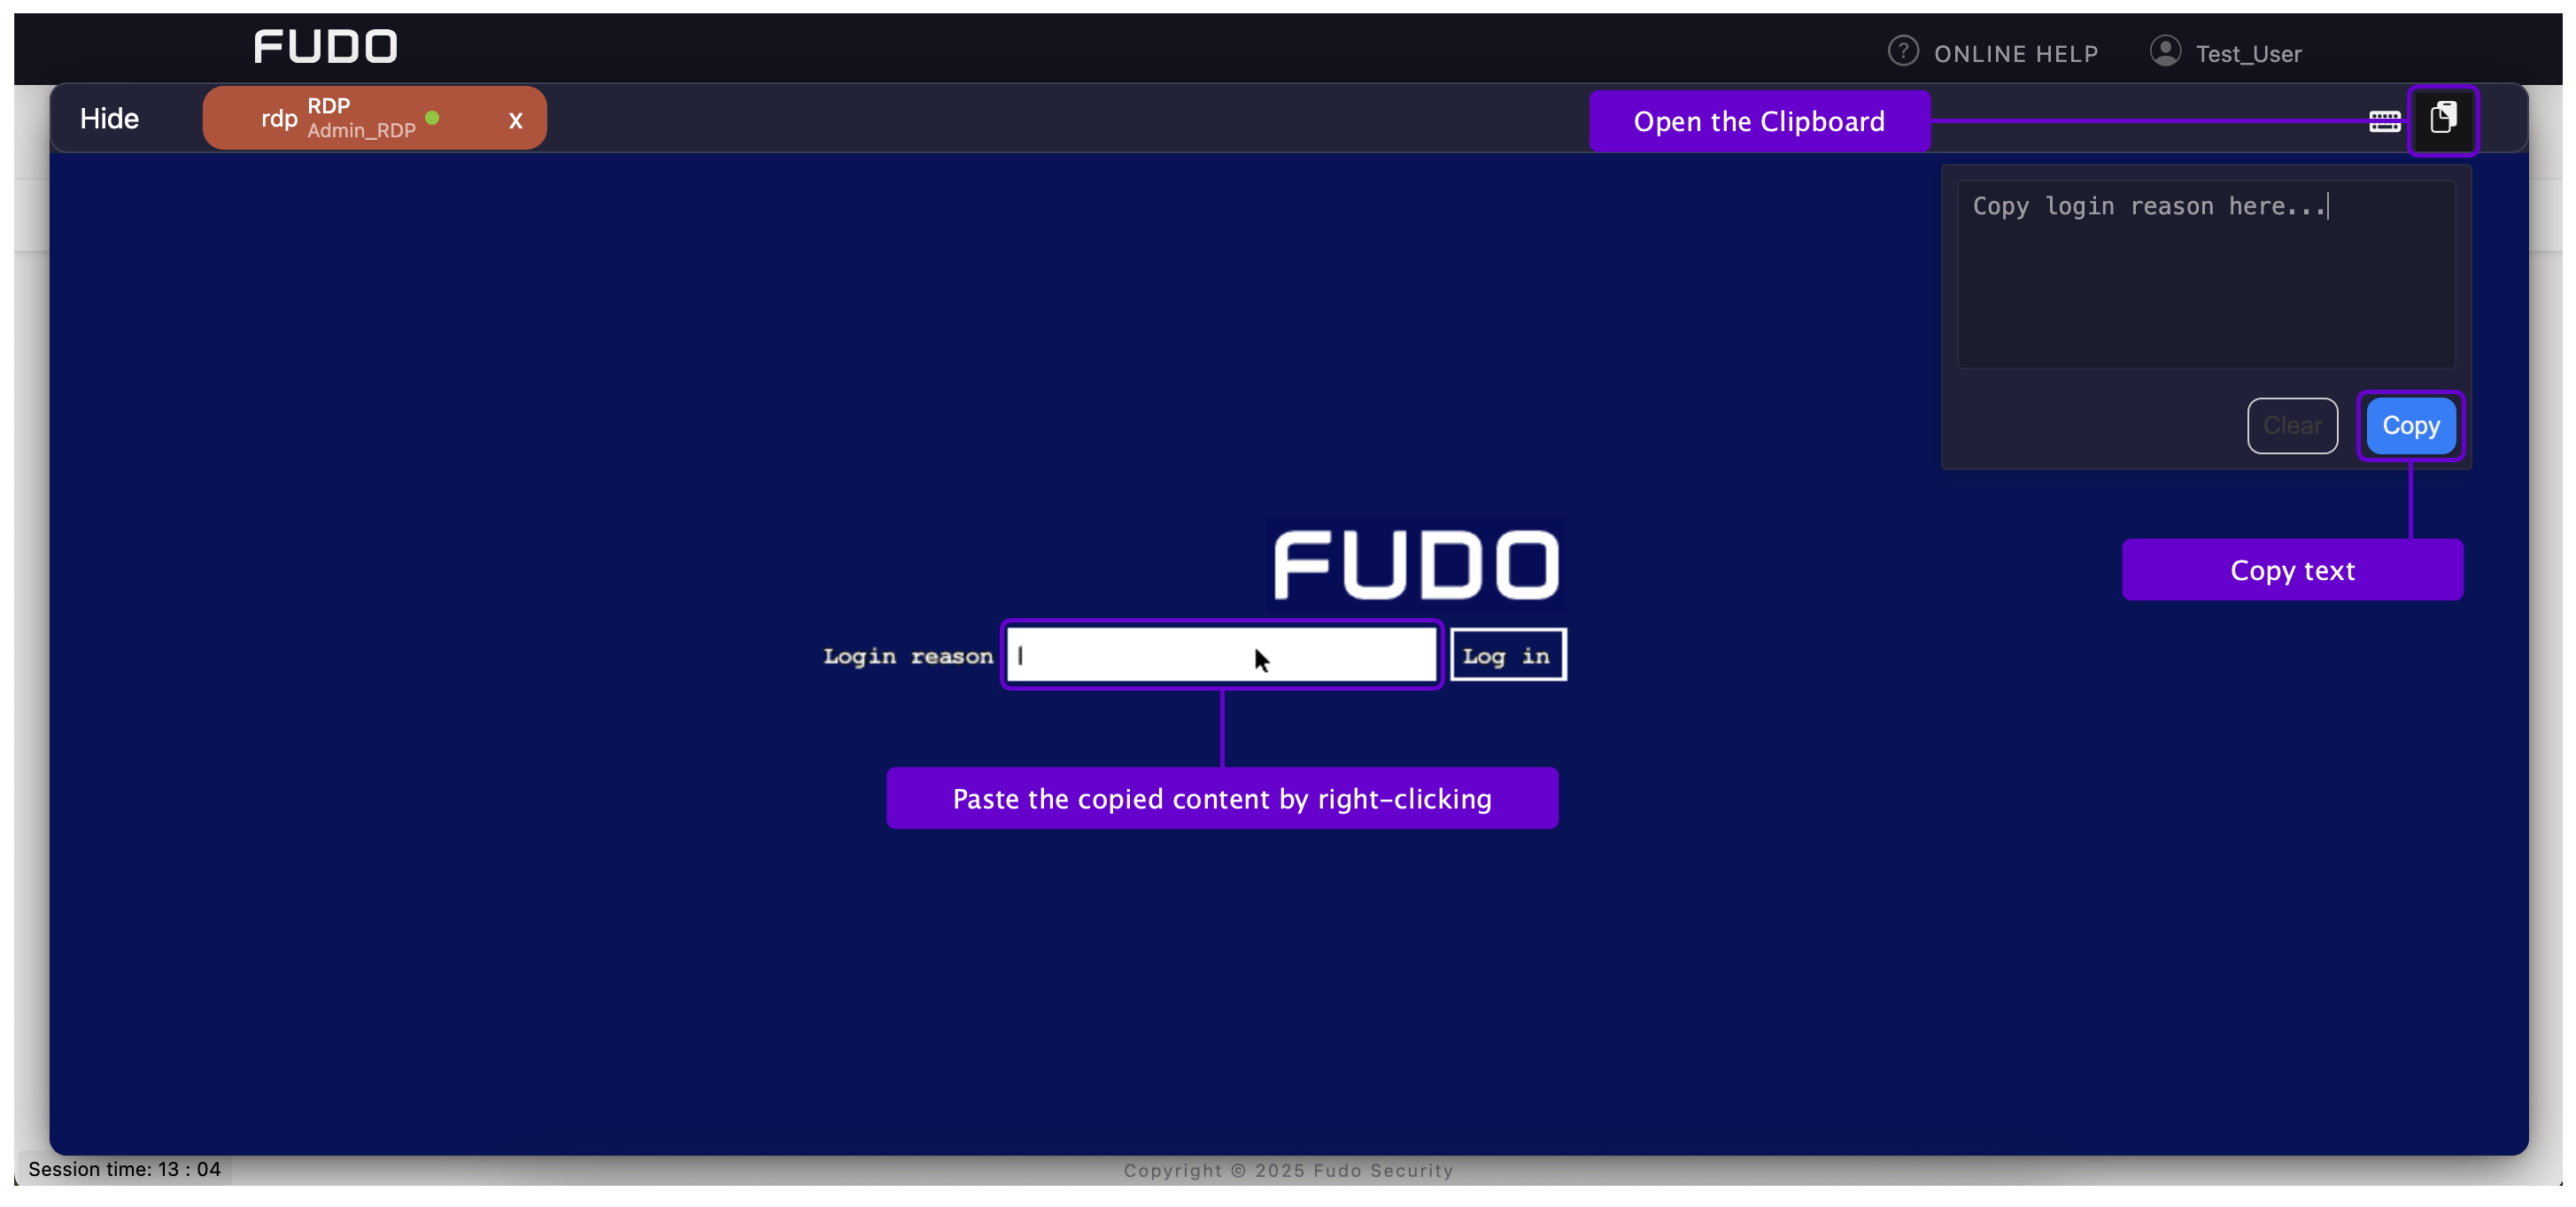
- Click the clipboard icon in the top-right corner of the screen.
- Paste or type the text you want to use as the login reason.
- Click the button to move the text to the session clipboard.
- Go to the field where the login reason must be entered.
- To paste the text, right-click in the input field.
Note
Keep in mind that the clipboard has a character limit for the Login reason field: a maximum of 60 characters for Polish and English text, and 40 characters for Cyrillic. If the copied text exceeds this limit, it may be truncated or not copied at all.
Related topics: