Creating a regular account
- Select > .
- Click .
- Define object’s name.
- Select Blocked option to disable account after it’s created.
- Select
regularfrom the Type drop-down list.
Select desired session recording option.
all- Fudo PAM saves session metadata (basic session information), records raw network traffic (RAW file) and stores session data in internal file format (FBS). The latter enables session playback using the built-in session player, as well as exporting sessions to a selection of video file formats.raw- Fudo PAM saves session metadata (basic session information) and records raw network traffic (RAW file). The raw data can be downloaded but it cannot be played back in graphical form using the built-in session player (session player only depicts the networks packet exchange between the client and the target host).noraw- Fudo PAM records the session data in a non-raw format that could be played back using the built-in session player.none- Fudo PAM saves only session metadata (basic session information).
In the Notes field, enter a message to User Portal users. If permissions are granted, notes can be also edited.
Note
Account notes can be displayed in the User Portal.
In the Category field select
privilegedornon-privilegedaccount category. The category serves an informational purpose.In the Data retention section, define automatic data removal settings.
- Select Override global retention settings option to set different retention values for connections established using this account.
- Check the Delete session data option to exclude sessions from retention mechanism.
- Next to the Delete session data field, define the number of days after which the session data will moved to external storage device. Default value when the option is checked, is 30 days.
In the Permissions section, add users allowed to manage this object.
In the Server section, assign account to a specific server by selecting it from the Server drop-down list.
In the Credentials section, enter privileged account domain.
Type in login to the privileged account.
From the Replace secret with drop down list, select desired option.
secret from a different account- From the Account drop-down list, select account object, whose credentials will be used to authenticate user when establishing connection with monitored server.
key- Click the i icon and select the key type.
- Click the i icon and browse the file system to find the file with a non-passphrase protected private key.
password from external repository- Select external repository.
password- Provide account password.
- Repeat account password.
Note
Two-fold authentication
With two-fold authentication enabled, user is being prompted twice for login credentials. Once for authenticating against Fudo PAM and once again for accessing target system.
To enable two-fold authentication, select
passwordfrom the Replace secret with drop-down list and leave the password and login fields empty.In the Password checkout time limit field, define the time after which the password is returned automatically.
Note
Defining the password checkout time limit automatically enables the Secret Checkout feature for the particular Safe.
- Select Change password after last checkin option to change the password automatically after it has been returned by the last user.
Note
This options is available only for Secret Checkout feature and it’s enabled after specifying the Password checkout time limit.
- Select Change password after session option to change the account password remotely after the session is ended.
Note
This option requires to choose at least one Password changer and a Password change policy any other than Static, without restrictions.
Refer to the Password changers topic for detailed information on setting up password changers.
- Check the Password recovery option to set a password verifier, to automatically trigger a password changer if it verifies that the password for an Account was changed and a new password is not stored in Fudo PAM.
Note
Having the Password recovery option enabled, the Password Verifier spawns “Trigger password changer” action in the account. When it’s disabled, the Password Verifier only sends event “Unable to verify password for account <account_name>”.
- Click , to have the password to the account changed automatically according to the password policy.
Note
Option to add a password changer is available after choosing an option to replace secret with a password.
- In the Password changer section, from the Password changer drop-down list select password changer specific for given account.
- In the Timeout field, define the script’s execution time limit.
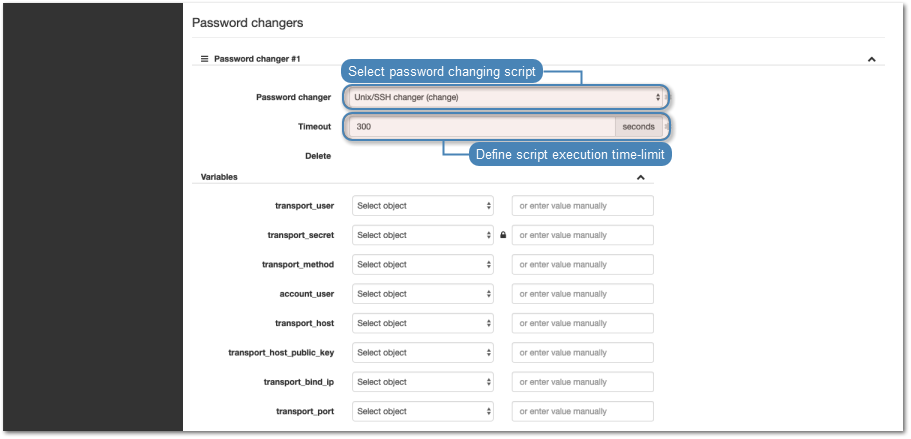
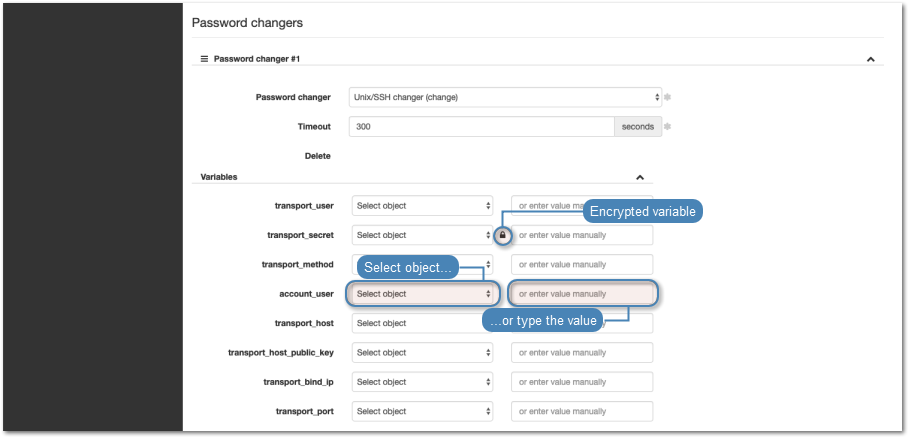
- In the Variables section, assign attributes to variables.
- Click .
Related topics: