Network interfaces configuration
Managing physical interfaces
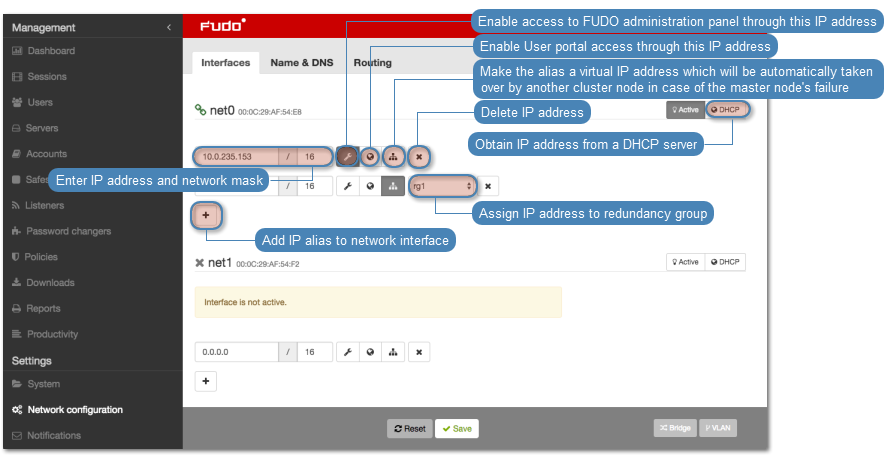
Defining IP address
Defined IP addresses are physical interface’s aliases, which are used in server’s configuration procedures (Local address field in proxy configuration).
Note
If the list of the assigned IP addresses is empty and the is no option to define an IP address, check if given interface is a member of a bridge.
To define an IP of a physical network interface, proceed as follows.
- Select > .
- Click i and provide IP address and subnet mask in CIDR format.
Note
i will be inactive if the option is enabled.
- Choose additional options for the IP address being defined.
| . | Enable access to administration panel on given IP address. Note that the management IP address is also used for replicating data between cluster nodes as well as service access over SSH protocol. Note The default port number for service access over SSH protocol is 65522. |
| i | Make the alias a virtual IP address which will be take over by another cluster node in case of the master node’s failure. Note Cluster IP address must be added manually on every cluster node, with the i option enabled. |
| i | Enable access to User portal on given IP address. |
- Select the redundancy group that the IP address will be assigned to (applicable to virtual IP addresses).
Note
Redundancy groups are defined in the Cluster view in the Redundancy groups tab. For more information refer to the Redundancy groups topic.
- Click .
Note
Current state of each network interface is represented with an icon.
| Interface active and connected. | |
| Interface active but disconnected. | |
| Interface disabled. |
Removing defined IP addresses
Warning
Deleting an IP address will disable access to servers which had this IP configured in the Local address of the proxy server.
To delete an IP address assigned to a given network interface, proceed as follows.
- Select > .
- Select the i option by the desired IP address.
- Click .

Disabling network interface
To disable a network interface, proceed as follows.
- Select > .
- Click next to given interface to deactivate it.
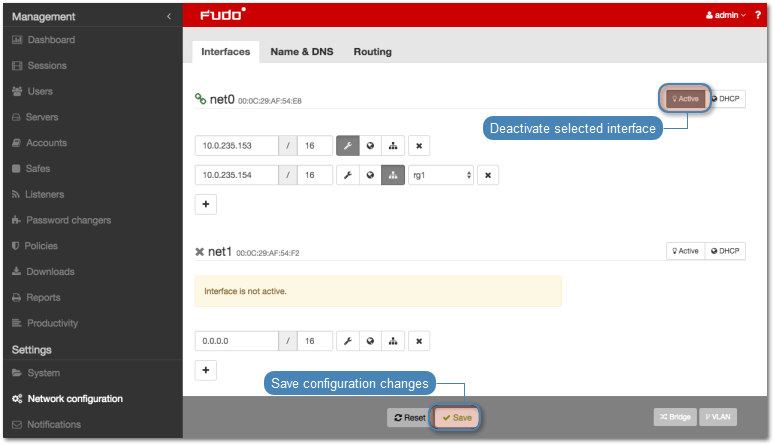
- Click .
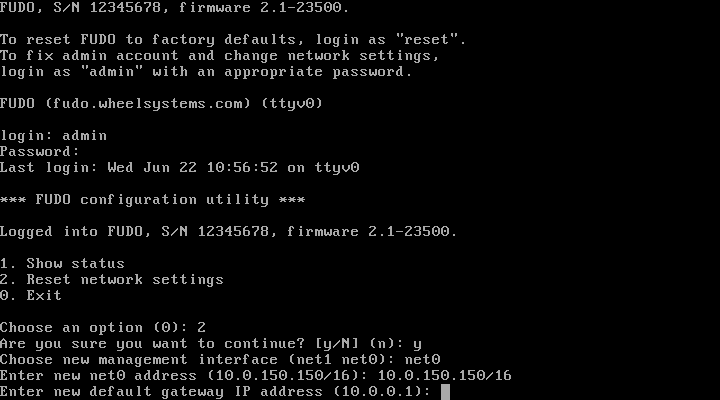
Defining IP address using system console
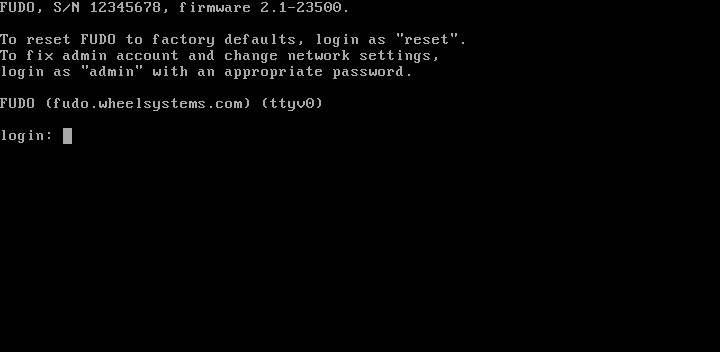
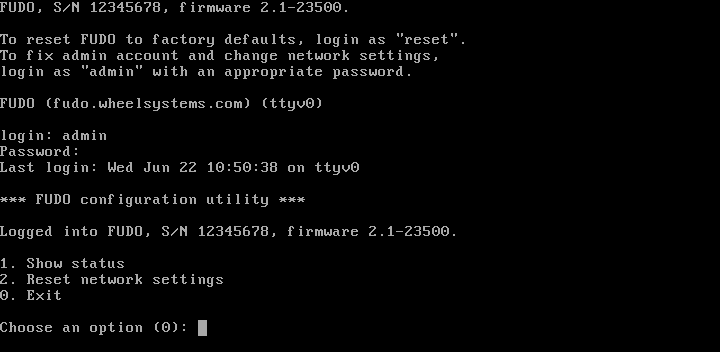
In case the web administration interface cannot be accessed, IP address can be defined using console connection.
- Connect monitor and keyboard to the device.
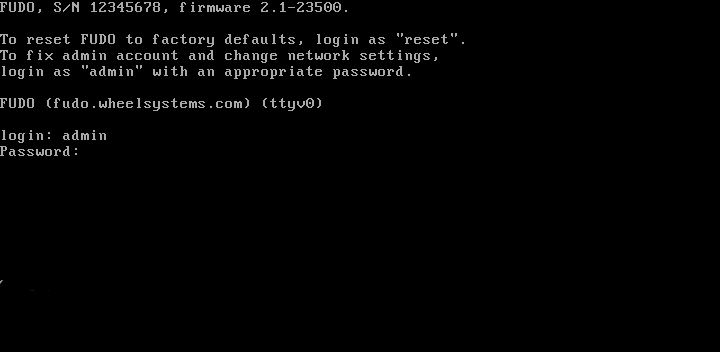
- Enter administrator account login and press Enter.
- Enter administrator account password and press Enter.
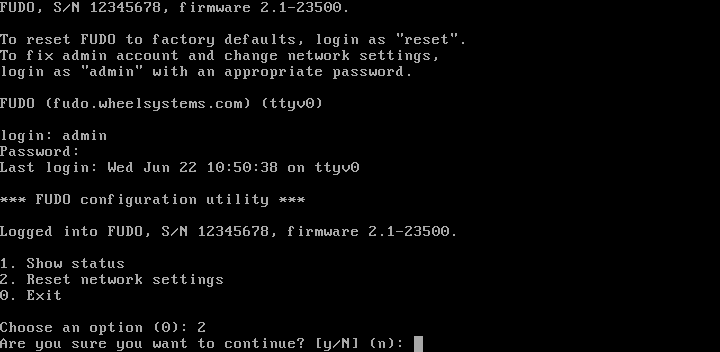
- Enter
2and press Enter to change network configuration.
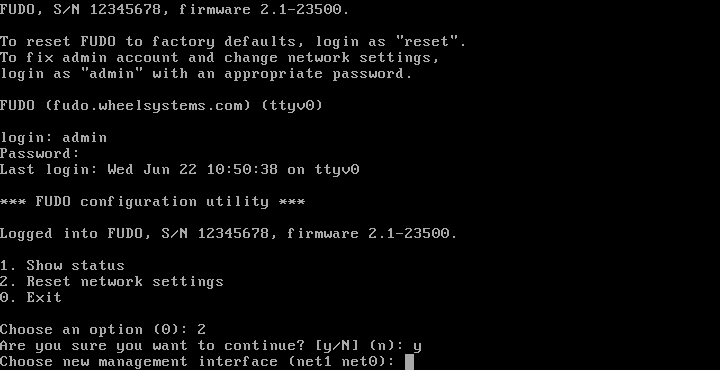
- Enter
yand press Enter to proceed with resetting network configuration.
- Enter the name of the new management interface (Fudo PAM web interface is accessible through the management interface).
- Enter IP address along with the network subnet mask separated with
/(e.g.10.0.0.8/24) and press Enter.
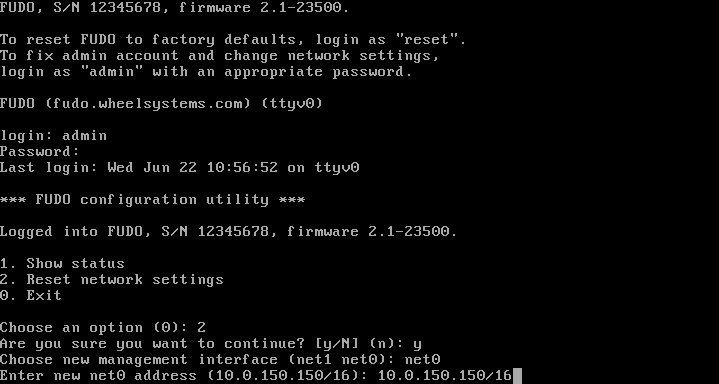
- Enter network gate and press Enter.
Setting up a network bridge
Bridge deployment scenario requires setting up a network bridge.
To configure a network bridge, proceed as follows.
- Select > .
- Click .
- Assign network interfaces or VLANs to the bridge.
Note
Setting up a network bridge requires removing all IP addresses directly assigned to interfaces which are selected as bridge members.
- Enter IP address and network subnet in CIDR notation.
- Select Spanning tree option to enable bridge loops prevention.
- Select the i option to enable access to the administration panel by given IP address and click .
- Click .

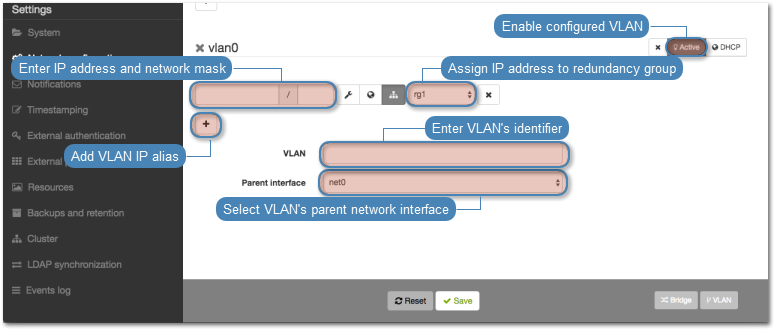
Setting up virtual networks (VLANs)
VLAN networks allow separating broadcast domains.
To configure a VLAN on , proceed as follows.
- Select > .
- Click .
- Select the physical interface and define VLAN ID.
- Add IP addresses to given VLAN.
Note
Select DHCP option, to obtain IP address from a DHCP server.
Note
The IP addresses are aliases to the physical interface and are used in servers configuration as proxy server address.
- Click to activate defined VLAN.
- Click .
Setting up LACP link aggregation
Link aggregation enables combining a number of network interfaces for improved transfer rates and implementation of failover scenarios in which the services remain available in case of a network switch failure.
To configure a network link aggregation, proceed as follows.
Select > .
Click .
Assign network interfaces.

Note
Setting up a network bridge requires removing all IP addresses directly assigned to interfaces which are selected as bridge members.
- Enter IP address and network subnet in CIDR notation.
- Choose additional options for the IP address being defined.
| . | Enable access to administration panel on given IP address. Note that the management IP address is also used for replicating data between cluster nodes. |
| . | Make the alias a virtual IP address which will be take over by another cluster node in case of the master node’s failure. |
| i | Enable access to User portal on given IP address. |
- Click .
Related topics: